Group people, projects, and tasks in Beebole with hierarchical tags — departments, teams, locations — and cascade schedules, rates, and approvals through them.
Tags in Beebole are hierarchical labels you apply to people, projects, and tasks. While projects describe what your team works on, tags describe how that work is organized — by department, team, location, cost center, or any dimension that matters to you. Tags also carry configuration: schedules, rates, approval workflows, and more cascade from a tag to everyone and everything in it.
Categories — Each category captures one dimension of your organization. A new account starts with Department; add a category for every other dimension you need, such as location or cost center.
Tags — The labels inside a category, such as a department name or a country.
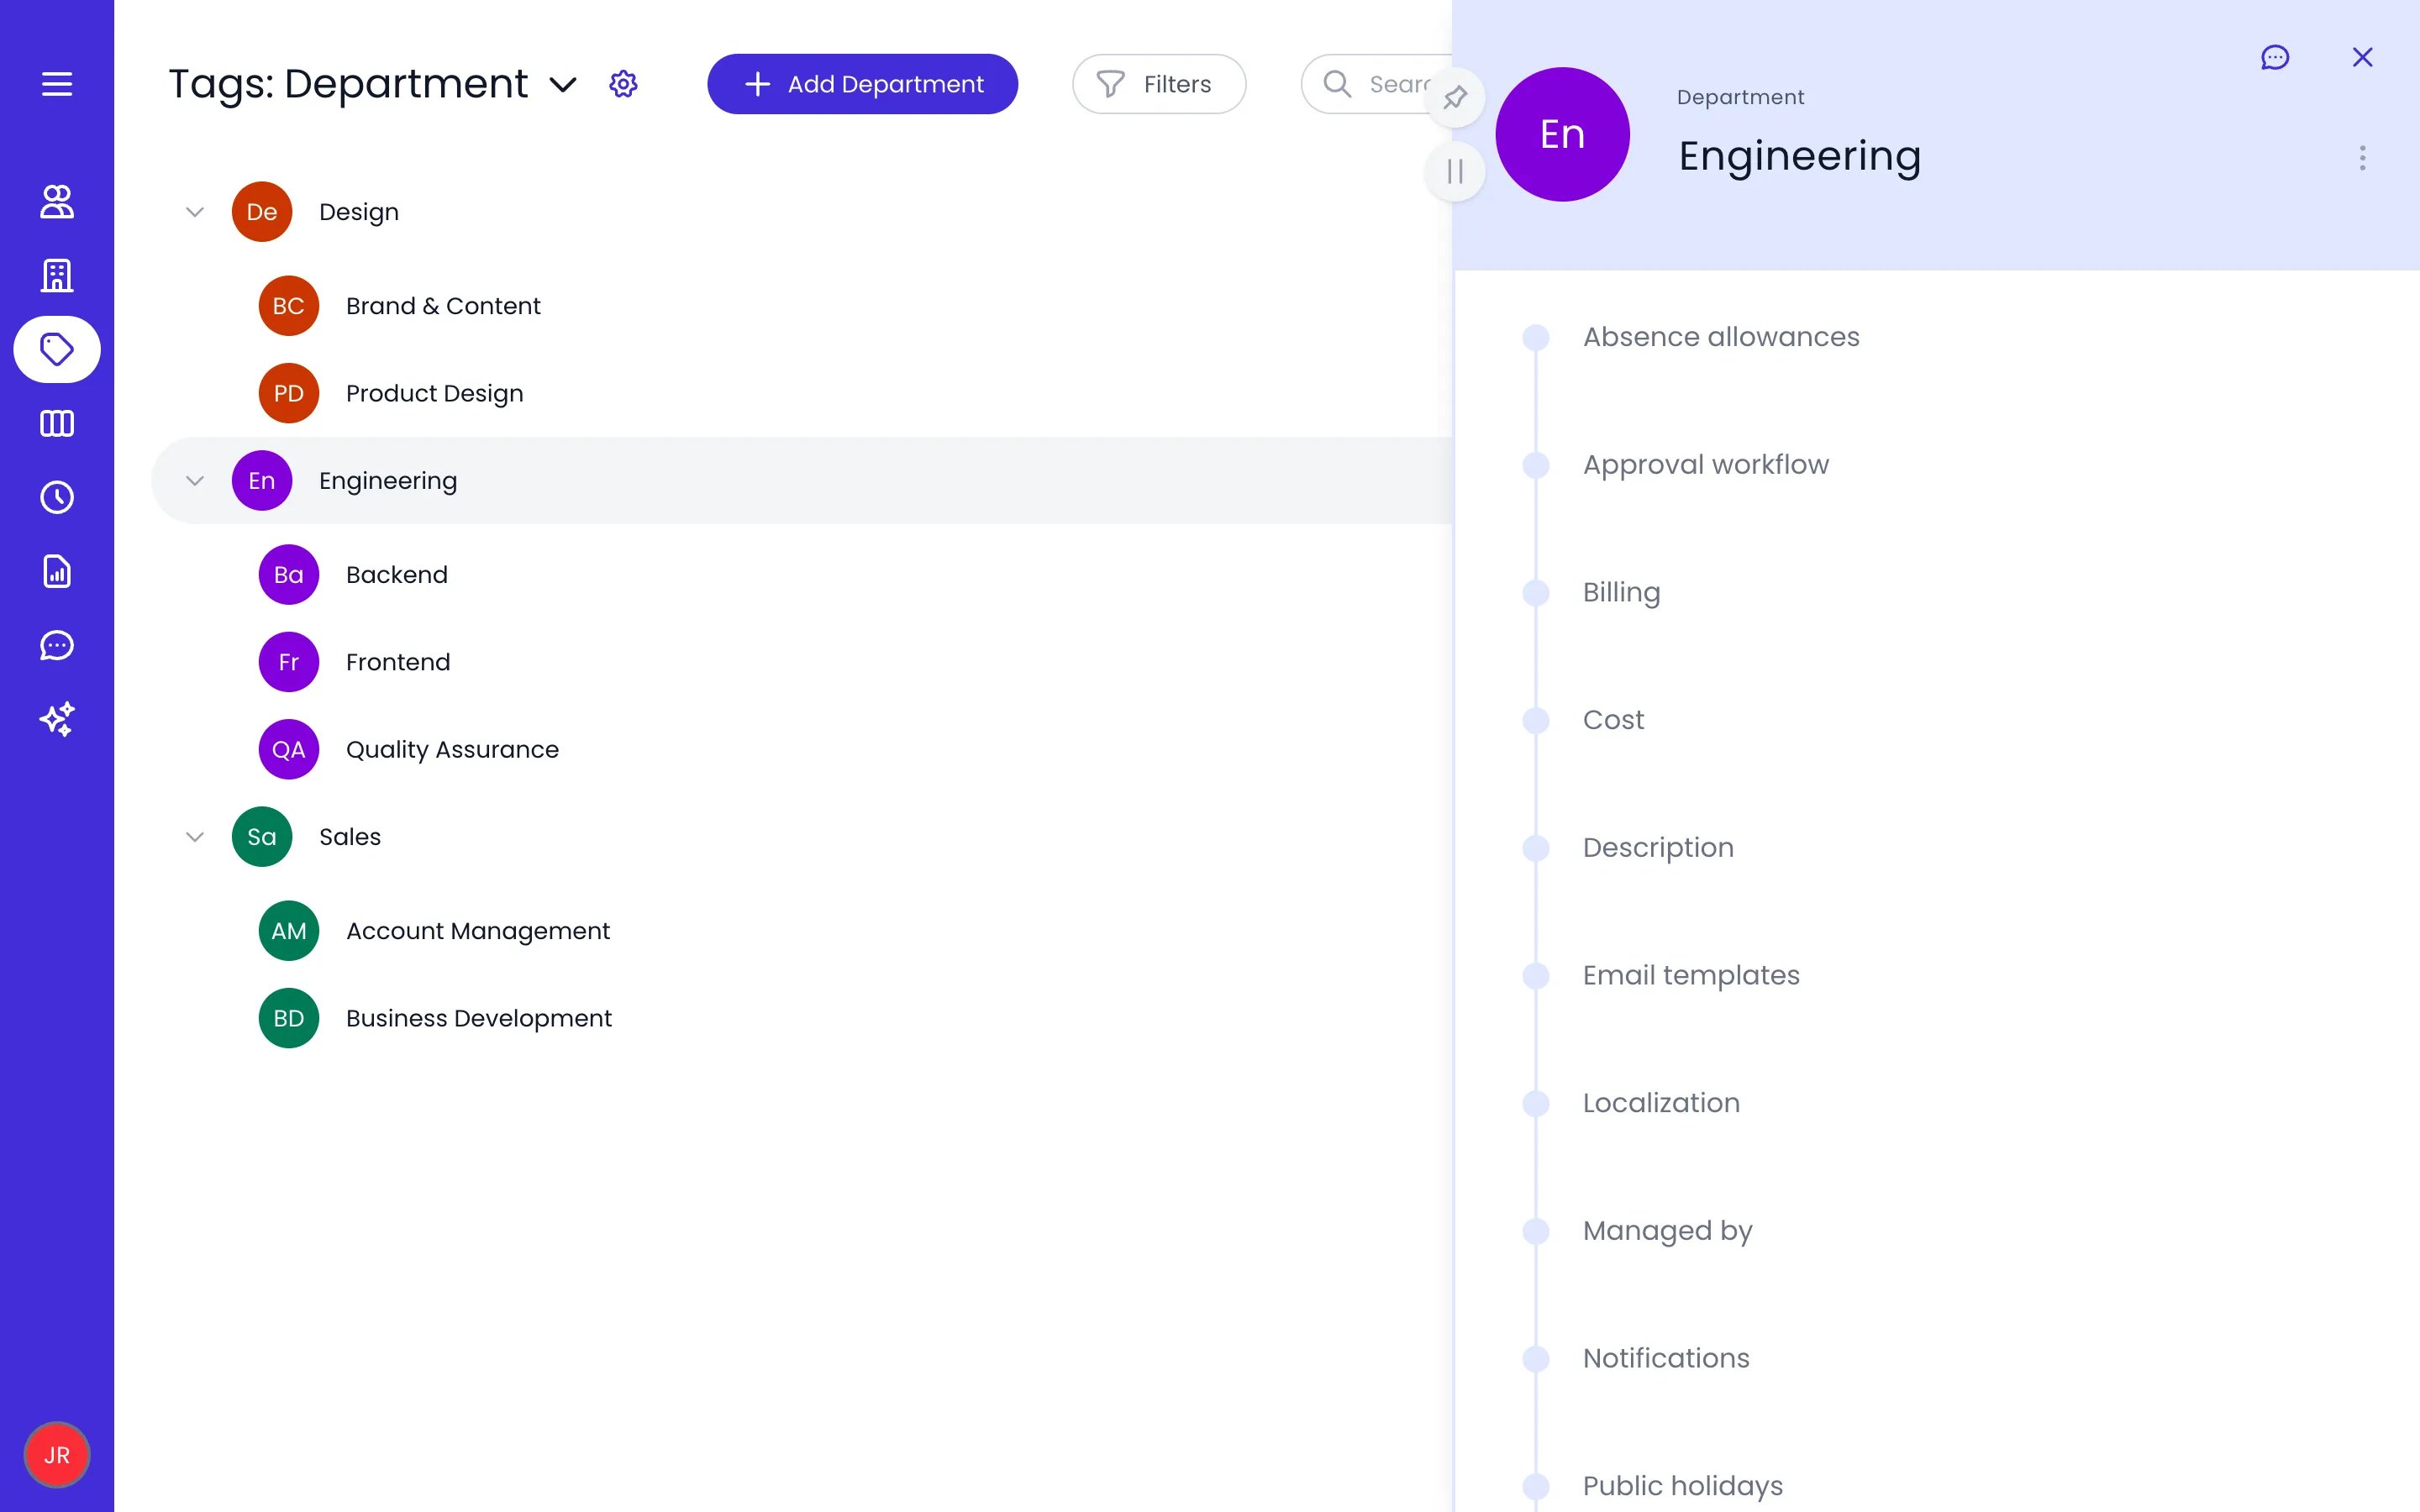
Sub-tags — Nested tags for finer grouping. Each category names its own levels — the Department category starts with the levels Division and Team.
The Department category with three divisions and their teams, and the Engineering tag's settings panels
A person, project, or task can hold tags from several categories at once — someone can be in a Department tag and a location tag at the same time, and each tag cascades its configuration independently.
Click the category name next to the Tags: heading and select a category. To create a new one, type its name in the field at the bottom of that menu and click Add.
3
Add the tag
Click the Add [category] button at the top right — its label shows the active category, for example Add Department. Enter the tag name and click the Save new… button (its label ends with the level you are creating).
4
Add sub-tags (optional)
In the tag list, hover over the parent tag’s row and click the + button that appears next to its ⋯ action menu. The parent expands and a name field opens right below it. Type the name and press Enter. See Adding sub-tags from the list.
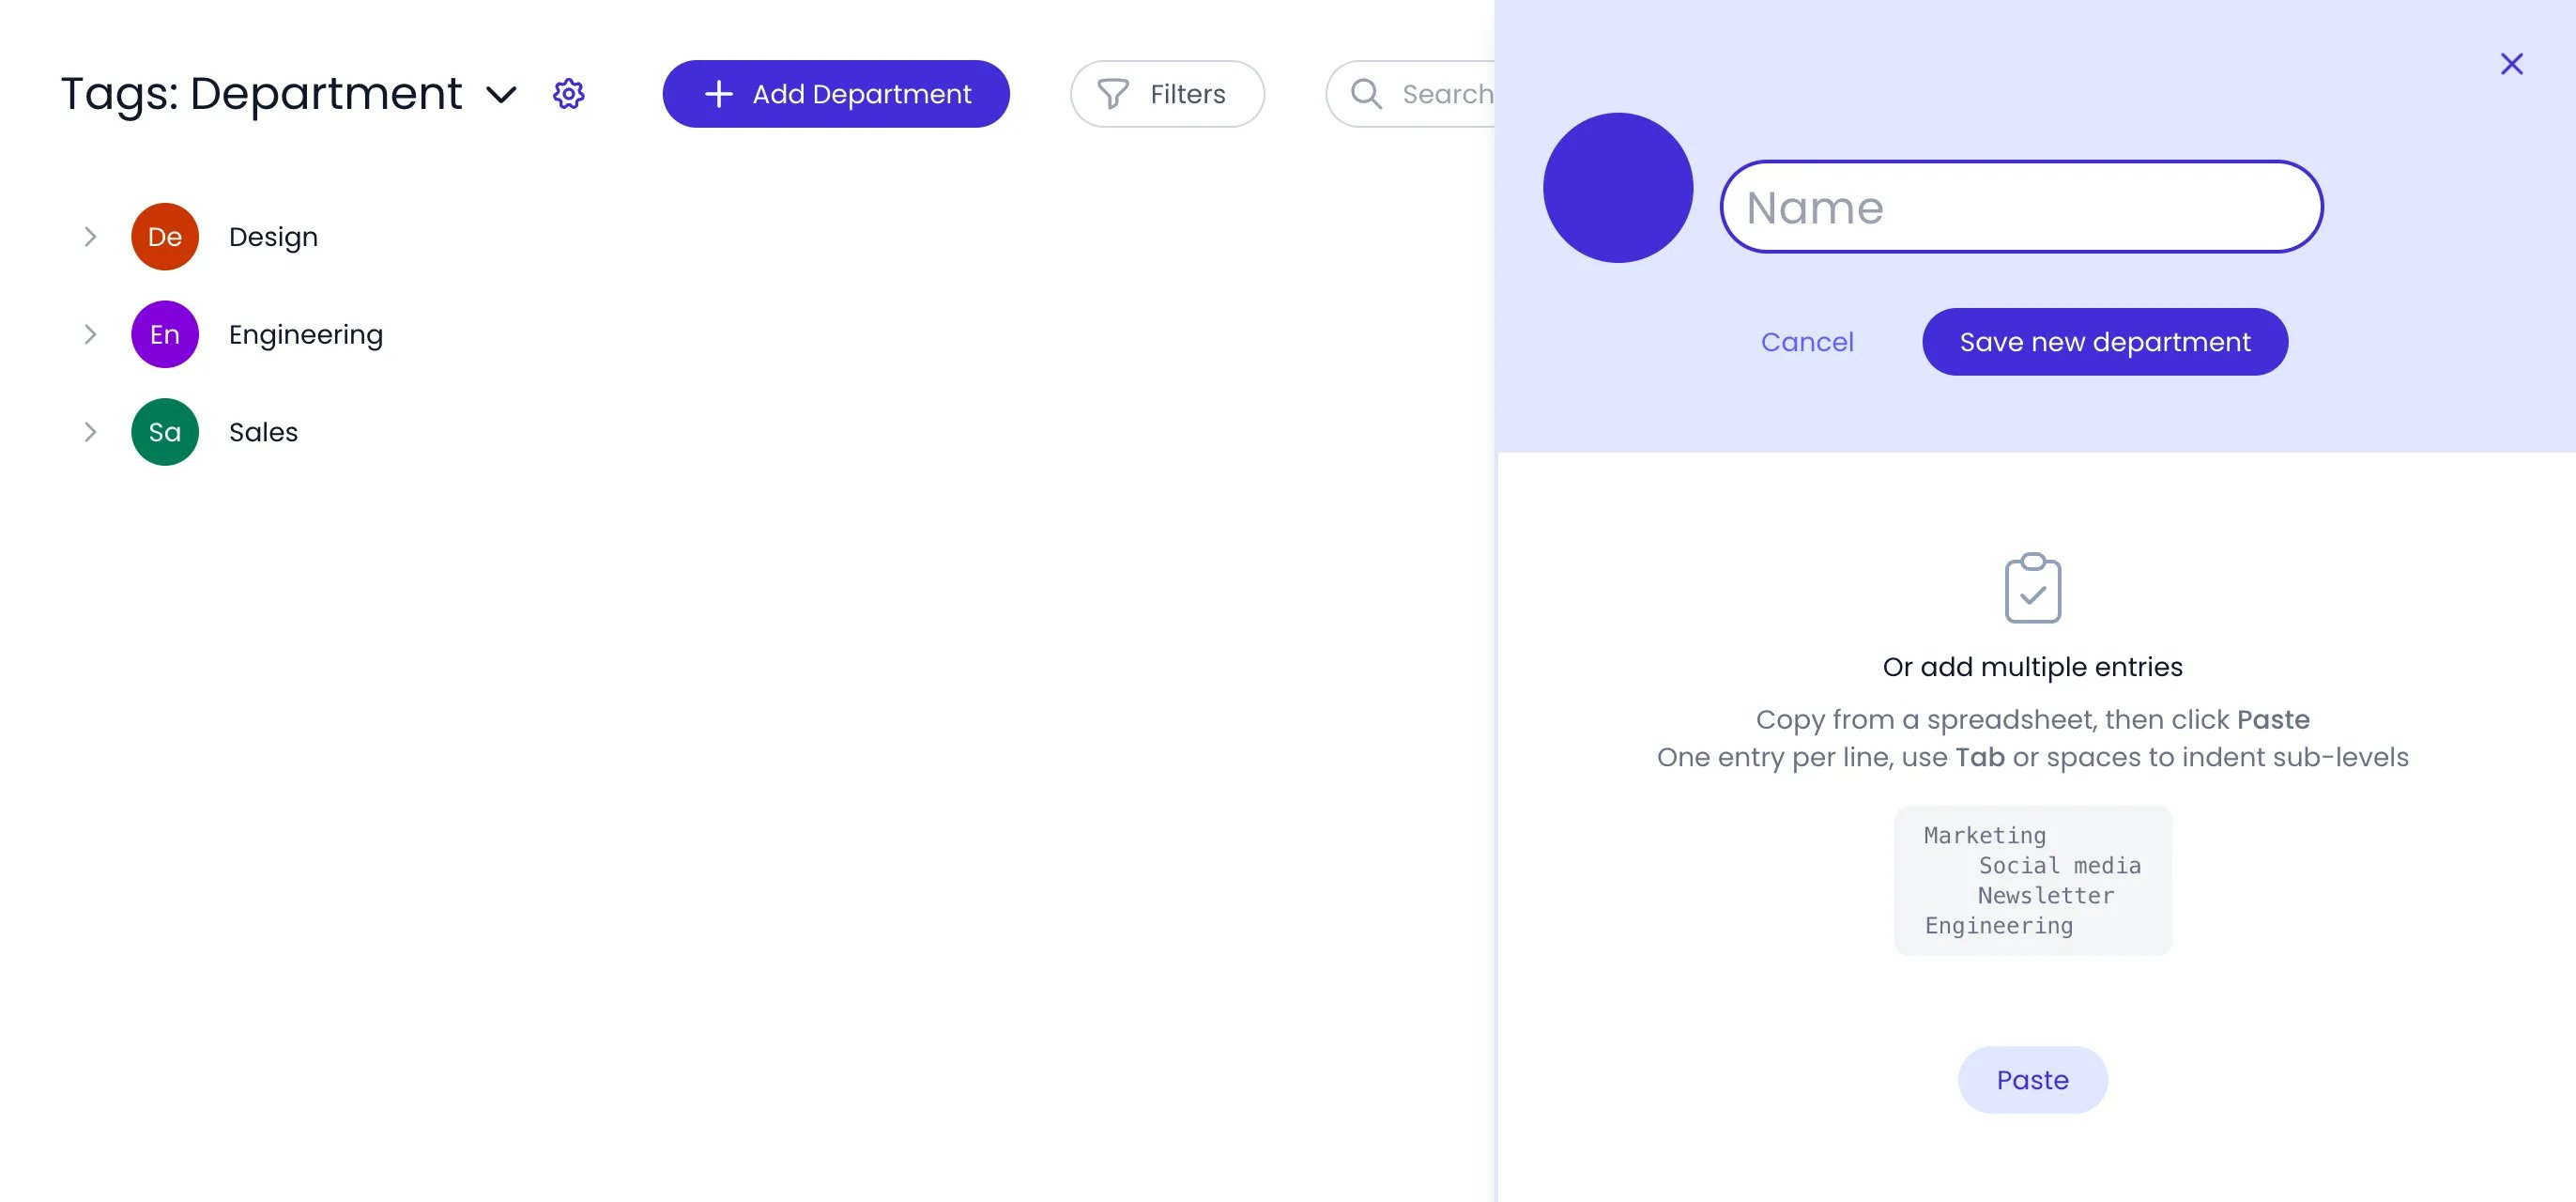
The Add Department panel: a name field, and an area to paste a whole tag tree
The + button on a tag’s row adds tags under that tag without leaving the list. Its tooltip reads Add followed by the level name, for example Add Team, and the same text is the placeholder of the name field it opens.
Press Enter to create the sub-tag. The field stays open for the next one, so you can type several names in a row.
Click elsewhere to create what you typed and close the field, or press Escape (or click the ✕ at the end of the field) to close it without adding anything.
Paste a list into the field to create several sub-tags at once: one name per line, or names separated by semicolons on a single line. Indent lines with Tab or spaces to nest them under the line above, which builds a whole sub-tree in one paste. Hovering the field shows the hint Enter a name or paste a list (one per line or separated by ;).
Hold ⌘ (Ctrl on Windows) and click the + to open the full add form instead (⌘+Click to open the form).
When the category is limited to its named levels, the + on a row at the last level shows a message instead of the field. See Level names.
Each category stores its own level names, so the interface can speak your organization’s vocabulary. You edit them from the category’s settings: next to the category name in the Tags: heading, click the gear button — its tooltip is the category name followed by settings, for example Department settings. The button is only shown to people who can manage tags.
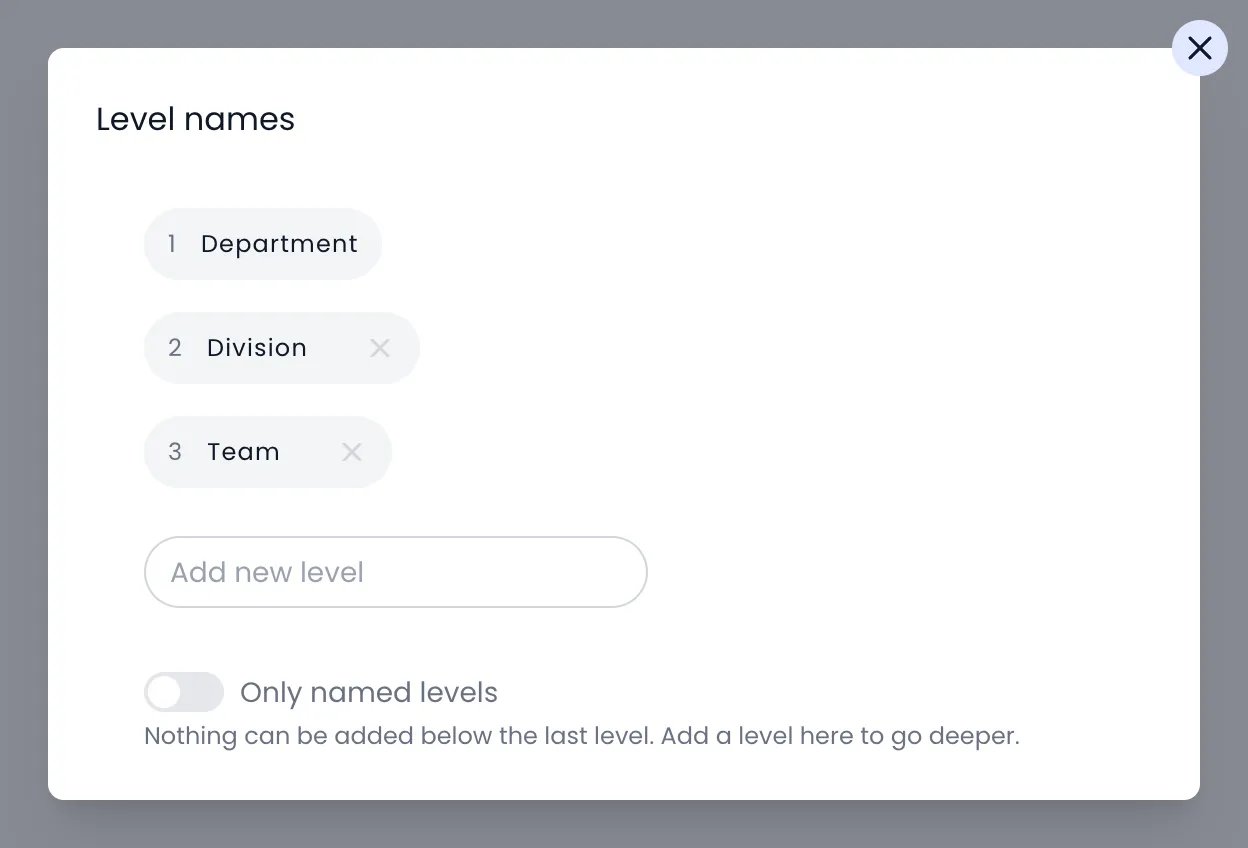
Level names for the Department category
The dialog shows a Level names list. Row 1 is the category name itself (the root level), and the rows below it are the levels underneath, for example Division and Team. From there you can:
Rename a level — click its row, type the new name, and press Enter (or click elsewhere). Press Escape to cancel the rename; the dialog stays open. Renaming row 1 renames the category. The new name applies to that level across the whole category.
Add a level — type its name in the Add new level field and press Enter. Until you name a deeper level, Beebole labels it after the level above with a Sub- prefix, for example Sub-Team.
Remove a level — click the × at the end of its row. Every row below the category row can be removed, not only the last one.
Reorder levels — hover over a row to show its gripper on the left, then drag the row to its new place. Row 1 is the category itself and always stays first.
Below the list, the Only named levels switch keeps the hierarchy within the levels you have named. When it is on, nothing can be added, moved, or copied below the last named level, as the hint under the switch says: Nothing can be added below the last level. Add a level here to go deeper. In the Department category, for example, a team can’t get a sub-tag of its own: clicking the + button on its row shows No lower level available, see Department settings, and moving or duplicating a tag is refused the same way when the tag, or any of its sub-tags, would land below the last level. To go deeper, add a level in the dialog. When the switch is off, there is no depth limit and deeper levels take the Sub- labels described above. Project categories have the same switch.
You move a tag by changing its parent from the tag’s detail panel:
1
Open the tag
Click Tags in the sidebar, then click the tag to open its details.
2
Open the parent selector
Hover over the breadcrumb above the tag name and click the Change parent button that appears.
3
Pick the new parent
Select the new parent tag or the category root. The change is saved immediately, and the tag’s sub-tags move with it.
A tag can only be moved within its own category — the parent selector lists destinations from the same category and excludes the tag’s own sub-tags. To use a tag in another category, create it there and re-assign the tagged people or projects.
You can assign tags from either side of the relationship.
From the person, project, or task
From the tag
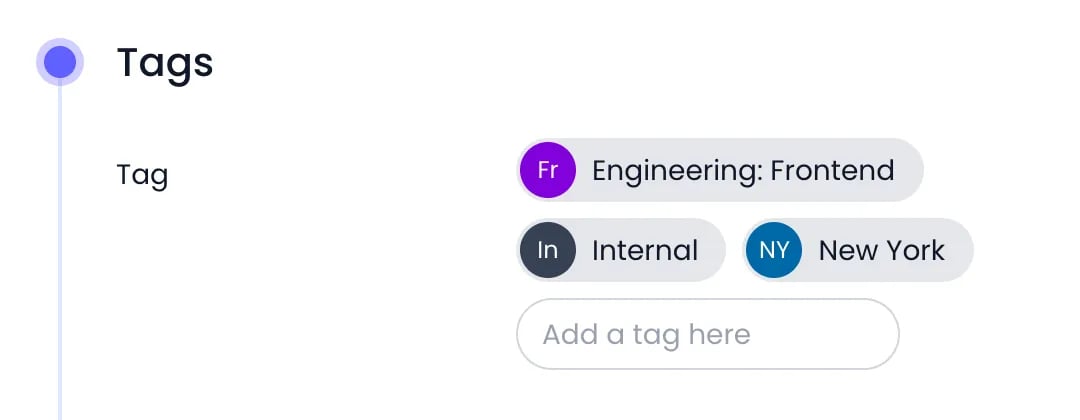
Open the person’s, project’s, or task’s details — for example, click People in the sidebar, then click the person. Click the Tags panel to open it, then pick a tag in the Add a tag here field. To remove a tag, hover over its badge and click the Unassign button that appears on it. Hovering over a tag badge also reveals a calendar button (Pick a start date) to set the date the assignment takes effect.
A person tagged with a location, a team, and a contract type
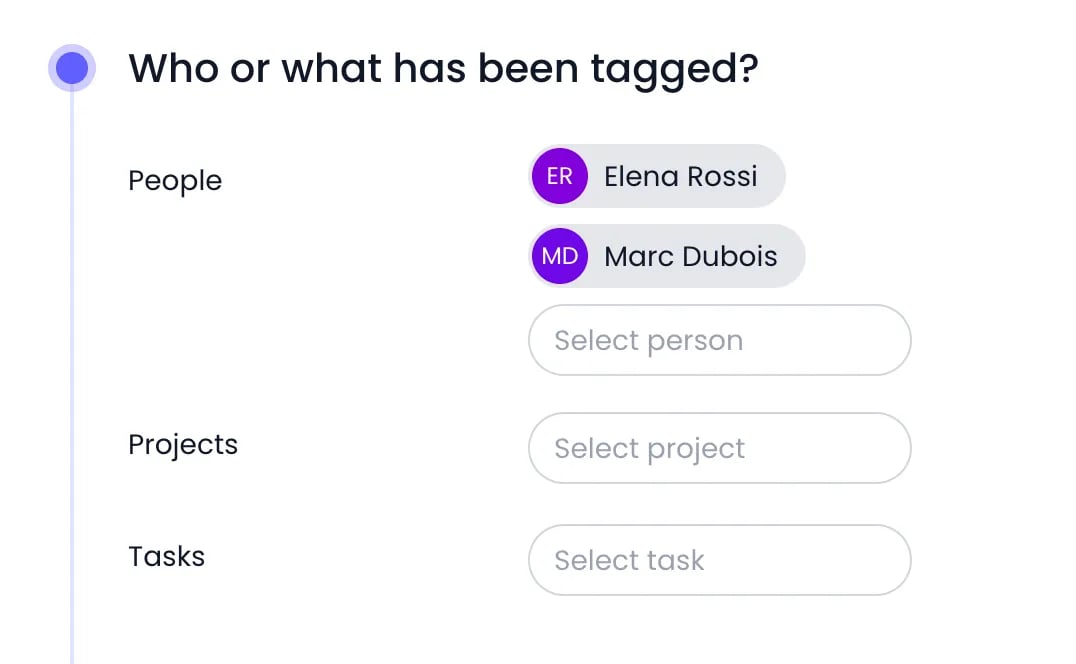
Open the tag’s details and click the Who or what has been tagged? panel. It has People, Projects, and Tasks sections — use the Select person, Select project, and Select task fields to add entries, and remove them from the same lists.
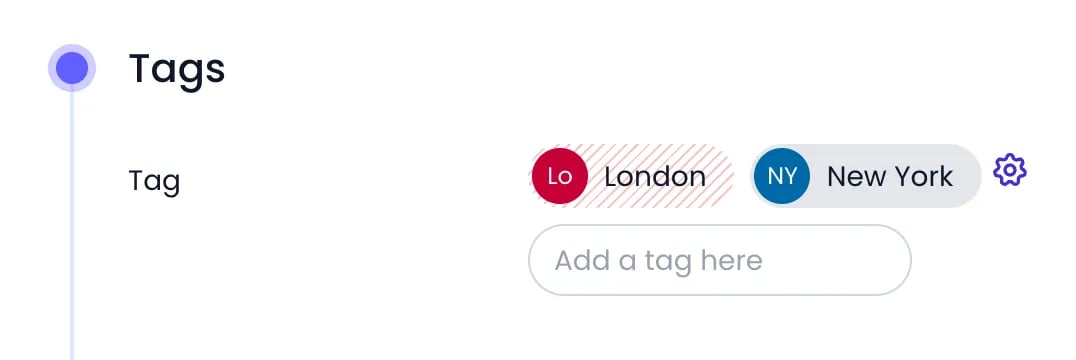
A tag applied to a parent project or task is inherited by every item below it. In the Tags panel of a subproject or subtask, an inherited tag shows an indicator next to its badge that points to the item where the tag is defined. It has no calendar button, because the start date belongs to the parent’s assignment.You can take an inherited tag off one specific item without touching the parent. Hover over the badge and click Unassign. Beebole records an exclusion on that item and keeps the badge in place with a red hatched background, so you can see that the tag is off here while the parent still carries it. The same excluded badge appears everywhere the item’s tags are listed, including the Who or what has been tagged? panel on the tag’s side.To give the tag back, hover over the excluded badge and click Unassign again. This removes the exclusion and the item inherits the tag as before.
An excluded tag and an inherited tag on a subproject
An excluded tag does not count as assigned. Kanban cards, Gantt rows, the task detail sheet, and custom-field matching all ignore it.
Configuration set on a tag applies to all people and projects in it, unless overridden at a more specific level. A tag’s detail panel includes these settings panels:
Panel
What inherits
Work schedule
People in the tag follow the tag’s schedule. See Work schedules.
Approval stages defined on the tag apply to its members. See Approval.
Absence allowances
Time-off allowances set on the tag apply to its people, unless a person has allowances of their own: those replace the tag’s whole set. See Time off.
Public holidays
A holiday calendar assigned to the tag covers its people. See Public holidays.
Timesheet and Planning Settings
Timesheet rules set on the tag, such as periods, timers, and reminders, override the organization defaults for its people. See Timesheet settings.
Valid period for time entry
The From and To dates bounding when time can be recorded apply to the people and projects in the tag.
Localization
Time zone, first day of the week, currency, number formats, Clock format, and date format for the people in the tag. See People.
Notifications
Notification settings for the people in the tag, including whether push notifications are on. See Notifications.
Email templates
The wording of the emails Beebole sends to the people in the tag. See Email templates.
Show or hide
Which time off types, expense types, work schedules, projects, tasks, and custom fields are available to people in the tag. See Assignments.
Because a person can belong to tags in several categories, you can compose configuration: a work schedule from a Location tag and an approval workflow from a Department tag, for example.
Configuring these settings on tags requires the Advanced plan, or the Custom fields, custom roles & advanced configuration add-on on the Essential plan. Without it, the tag’s settings panels show an upgrade button and a preview of the feature instead of their settings. Creating tags and tagging people, projects, and tasks works on every plan.
Tags appear as grouping and filtering dimensions in Reports. Group a report by tag to break down time, costs, and billing by department, team, or location — or filter by a tag to narrow the report to one organizational unit.
Each tag has a ⋯ action menu — it appears when you hover over the tag’s row in the list, and next to the tag name in its detail panel. It offers Duplicate, Rename, Archive, Unarchive, and Delete.Archived tags are hidden from the list — click Show Archived at the top of the page to display them, and Hide Archived to hide them again.
Delete permanently removes the tag and its assignments. To retire a tag while keeping it available for historical reporting, use Archive instead. If you delete by mistake, click Undo in the notification that appears right after.
What's the difference between tags and project categories?
Project categories are part of Beebole’s project hierarchy — every project belongs to exactly one. Tags are a separate, cross-cutting dimension applied to people, projects, and tasks. Use categories to structure the work itself, and tags for organizational dimensions like departments or locations.
Can a person or project have multiple tags?
Yes. In Beebole, a person can hold tags from several categories at once — for example, an Engineering tag from a Department category and a London tag from a Location category. Each tag cascades its configuration independently.
Are tags required for time tracking?
No. Your team can track time in Beebole without any tags. Tags become valuable when you want group-level configuration — schedules, rates, approvals — or reporting by department, team, or location.
Can I remove an inherited tag from just one subproject or subtask?
Yes. Open the item’s Tags panel, hover over the inherited tag’s badge, and click Unassign. Beebole stores an exclusion on that item and shows the badge with a red hatched background; the parent and its other children keep the tag. Click Unassign on the excluded badge to give the tag back.
How do I create many tags at once?
Use the Or add multiple entries area in Beebole’s add panel: copy your tag list from a spreadsheet (one tag per line, indenting sub-levels with Tab or spaces), click Paste, review the preview, and click Import entries. To add a few sub-tags under an existing tag, click the + on its row in the list and type the names, pressing Enter after each, or paste the list into that field.
Was this page helpful?
⌘I
Assistant
Responses are generated using AI and may contain mistakes.