

Assignments control which items are available to a person. What a person can do (view or edit data) is controlled by their role, covered in Roles & Permissions.
How access control works
Beebole resolves access from three places:
The item-side and person-side panels edit the same underlying links — pick whichever direction is more convenient. All of these settings are saved automatically.
Set the account-wide defaults
1
Open Account Settings
Click the button with your initials at the bottom of the sidebar to open Settings, then click Account Settings.
2
Open Show or hide by default
Open the Show or hide by default panel.
3
Choose the defaults
Check or uncheck each option. Changes are saved automatically.
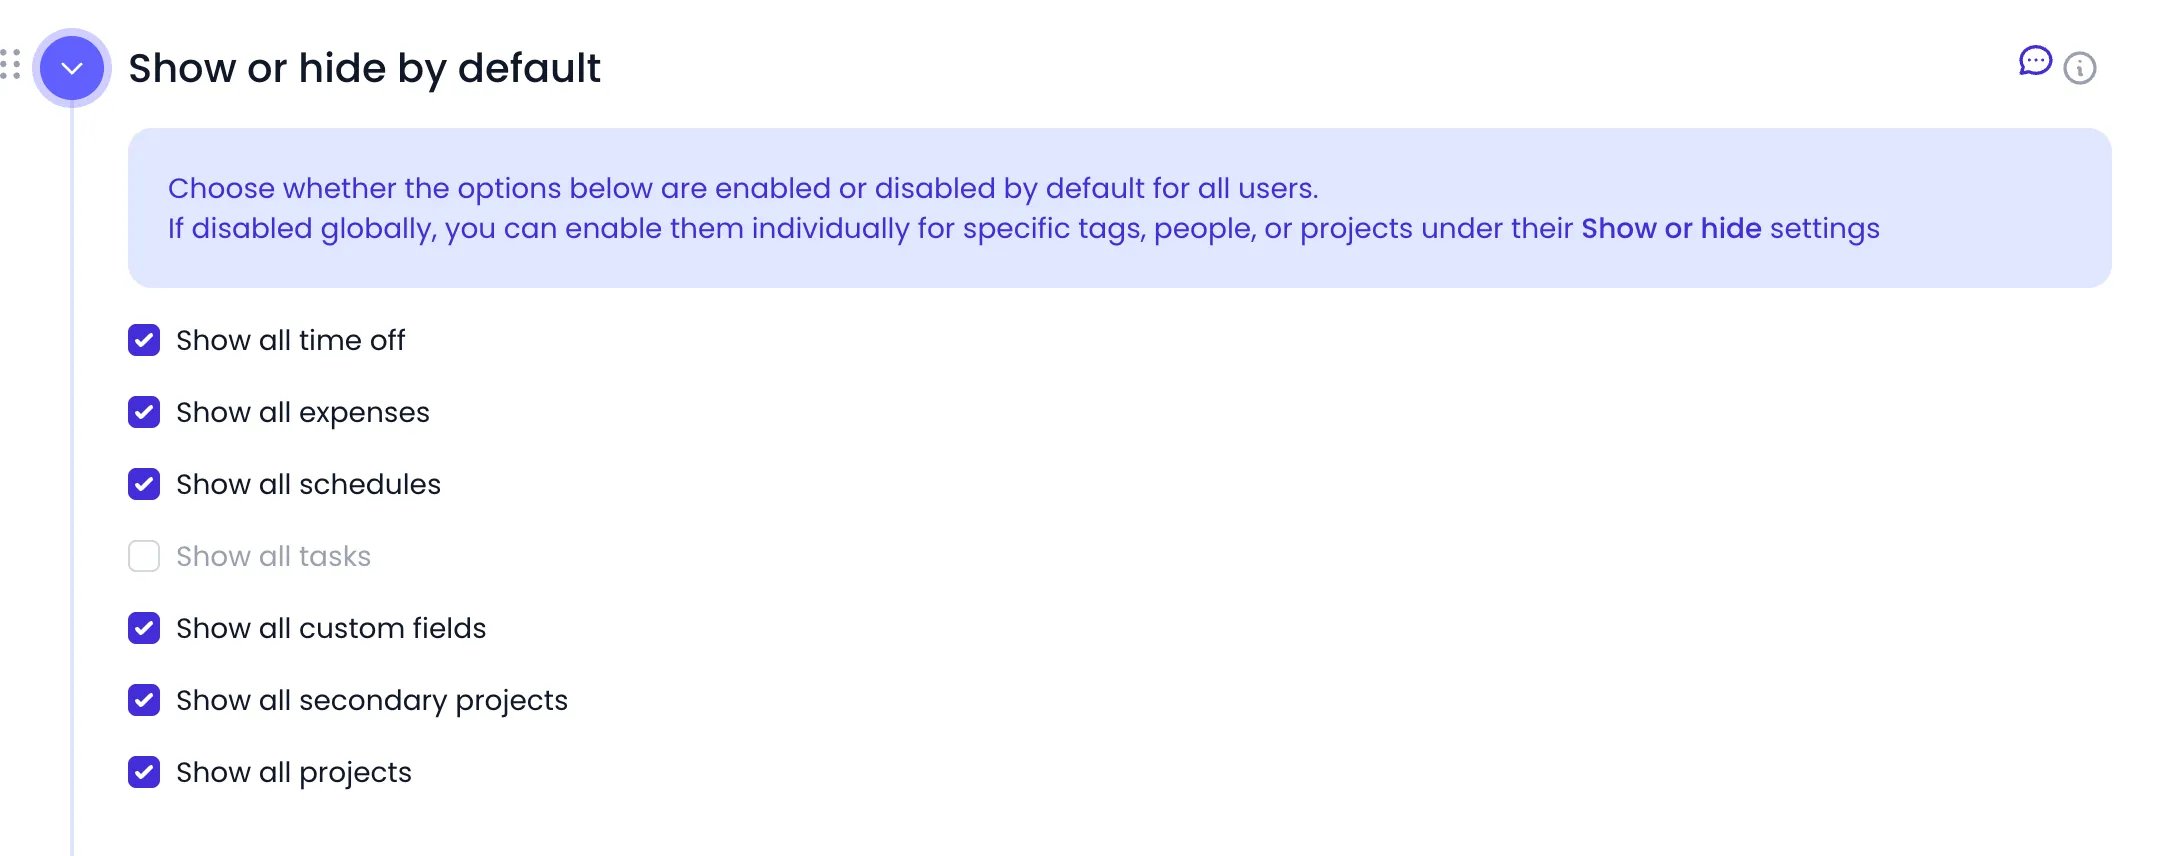
The Show or hide by default panel in Account Settings
Secondary projects are the projects picked after the first one in a timesheet row that chains several categories, such as the activity picked after a client project in a row set to Client then Activity. See Project categories for how those rows are built.
When an option is disabled here, items of that kind are hidden from everyone until you grant access individually — per item under Who has access?, or per person or tag under Show or hide.
For secondary projects, the account default can also be overridden per entity: on a specific project, person, or tag, choose All secondary projects available or No secondary projects available instead of following the default, or show and hide individual secondary projects one by one.
Grant access per item with Who has access?
Each project, time off type, expense type, and custom field has a Who has access? panel. On a task, the same list is called Potential owners. Here is where to find it:
The panel lists who is linked to the item. On a project or a time off type, it has two sections:
- Individually — add specific people with the Select person selector.
- By tags — add whole groups with the Select tag selector. Everyone tagged with that tag, or any of its descendants, gets access.
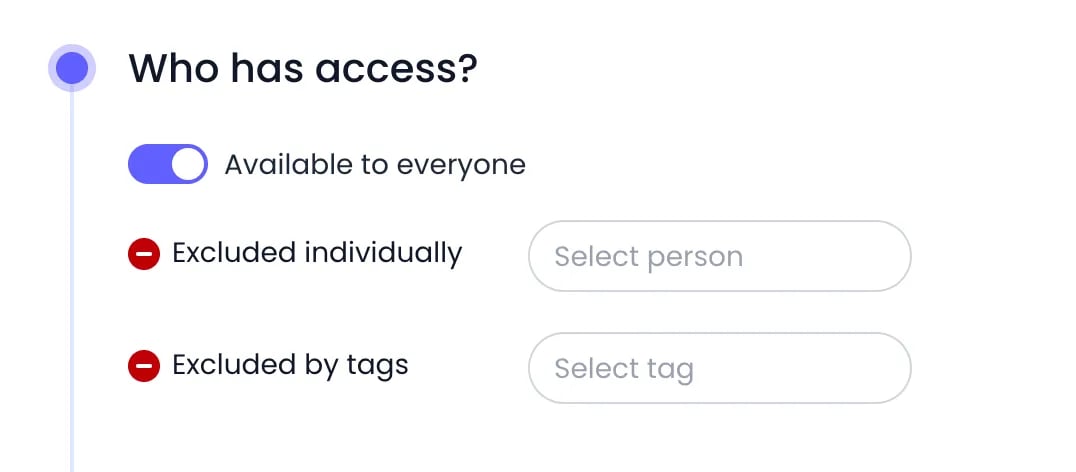
A project available to everyone, so the panel lists exclusions
The Projects section of an expense type limits it to specific projects. On a custom field, the Projects, Tasks, and Time off sections decide which projects, tasks, and time off types get the field. Which kinds of record can carry a custom field at all is set in its Custom field visibility panel. See Who a field is asked of.
Time off types, expense types, and custom fields don’t carry their own default toggle — their default comes from the Show or hide by default options above. Projects are the exception, with the per-project toggle.
Edit access from the person or tag side with Show or hide
The same links can be managed from the people side. Click People (or Tags) in the sidebar, select a person or tag, and open the Show or hide panel. For a person or tag it covers time off, expenses, work schedules, tasks, projects, secondary projects, and custom fields. A project’s Show or hide panel covers secondary projects, expenses, and custom fields. Each section follows the account default, just like the item-side panel: Show projects lists the projects added for this person, while Hide projects lists exclusions when all projects are visible by default. The same pattern applies to Show time off / Hide time off, Show expenses / Hide expenses, Show schedules / Hide schedules, and custom fields. Tasks are the exception: because assigning a task always grants it, the section is always Show tasks, whether or not Show all tasks is checked. On a person or tag, the secondary project section appears only when a timesheet row chains several project categories. Archived items, and tasks marked done, drop out of these sections, but their links still apply and show again once the item is unarchived or reopened.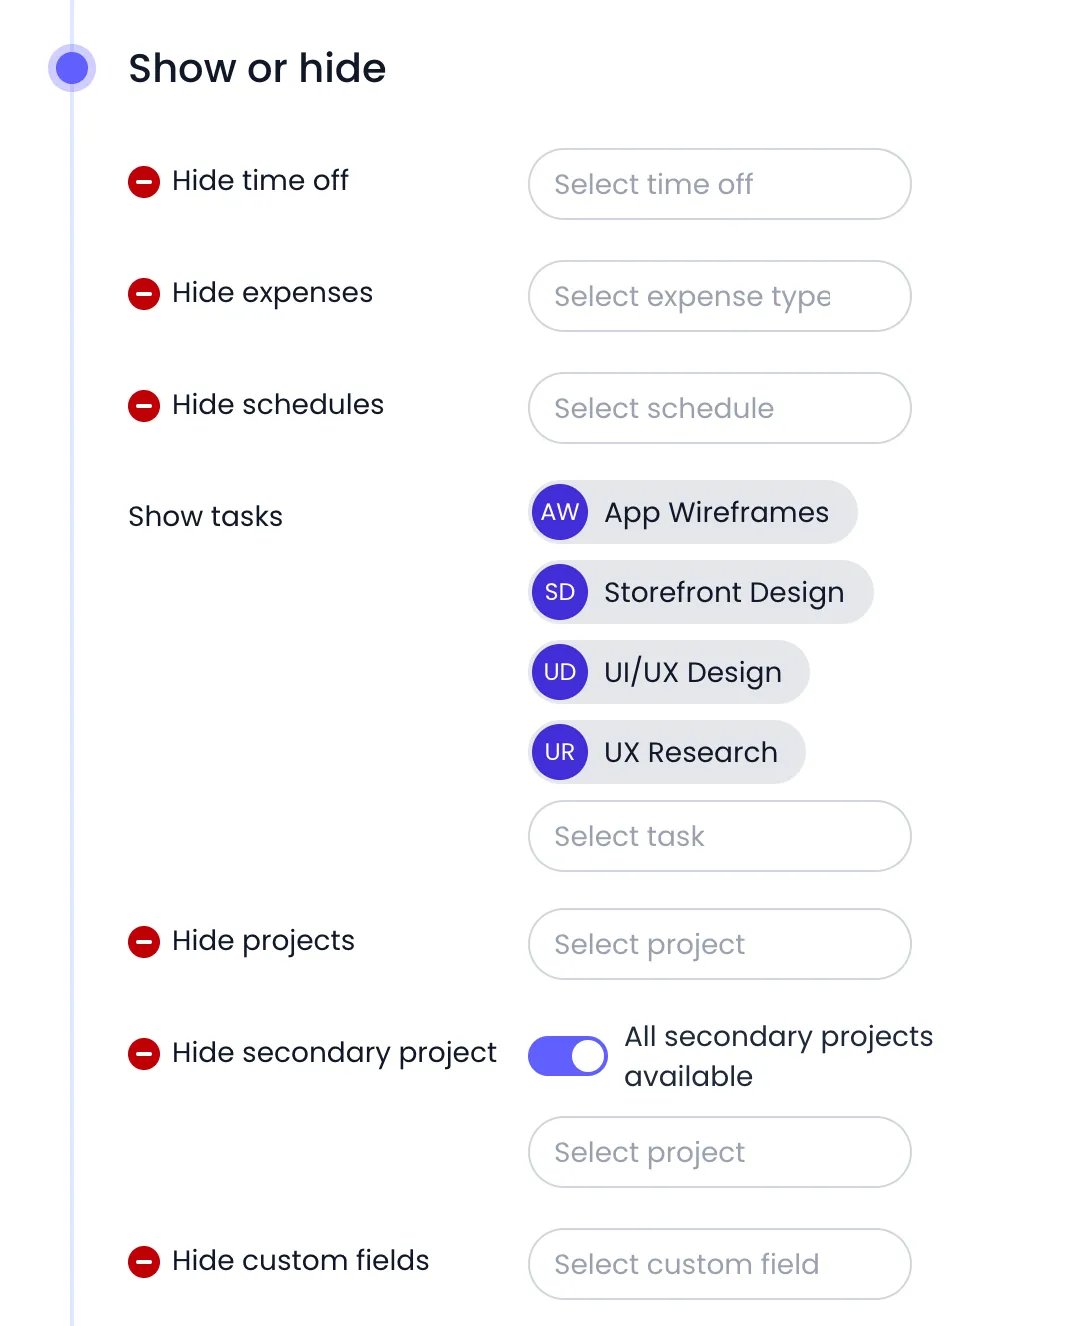
A person's Show or hide panel
Grant a whole category at once
In the Show tasks, Show projects, and Show secondary project sections of a person or tag, the selector lists each category as a row of its own. Click the category row to grant the whole category in one go; the chevron next to it still expands the category when you want a single item instead. A project’s Show or hide panel offers the same for secondary projects. A category granted as a whole stands for every task, project, or secondary project inside it, including anything you add to that category later. It appears as one badge in the category’s color, and its members disappear from the selector since they are already covered. Remove the badge to take the whole category back. When projects or secondary projects are shown to everyone by default, the section reads Hide projects or Hide secondary project instead, and picking a category there hides the whole category. For example, pick the Client category under Show projects to put every client project on a person’s timesheet without listing them one by one, or pick a planning under Show tasks to make all of its tasks available to that person. The same one-click pick works in a person’s Manages panel: adding a project category, a planning, or a tag category such as Department makes the person manager of everything inside it, now and in the future. See People for the panel itself. Categories are created and renamed from the category menu, described in Projects.Task assignment
Tasks are independent planning items, separate from projects, and carry their own assignment attributes:- Owner: the single person responsible for the task, with their % FTE, the share of their working time planned for it.
- Potential owners: the people and tags the task is available to, in an Individually section and a By tag section. It never turns into an exclusion list, because assigning a task always grants it.
Which plannings a person can book
Alongside the item-by-item assignments above, one setting decides which whole plannings a person may record time on: Record time on these plannings, in the Categories tab of the Timesheet and Planning Settings panel. Add a planning to the list with Pick a planning. See Timesheet and planning settings for the setting itself. The list cascades like every other timesheet setting. The value on Account Settings applies to everyone, a value on a tag overrides it for everyone under that tag, and a value on a person overrides both for that one person — so you can let one team book time on a planning that stays out of everyone else’s timesheet. Beebole enforces the list when an entry is saved, not only in the timesheet’s pickers. Creating an entry on a task, or moving an existing entry to another task, checks the task’s planning against the list of the person the entry belongs to — not the person doing the typing. An entry that breaks the rule is refused with Your timesheet settings do not allow recording time on this task. While the Allow only planned tasks in the timesheet restriction is on, the plan replaces this list: every planning counts, and time is accepted only on the tasks the person owns. See Restrictions.Because the check follows the timesheet’s owner, a manager or admin recording time for someone else is held to that person’s own list. Entries saved before you changed the list stay as they are and remain editable in every other way.
Example: a client project for a five-person team
Suppose the Website Redesign project for Acme Corp should only appear on five people’s timesheets:- Click Projects in the sidebar and select the project.
- Open Who has access? and switch the toggle to Unavailable to everyone.
- Under Individually, add the five people — or tag them and add the tag under By tags.
Related content
Roles & Permissions
Define what each role can view and edit across Beebole.
Projects
Create and organize the projects your team tracks time against.
Tags
Group people with tags to grant access to whole teams at once.
Time Off
Configure time off types, allowances, and balances.
Frequently asked questions
What is the difference between assignments and role permissions?
What is the difference between assignments and role permissions?
Assignments decide which items are available to a person in Beebole — which projects, time off types, and expense types they can pick. Role permissions decide what they can do with data — view it or edit it, and for whom. Both apply at the same time.
How do I make a project visible to only a few people?
How do I make a project visible to only a few people?
Open the project’s Who has access? panel, set the toggle to Unavailable to everyone, then add the right people under Individually or a tag under By tags. Only the people you add see the project in Beebole.
Can I grant access to a whole department at once?
Can I grant access to a whole department at once?
Yes. Tag the department’s people, then add that tag under By tags in the item’s Who has access? panel (under Tags on an expense type or a custom field). Anyone tagged later inherits the access automatically, including through descendant tags.
Where do I set what everyone sees by default?
Where do I set what everyone sees by default?
In Beebole’s Account Settings, under Show or hide by default. Each option — projects, secondary projects, time off, expenses, work schedules, tasks, and custom fields — decides whether that kind of item is available to everyone or hidden until granted.
Can I give someone access to a whole category of projects or tasks?
Can I give someone access to a whole category of projects or tasks?
Yes. In the person’s or tag’s Show or hide panel, open the Show projects or Show tasks selector and click the category row itself, for example Client, instead of a single item. Everything in that category is granted, including projects or tasks added later, and the category shows as one badge you can remove at any time.