Roles
When you add a user to Beebole, you can select a “User group” or role for them in the User details module. A user can be an administrator, contractor, employee, project manager, or team leader. The role you select will determine a person’s permissions, access rights, and responsibilities in the platform. Administrators have access to everything in the platform, including the right to approve and reject any hours and to track time on behalf of other users. You can change a person’s user group at any time. You can assign people to team leaders and projects to project managers, which will give them additional access to hours tracked by certain people or on certain projects, as well as approval rights. Check our documentation to read more about configuring access rights and authorizations for different user groups. Another way to control which modules users have access to is by configuring default screens for different user groups. You can do this with the User Screens module in the Settings screen.Using Groups to Create Teams, Departments, etc.
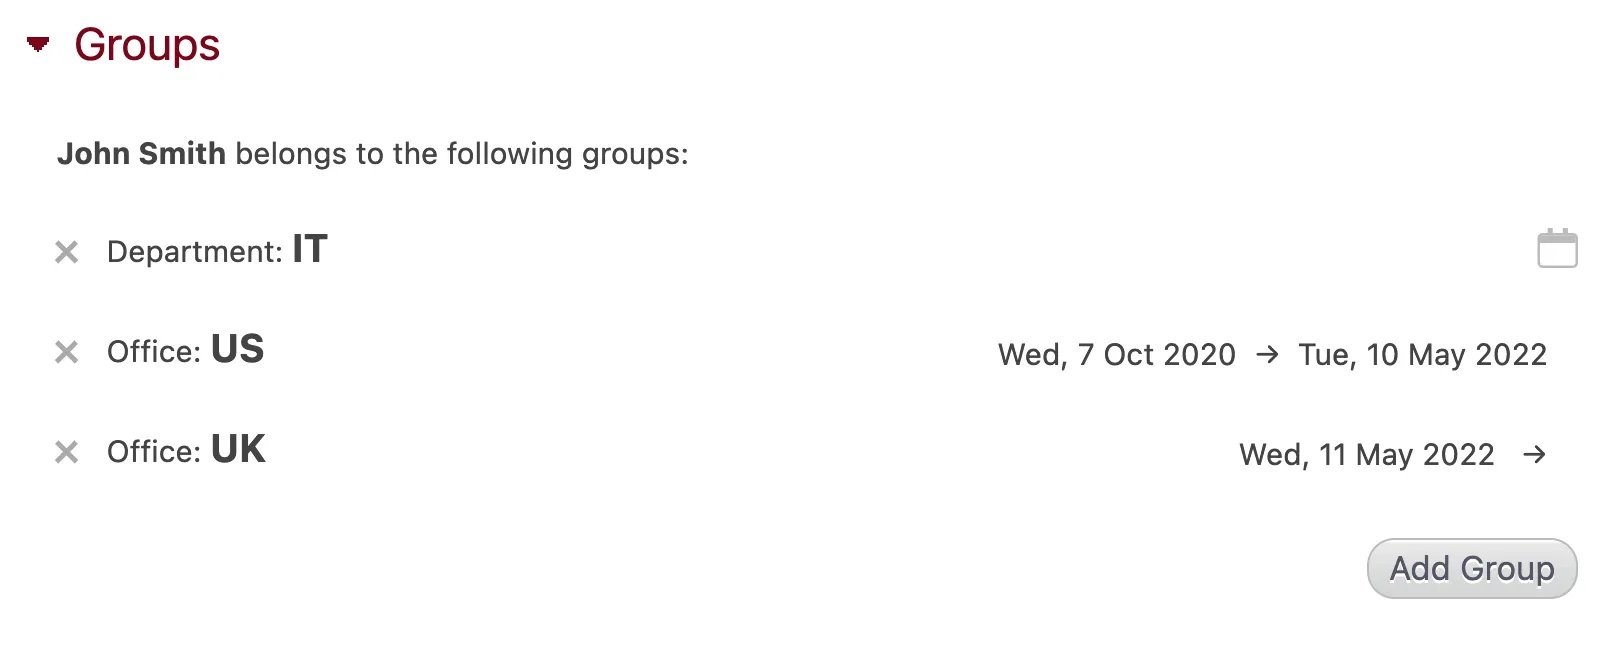
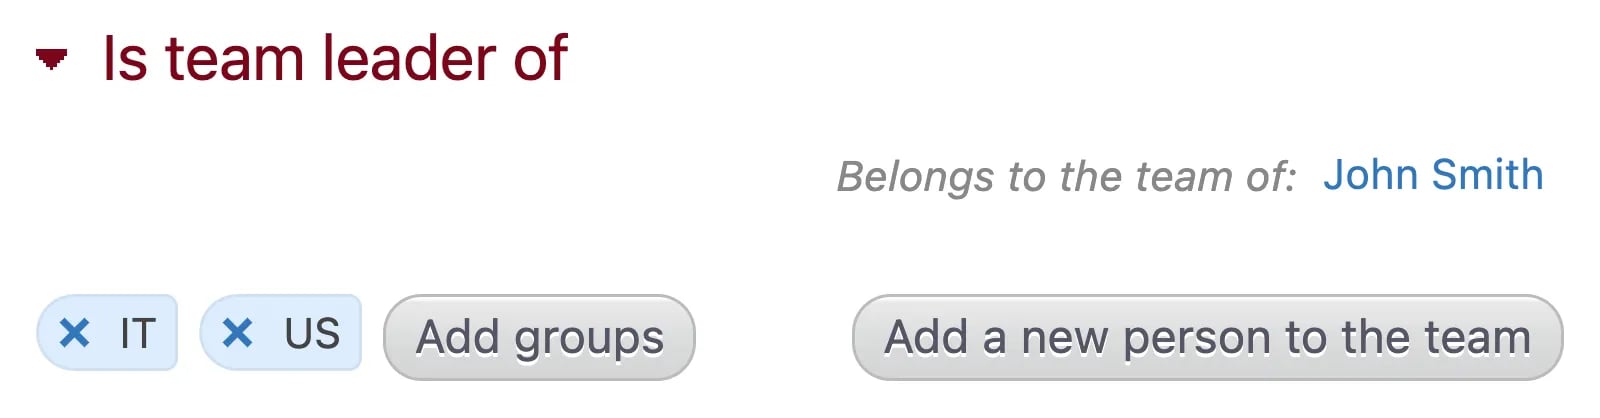
Users can be organized by team, department, location, employee type, etc. using the Groups Settings and Groups modules. Groups are categories that you create, so they can be anything. They also can be used for any entity, including companies and projects. Groups are useful for a variety of reasons. You can use groups to filter reports in the Report and Chart & Table modules. You can also use them to make bulk selections when configuring certain modules, such as Exclusive Members, Is Team Leader Of, and Project Manager. Rather than selecting employees one by one, use the “Add groups” button. Start by creating groups in the Groups Settings module in the Settings screen. If the module isn’t visible, you can add it by clicking “Customize” in the top right corner and dragging and dropping the module anywhere on the screen. Ideally, groups should have a hierarchy of two levels or more, as seen in the example below. To create groups:
- Click on the field labeled “Type here the name of a new group” to add a name to the top level of your hierarchy (for example, “Locations” or “Departments”). Each time you fill in a row a new one will be added. All changes are saved automatically.
- To add a second level to a group (for example, “New York” or “Marketing”) click the ”+” to the left of the group name. You can add as many categories as needed by clicking the ”+”.
- To delete a group, click the red “X” to the right of the row.
Customizing Access Rights and Authorizations
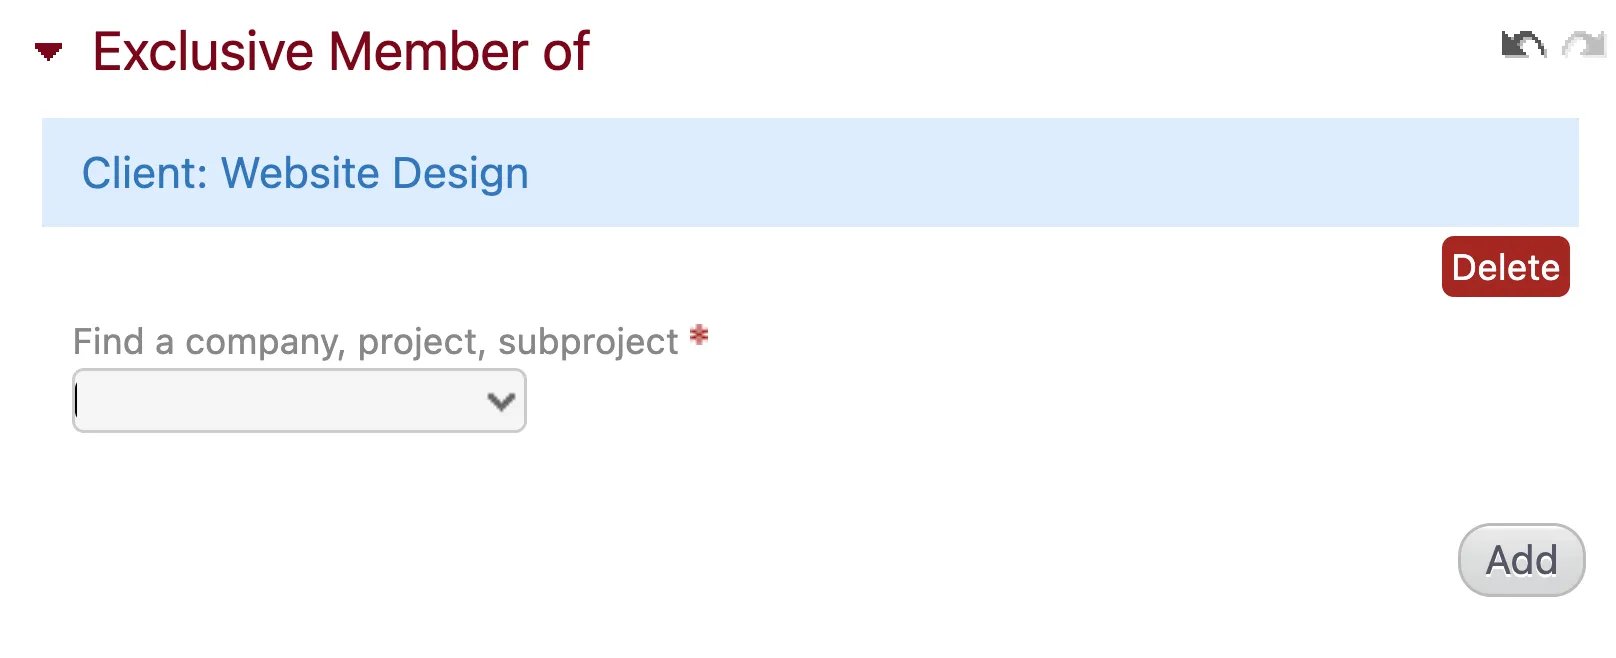
There are three different ways that you can configure access rights and authorizations in Beebole:- Limit the clients or projects visible to users in their timesheets: by default, the timesheet shows all clients and projects, but you can limit this by creating exclusive members.
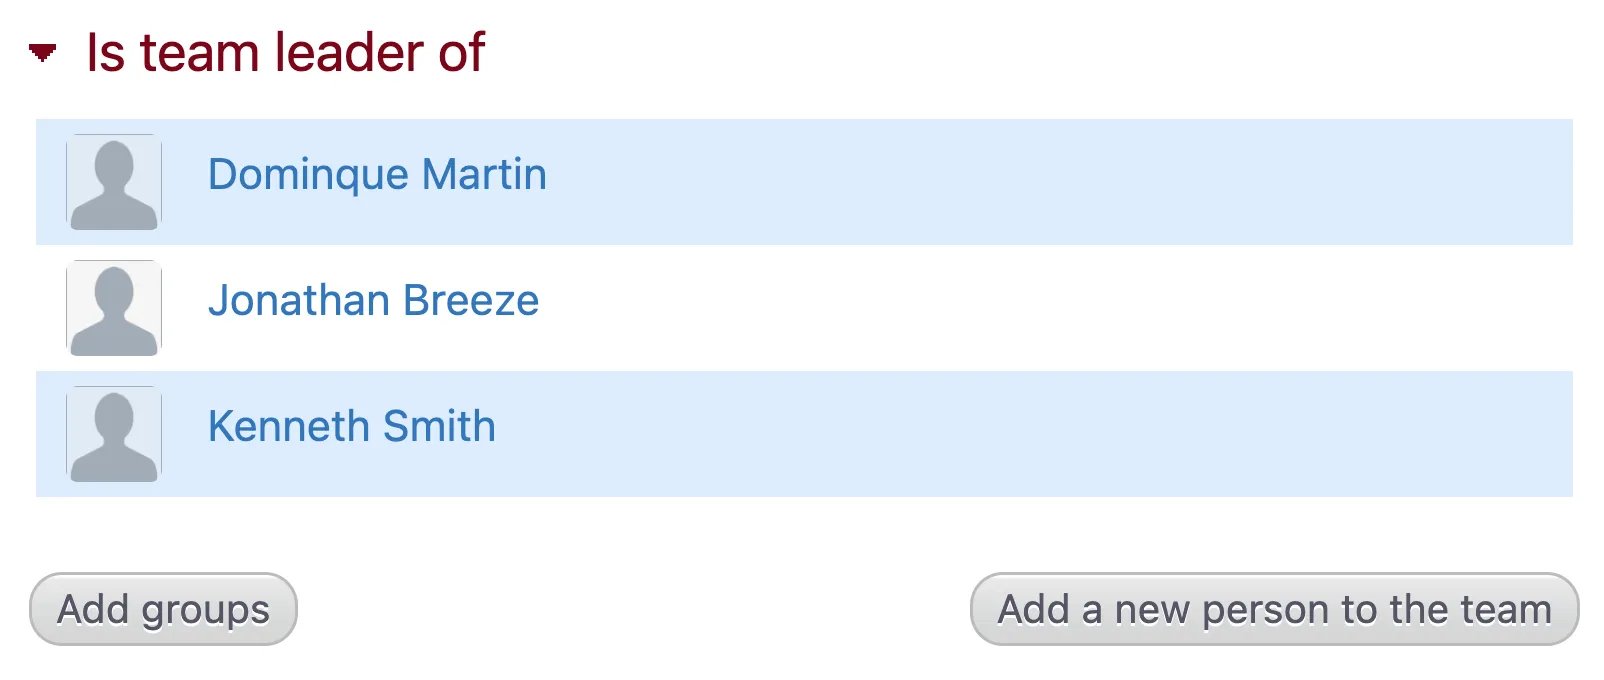
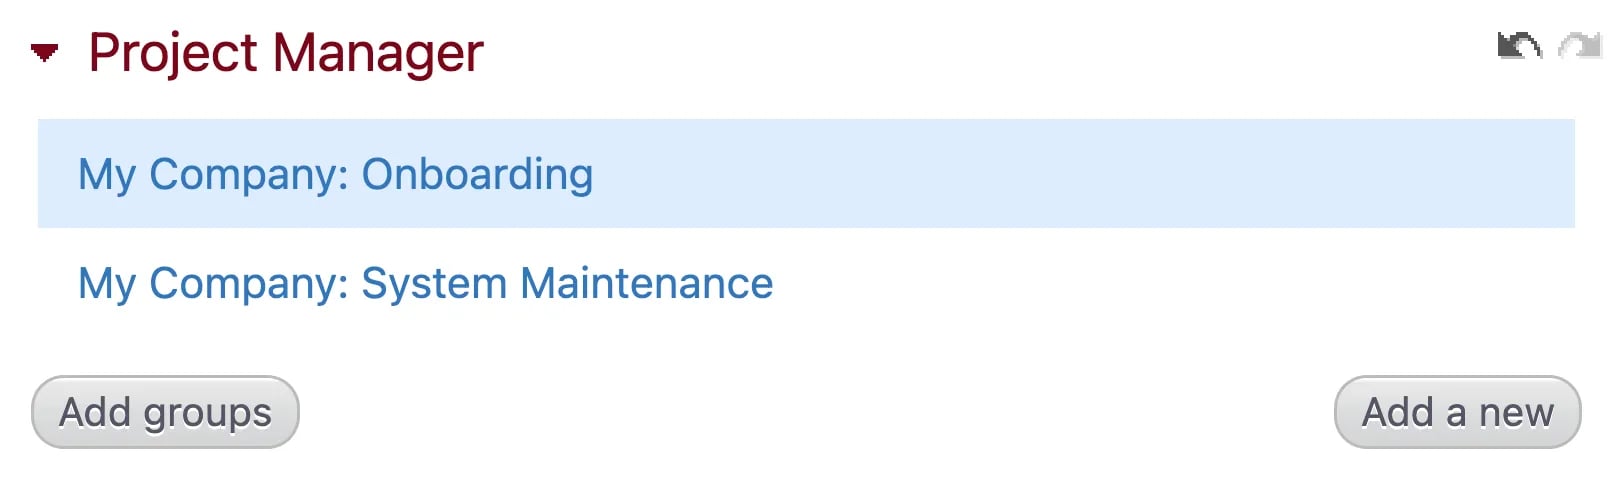
- Give managers access to their teams and projects: you can define certain users as team leaders or project managers and give them access to the hours recorded for those people and/or projects. This will also make them responsible for approving hours.
- Define what modules are visible to each group of users: you can use the Authorizations module in the Settings screen to define which modules are visible to each user group (employees, contractors, team leaders, and project managers).

- see all hours recorded by employees for the project(s) in the various modules where hours are shown (Chart & Table, Reports, etc.).
- approve all hours recorded by employees for the project(s) using the Approval module.
- For project managers to see their assigned projects their “User group” must be set as “Project Manager” in the User details module on their page.
- A user who has been given the role of “Project Manager” but has no projects assigned to them will be able to view and approve all hours on all projects.
- Once you have selected a user group, choose the module you wish to make available from the “Module” dropdown menu.
- Choose where you want the module to be visible using the “Entity group” dropdown menu.
- Depending on the module, a “read only” option may appear. Tick it if you do not want the given user group to be able to edit the information/content in the module.
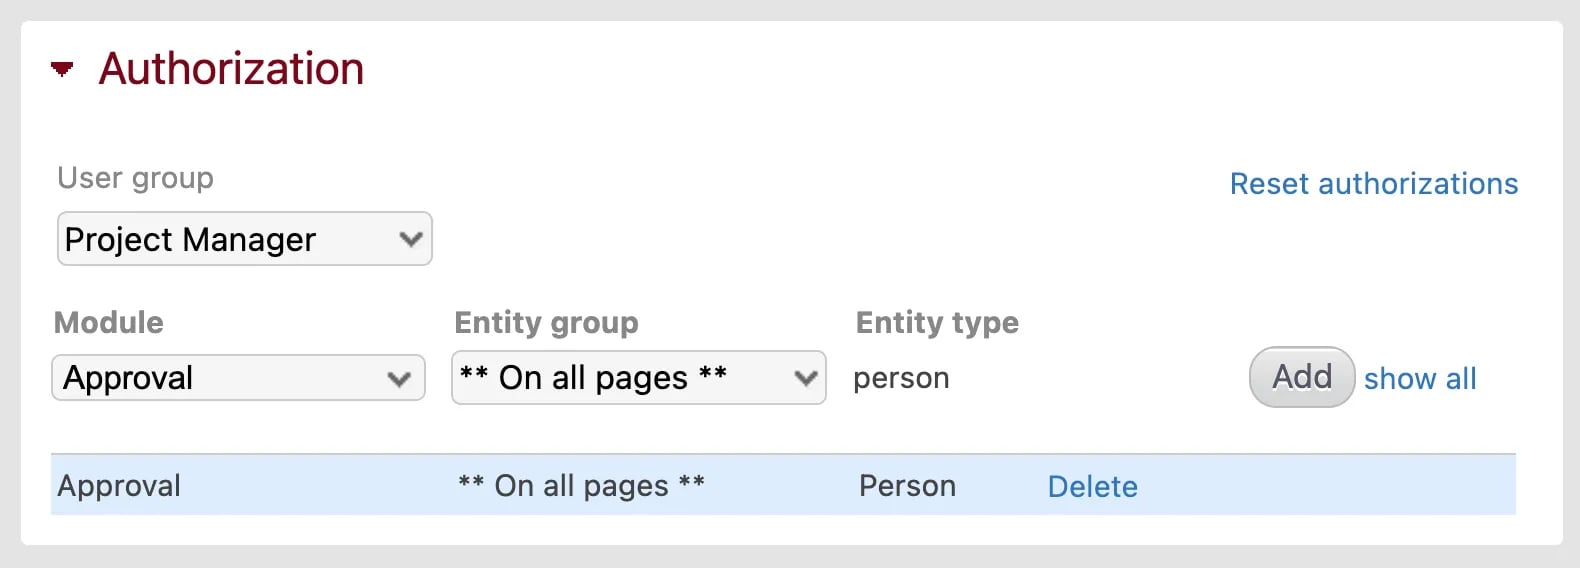
- Just because a module is available for a certain user group does not mean they have full permissions to use it. For example, project managers have access to the Approval module on the pages of all people, but they can only approve hours recorded on the projects they actually manage.
- The home screen also serves as a user’s personal screen when logged into their own account. Therefore, to give authorization to a module on the home page, select “Person - Self”.