Integrations Using Zapier and Pipedream
Zapier allows you to easily connect Beebole with thousands of other applications. Integrate with tools like Quickbooks, Jira, Asana, Slack, BambooHR, and more without coding by using Zaps. Zaps are workflows that connect applications to help automate tasks. Zaps begin with an event called a trigger and perform one or multiple events called actions. For example, creating a new issue in Jira can trigger the creation of a subproject in Beebole. You can read more about using Zapier with Beebole and refer to Zapier’s documentation for help building your first Zaps. For added flexibility, Pipedream offers many of the same integrations as Zapier but with code-level control when you need it, and many no-code integrations as well. Harness Beebole’s API to adapt integrations to meet your team’s specific needs. For example, build workflows to automate payroll reporting or send alerts to managers for usual time entries. Read more about using Beebole with Pipedream on their site. For any additional questions about integrations, please reach out to our support team.Link Your Account with Google Workspace
It is easy to link your Beebole account to your Google Workspace account (previously called Google Apps or Google Suite). If you do not have a Beebole account, visit our listing on the Google Workspace Marketplace and click the “Install” button at the top of the page. Follow the steps provided and be sure to launch Beebole when prompted to create a new account.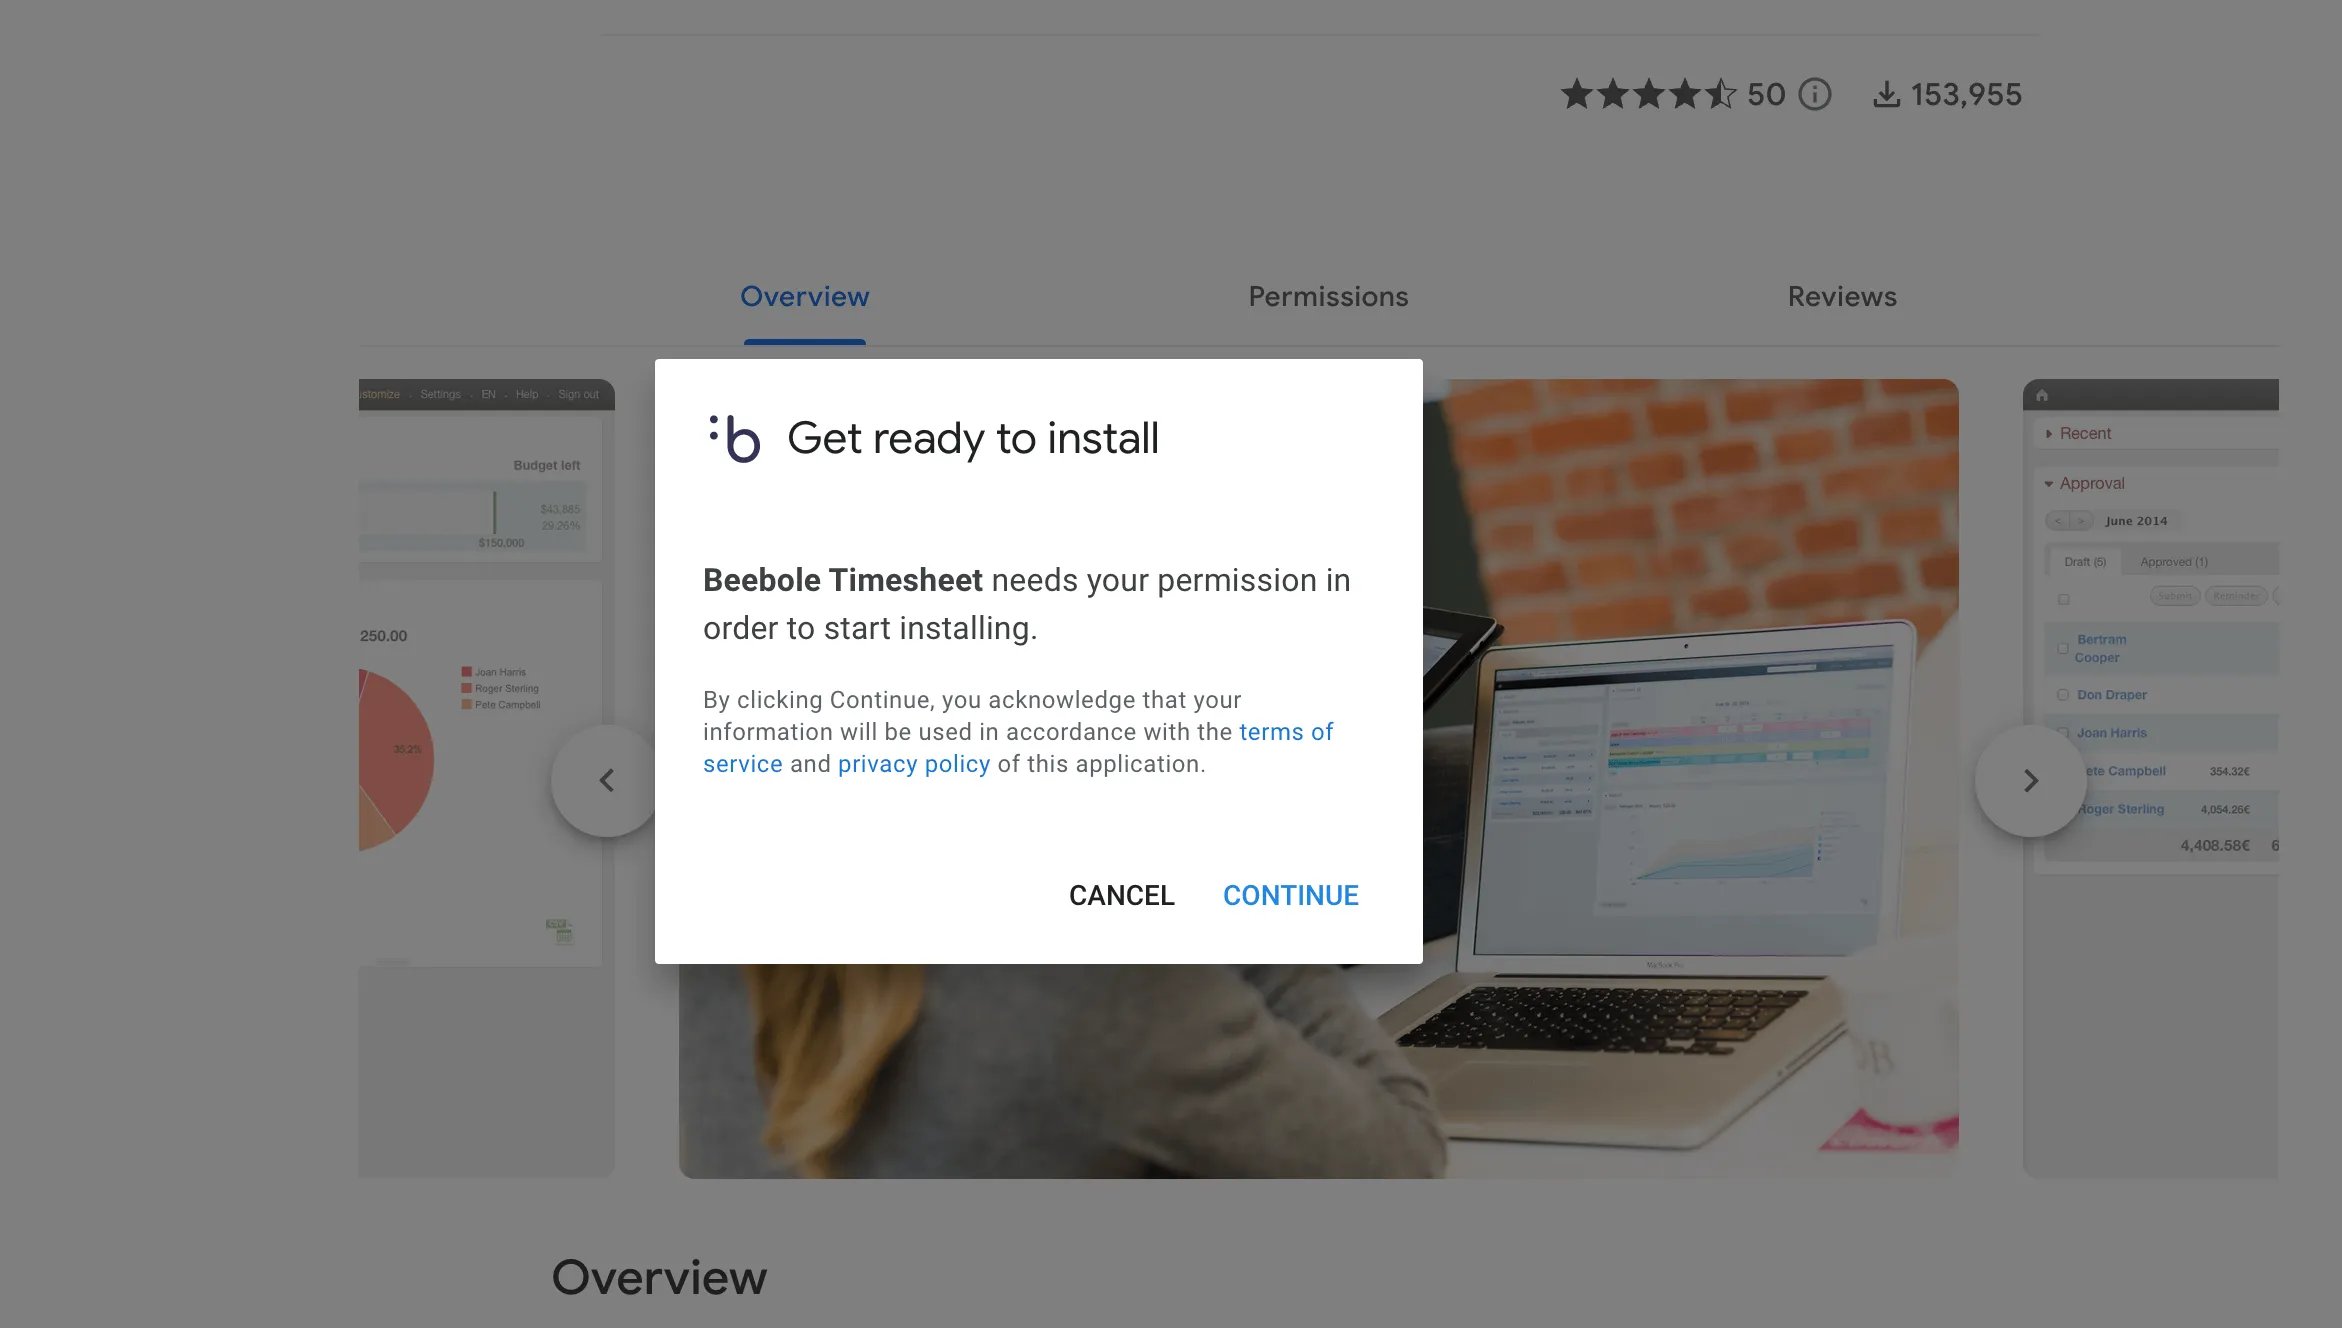
https://beebole-apps.com/sso2/google?domain=yourDomain.com If you use multiple Google Workspace domains and would like to link them all to a single Beebole account, you can do so by entering all domains in the ad-hoc field, separated by a semicolon. You can also link multiple Beebole accounts to a single Google Apps domain. In this case, users will be presented with a list of all linked accounts to choose from when logging in. NOTE:
- When using the Google Workspace authentication, you do not need to manually import employees. New users that do not already exist in Beebole will be added automatically the first time they use the app. They will be classified as an Employee by default, but their user group can be changed (e.g. to Team Leader, Project Manager, etc.) in the User Details module.
- When adding users manually, it is important to ensure that the email address exactly matches the email used in the Google Workspace domain, otherwise duplicate users will be created. For example, john.smith@company.com is not an exact match of jsmith@company.com. Even if John Smith can receive emails at both addresses, the system will consider these two distinct users.
- If your subscription limit is reached, each new user will be added as inactive and will not be able to record time. You can increase the users in your subscription and then activate them using the Person Details module on their individual pages.
Microsoft Azure and Microsoft 365 Integrations
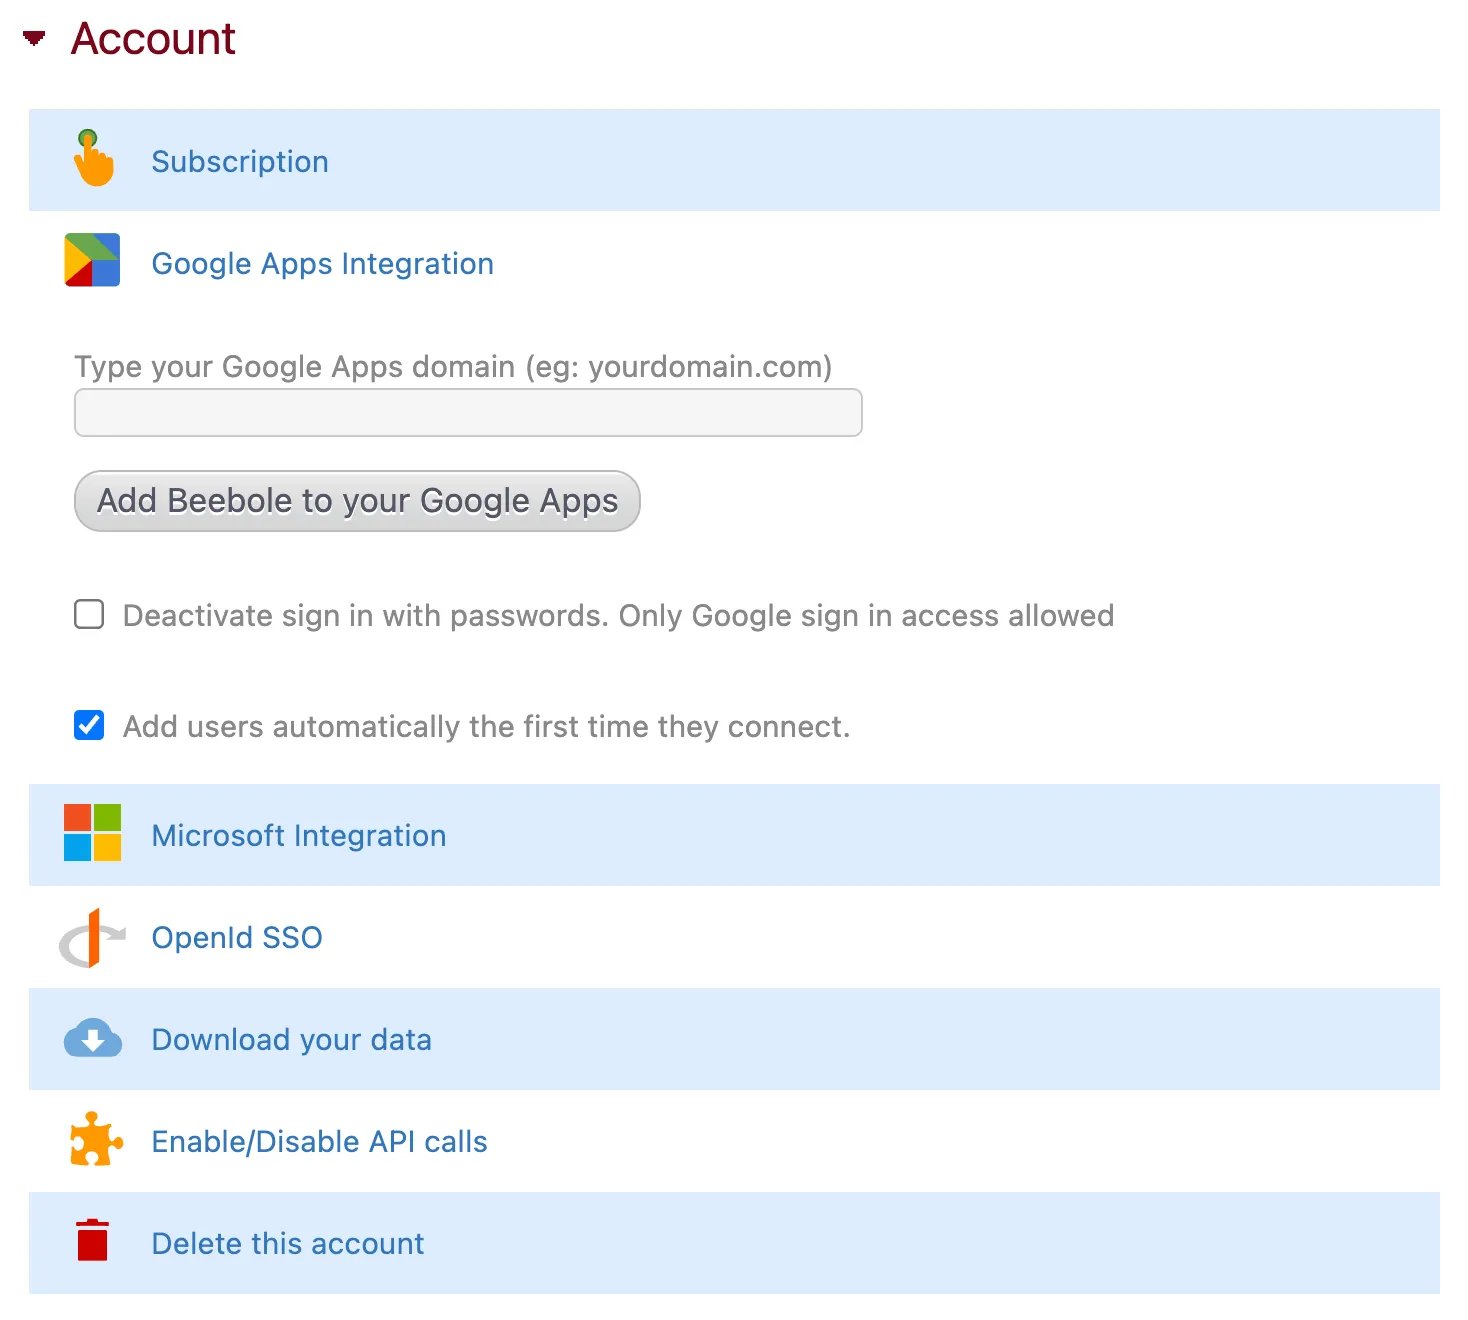
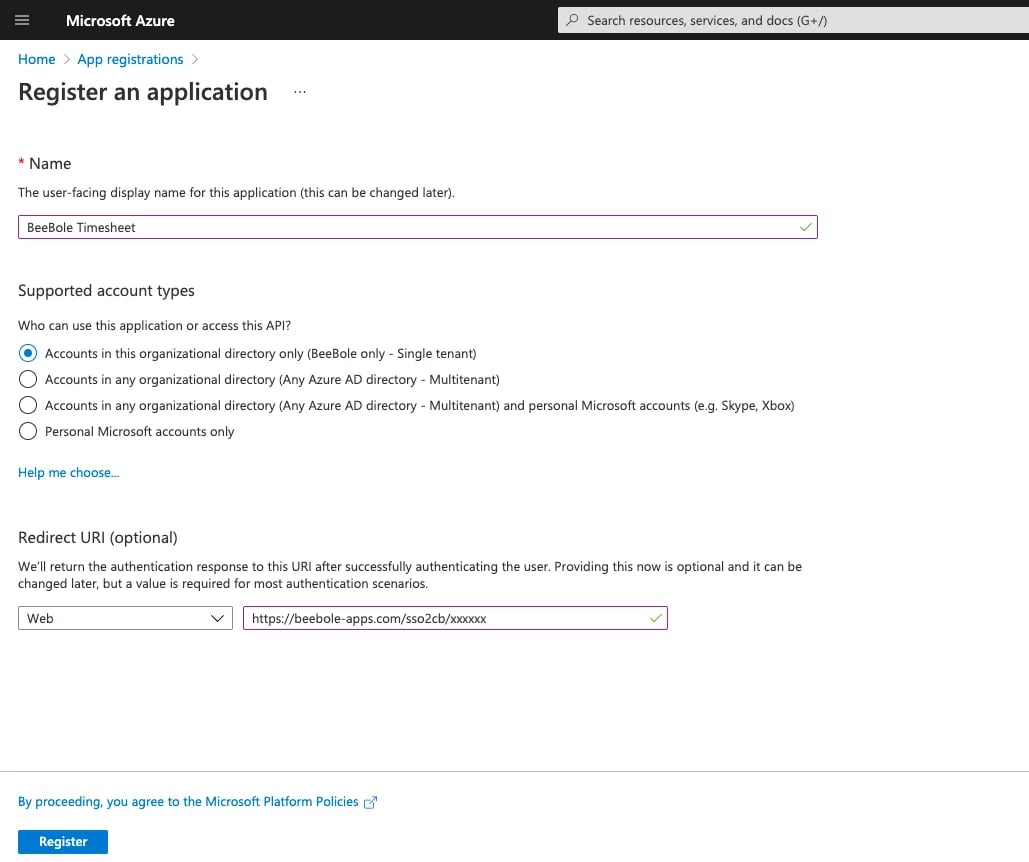
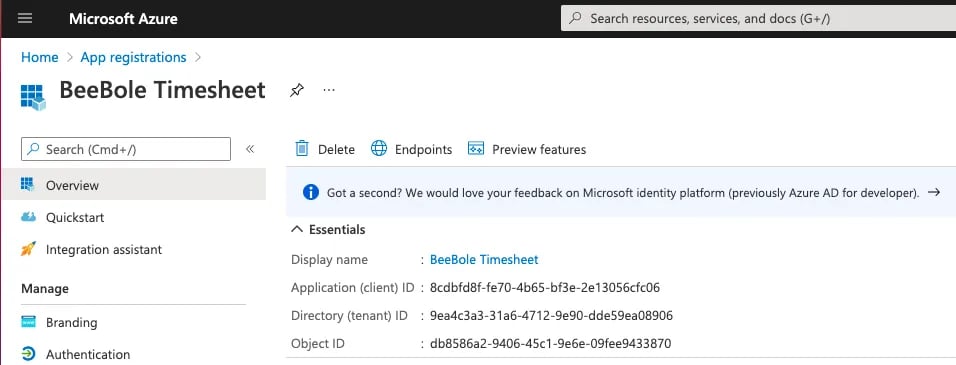
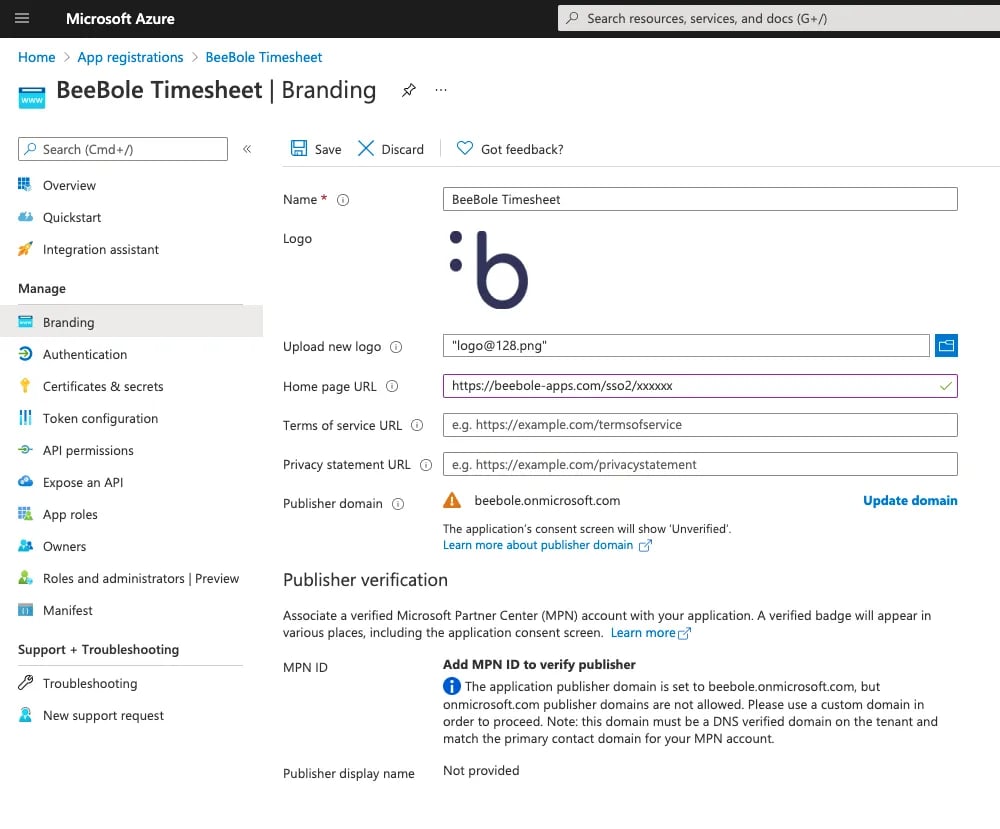
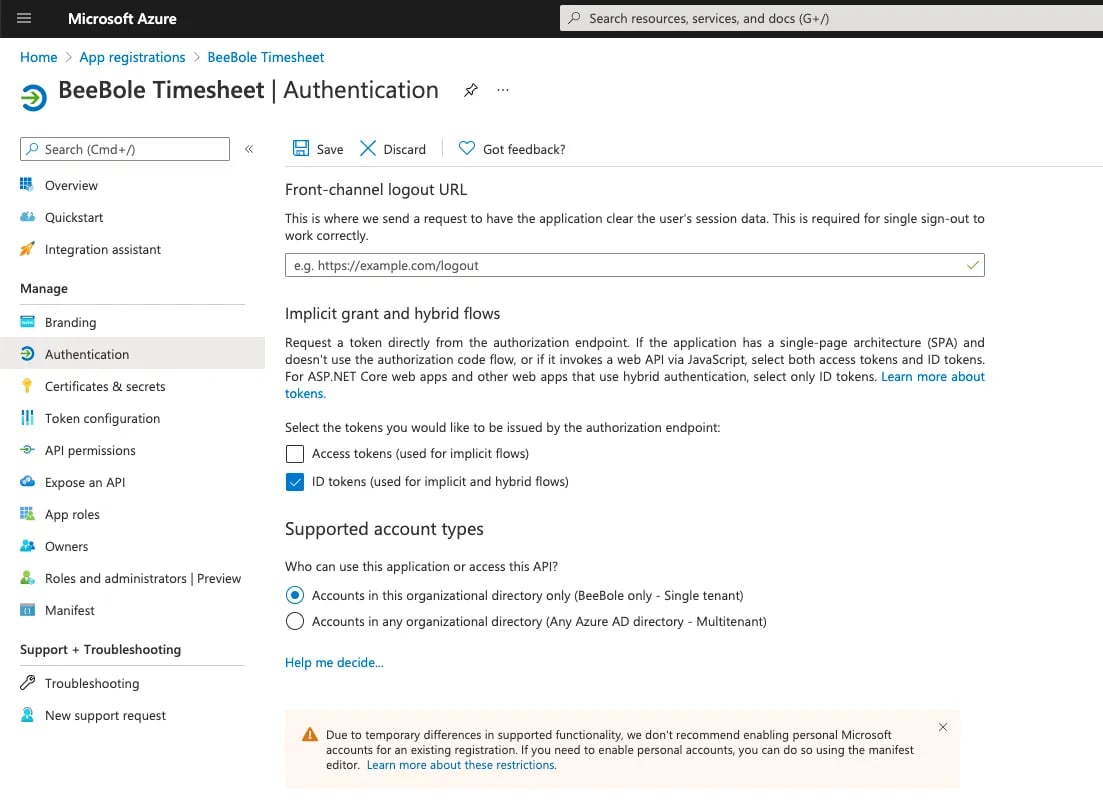
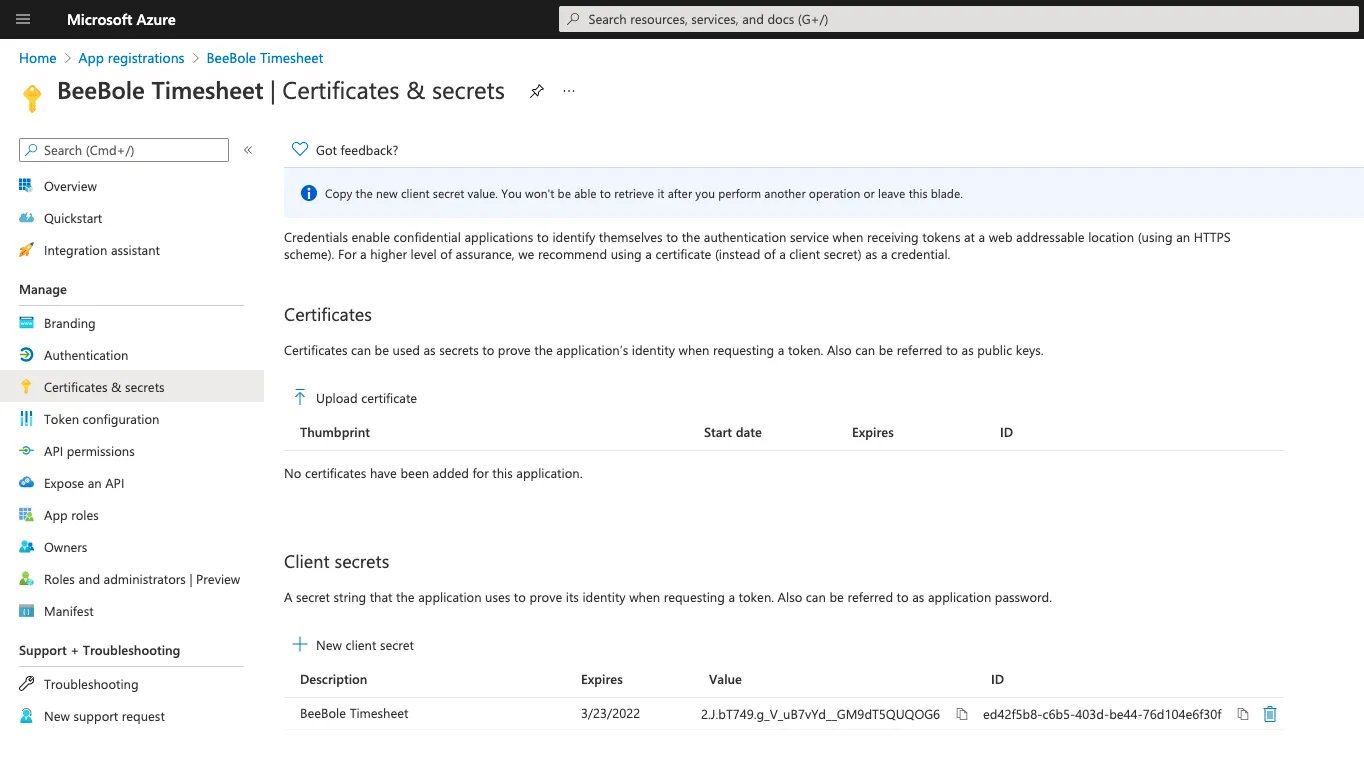
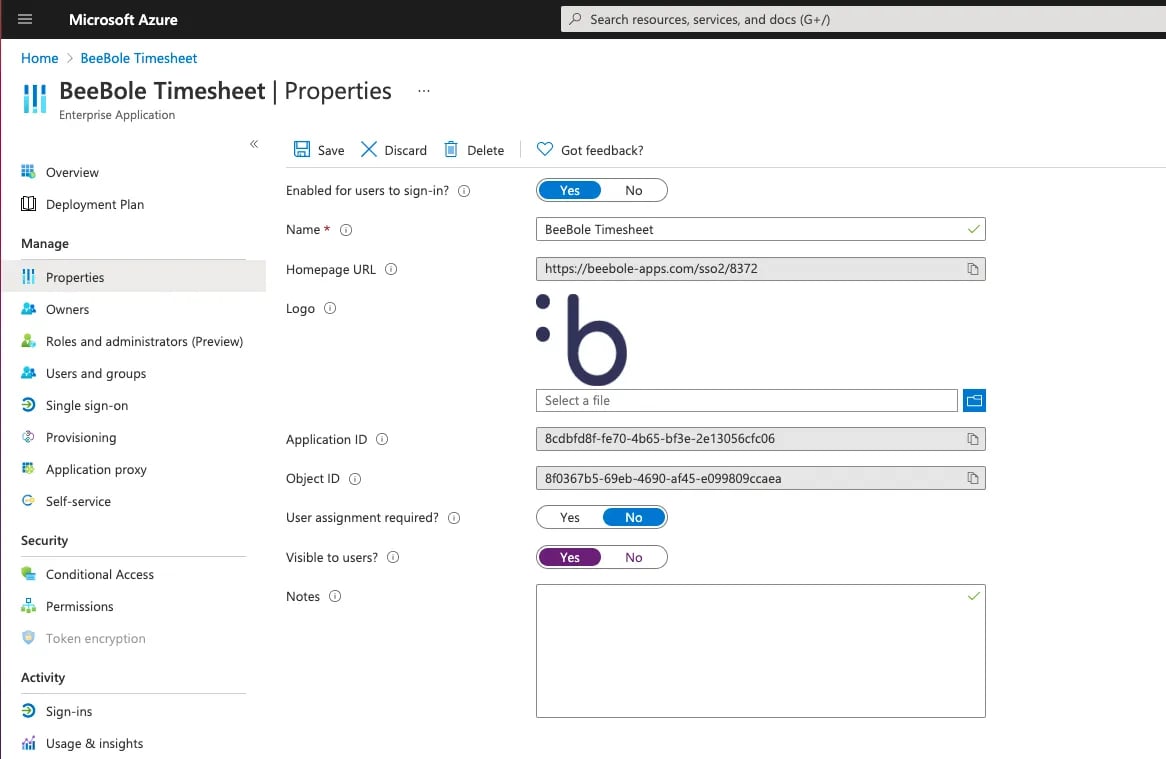
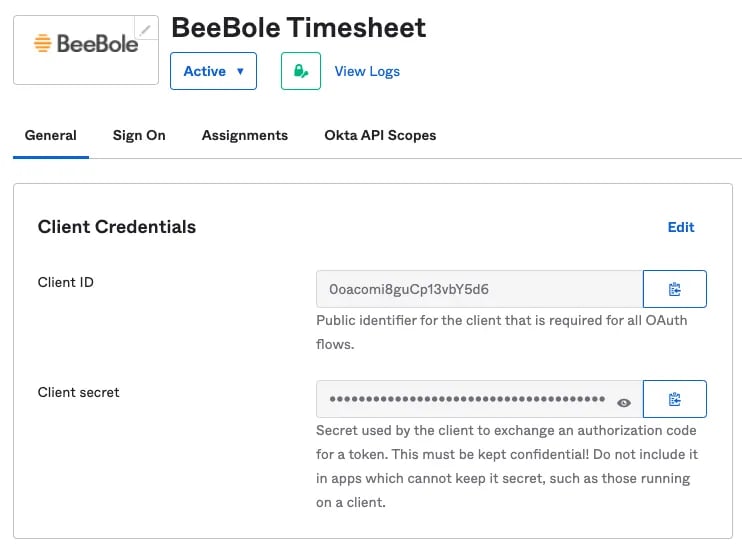
By default, all users can connect to Beebole with their Microsoft credentials (Azure, 365, etc.) by clicking on the Microsoft login button on the sign in page. You can require that users sign in exclusively using the Microsoft SSO (Single Sign On) integration by going to the Microsoft Integration section of the Account module, which can be found in the Settings screen. This is automatic, and you don’t need to take any further steps. If you’d like to also enable the app in Azure, please read on. Follow the steps below to integrate with Microsoft Azure and add Beebole to your Azure portal:- In your Azure administrator account, go to “Register an application” under App Registrations. Fill in the required fields. Be sure to define the authentication scenario for the redirect URI as “Web”. The redirect URI is https://beebole-apps.com/sso2cb/xxxxx, where xxxxx should be replaced by your account ID. You can also directly retrieve the URI from your Beebole account in the OpenID SSO section of the Account module in the Settings screen. Clicking “Register” will take you to the app overview page.
Enabling SSO Integrations
You can connect to your Beebole account with Single Sign On using OpenID Connect/OAuth2.0. The following information is generic to OpenID Connect/OAuth2.0 configurations, which can be used with SSO solutions such as Okta or OneLogin, although instructions for these specific platforms are provided below. Beebole also has built-in SSO integrations for Google Workspace and Microsoft, which you can read more about above. To configure SSO for your account, go to the OpenID SSO section of the Account module in your Settings screen. The following screen will appear: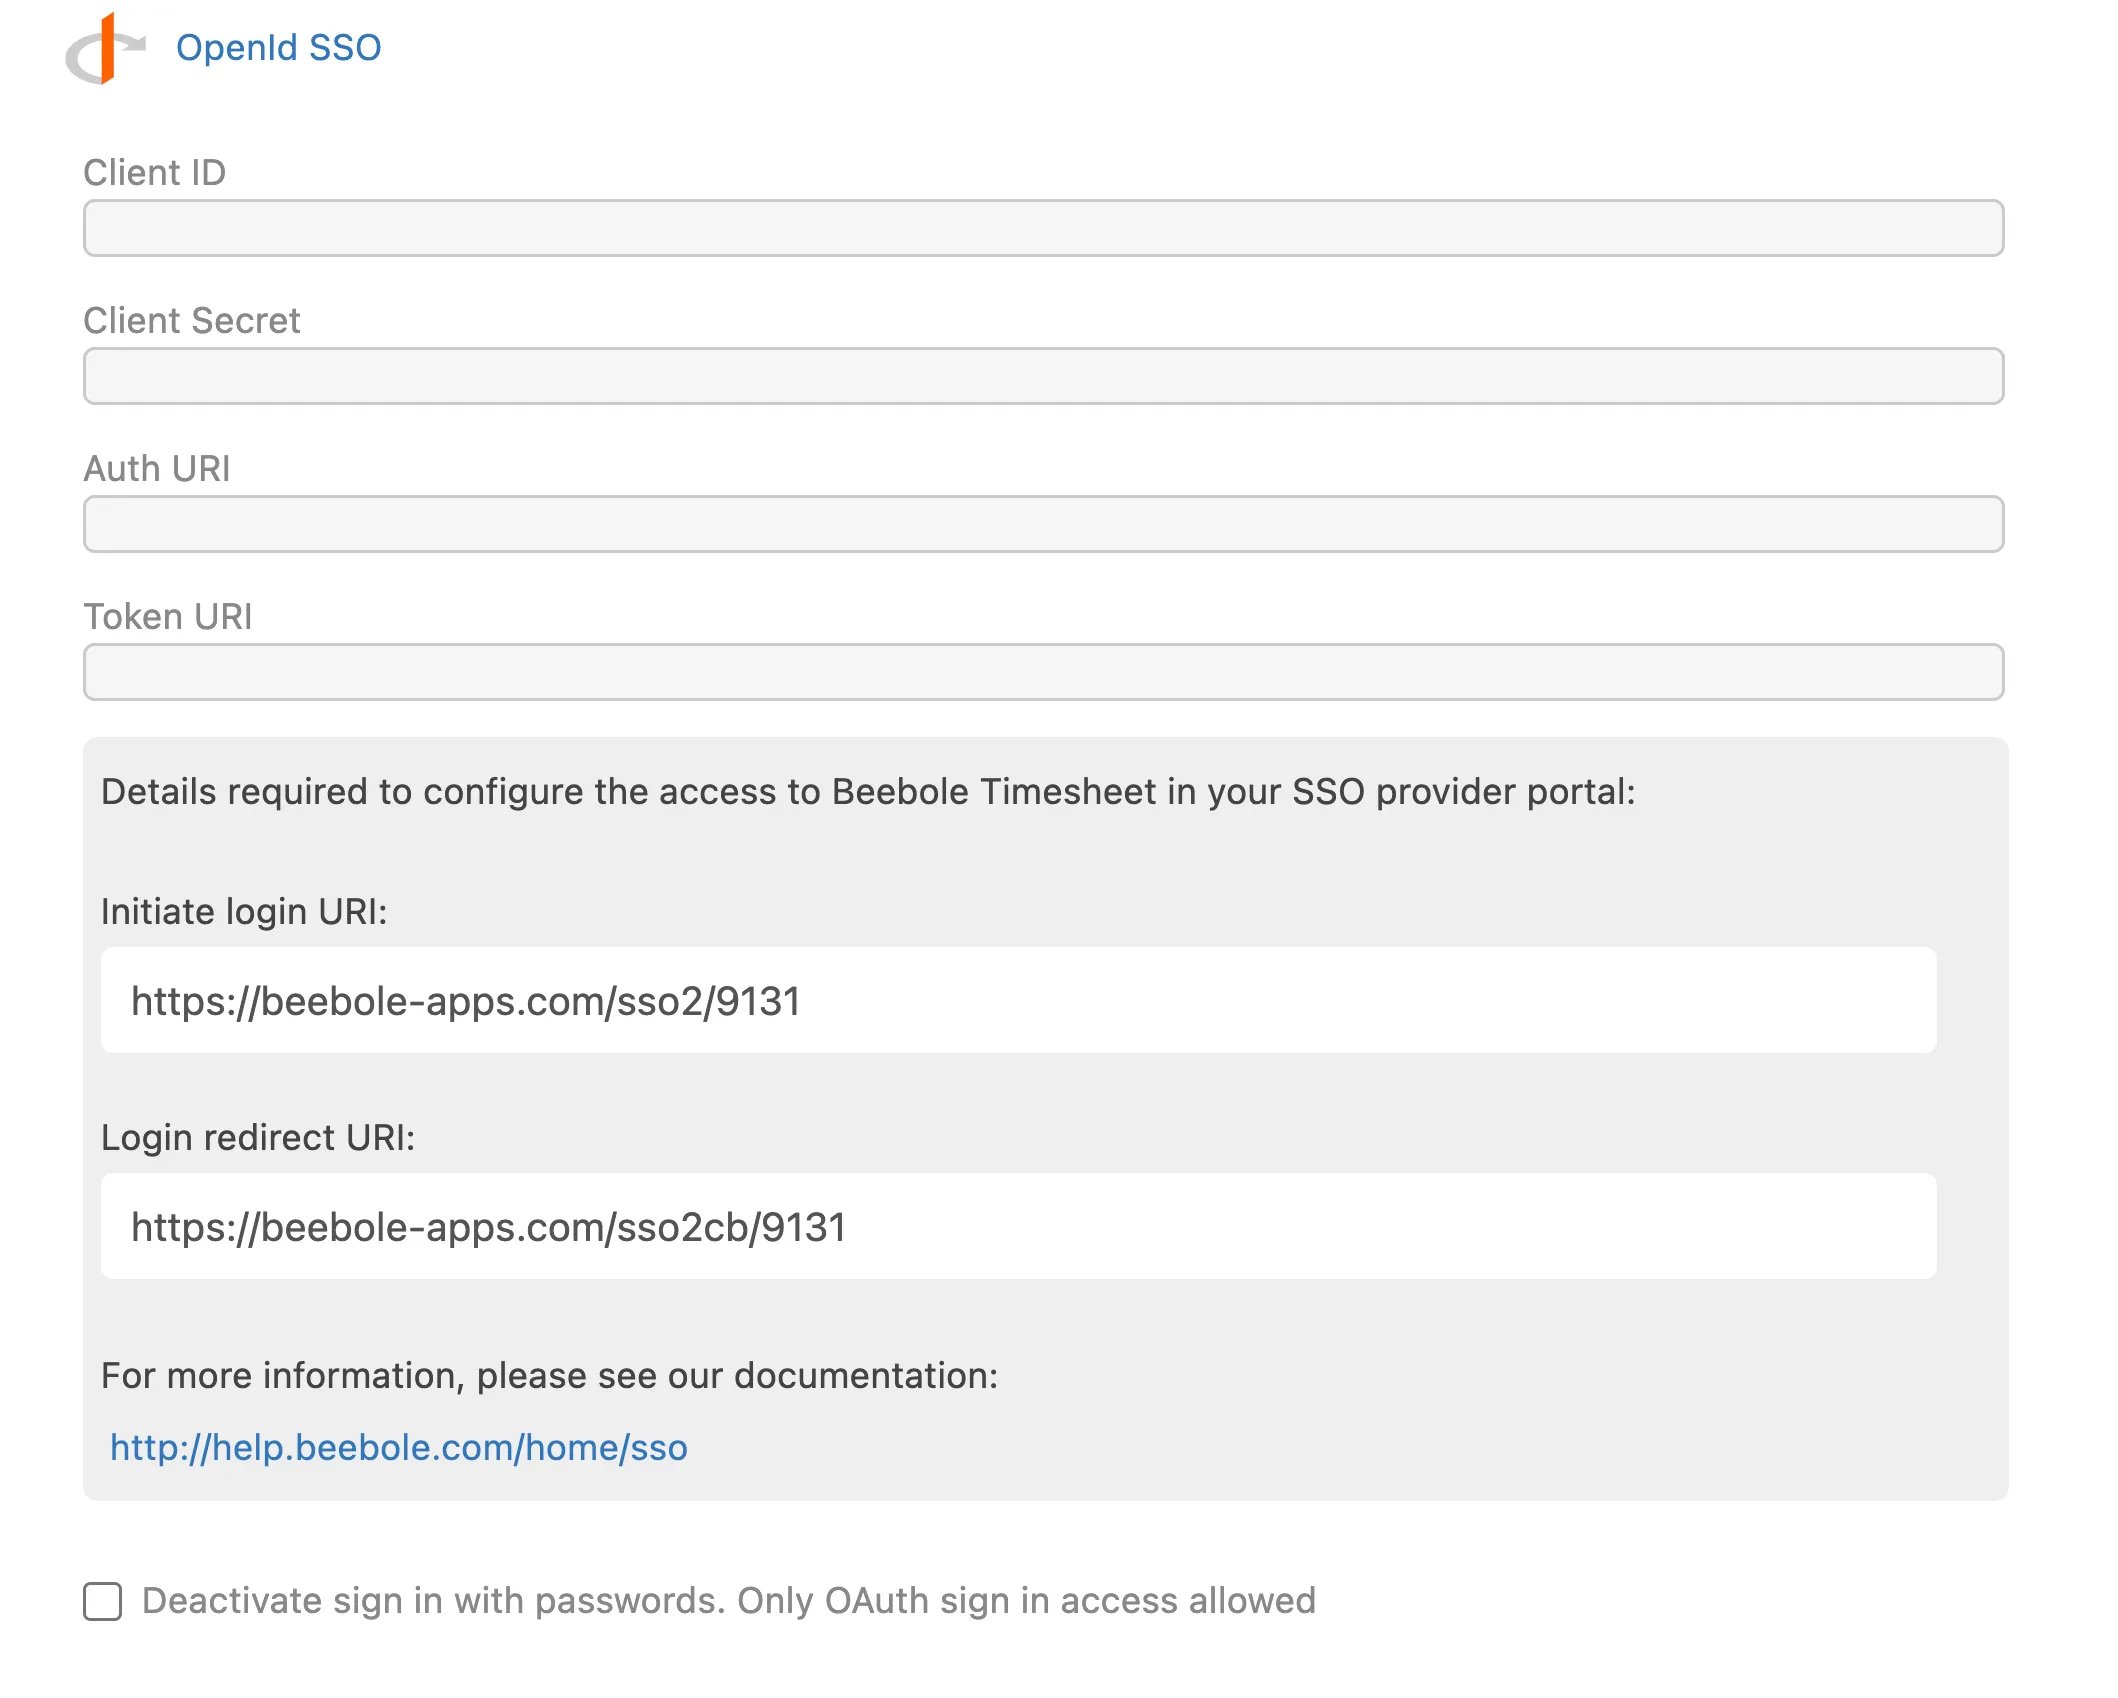
Okta SSO Integration
Follow the steps below to create an SSO connection to your Beebole account using Okta:-
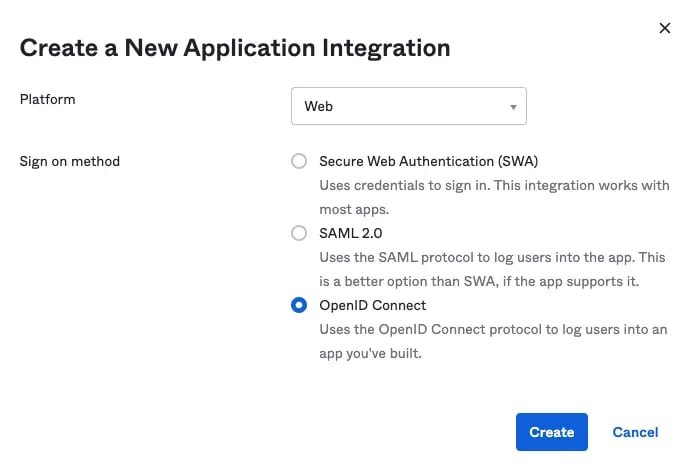
Once you’ve connected as an administrator to your Okta portal, create a new app. Be sure to define it as a web platform using the OpenID Connect protocol.\
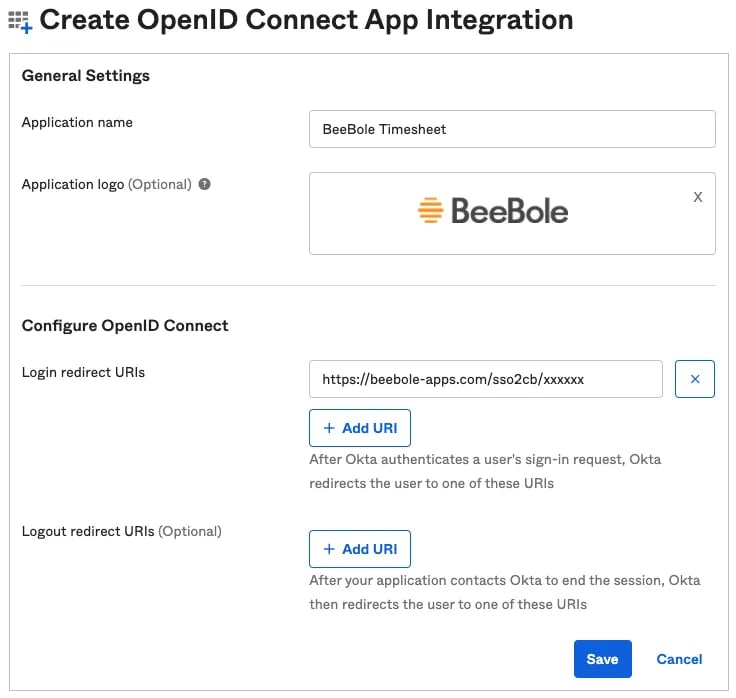
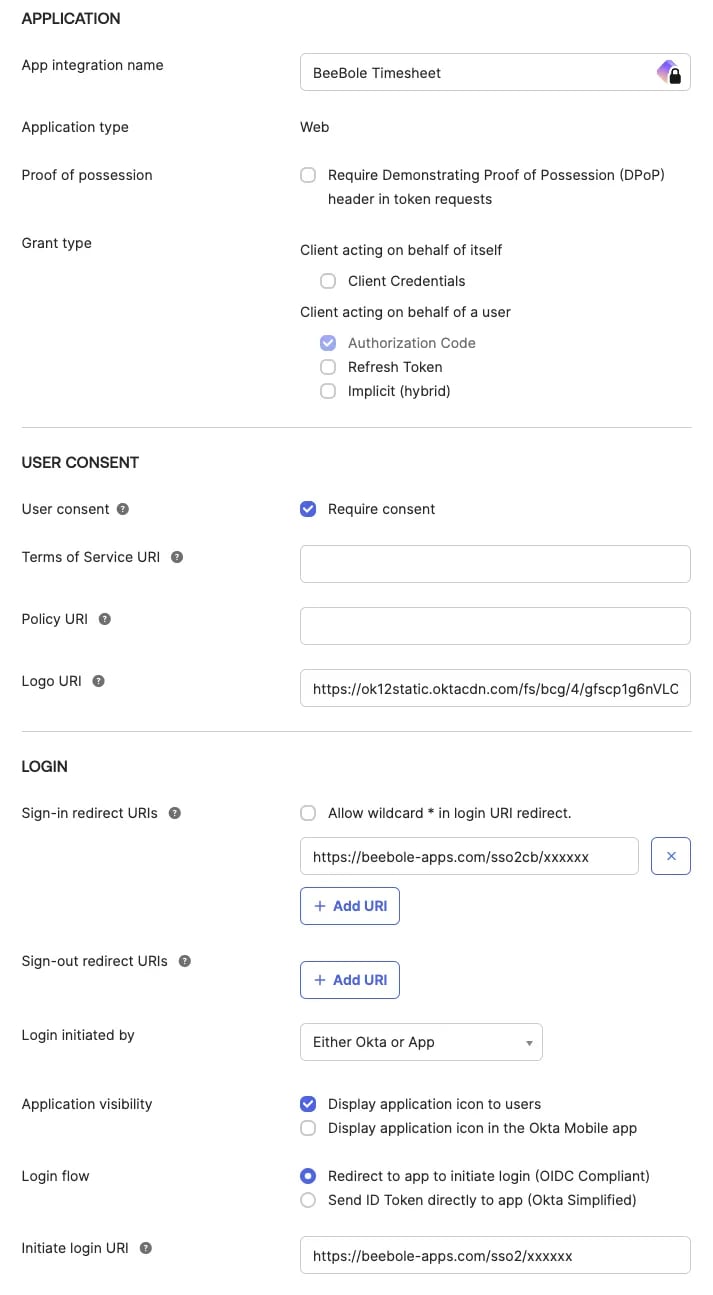
- In the next step, give your new app a name, such as Beebole, and upload a logo of your choice. Define the “Login redirect URI” as https://beebole-apps.com/sso2cb/xxxxxx, where xxxxxx should be replaced by your account ID. You can directly retrieve the URI from your Beebole account’s Settings page under “OpenID Connect” in the Account module.
- Complete the app configuration in the “General Settings” section under “Application”. Under the “Login” section, replace xxxxxx with your Beebole account ID or retrieve the “Initiate login URI” from your Beebole account Settings page under “OpenID Connect” in the Account module.
 ()User Consent is optional*
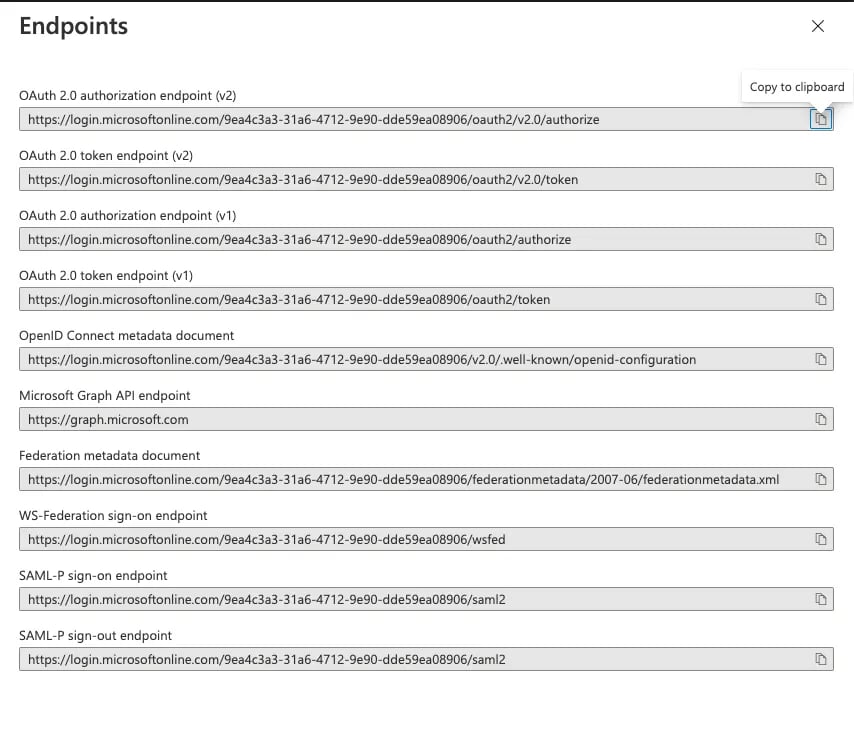
5. Return to the “OpenID Connect” section in the Account module of your Beebole Settings page. Here, define the Okta API endpoints. You can read more about these in the Okta documentation here: https://developer.okta.com/docs/reference/api/oidc/
()User Consent is optional*
5. Return to the “OpenID Connect” section in the Account module of your Beebole Settings page. Here, define the Okta API endpoints. You can read more about these in the Okta documentation here: https://developer.okta.com/docs/reference/api/oidc/These URIs should look something like this: Authorize: https://${yourOktaDomain}/oauth2/default/v1/authorize Token: https://${yourOktaDomain}/oauth2/default/v1/token 6. Assign the new app to the desired people or group using the Assignment tab in Okta. 7. Employees assigned to Beebole in your Okta portal will now see a new Beebole app in their Okta end-user dashboard. Clicking on the app will automatically connect them and redirect them to their Beebole account.
OneLogin SSO Integration
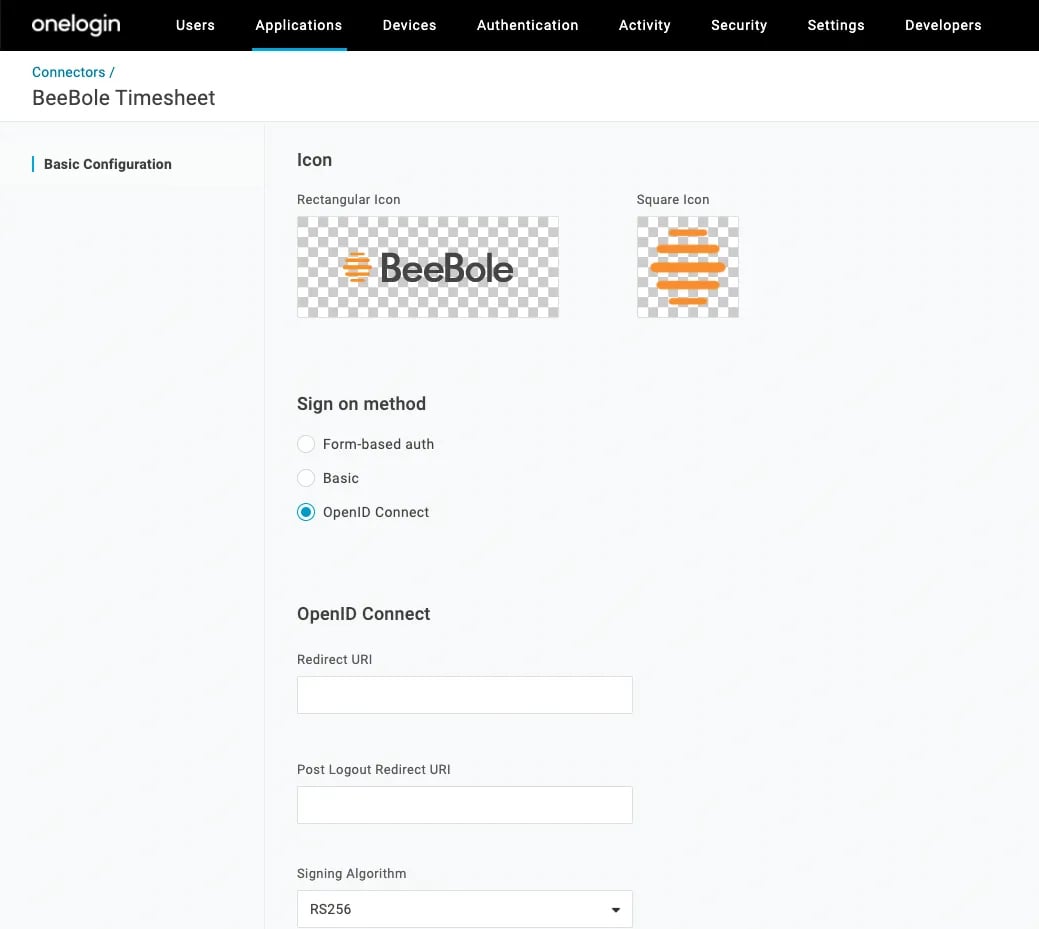
Follow the steps below to create an SSO connection to your Beebole account using OneLogin:- Once you’ve connected as an administrator to your OneLogin portal, go to Applications > Custom Connectors and create a new connector. Give the connector a name, such as Beebole, and define the sign on method as OpenID Connect. Upload a logo of your choice.
- Define the Redirect URI as https://beebole-apps.com/sso2cb/xxxxxx, where xxxxxx should be replaced by your account ID. You can directly retrieve the URI from your Beebole account’s Settings page, under “OpenID Connect” in the Account module, as “Login Redirect URI”.
-
Define the Login URL as https://beebole-apps.com/sso2/xxxxxx, where xxxxxx should be replaced by your account ID. You can directly retrieve the URI from your Beebole account’s Settings page, under “OpenID Connect” in the Account module, as “Initiate Login URI”.\
-
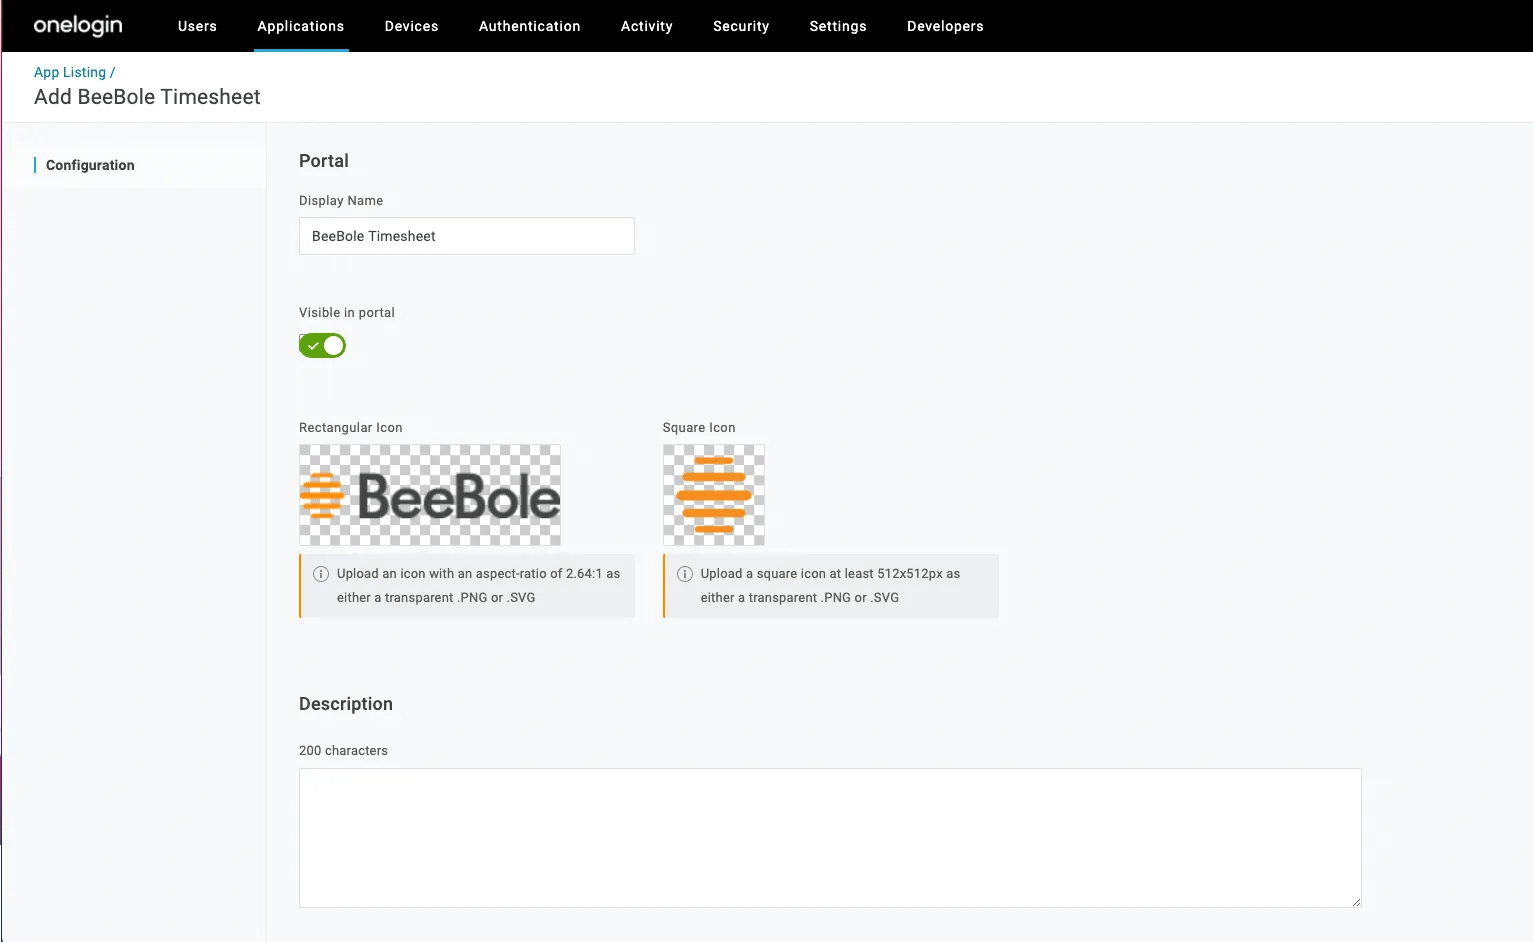
Back on the Custom Connectors page, click on “Add an app to the connector” next to the connector you just created. The parameters should appear by default.\
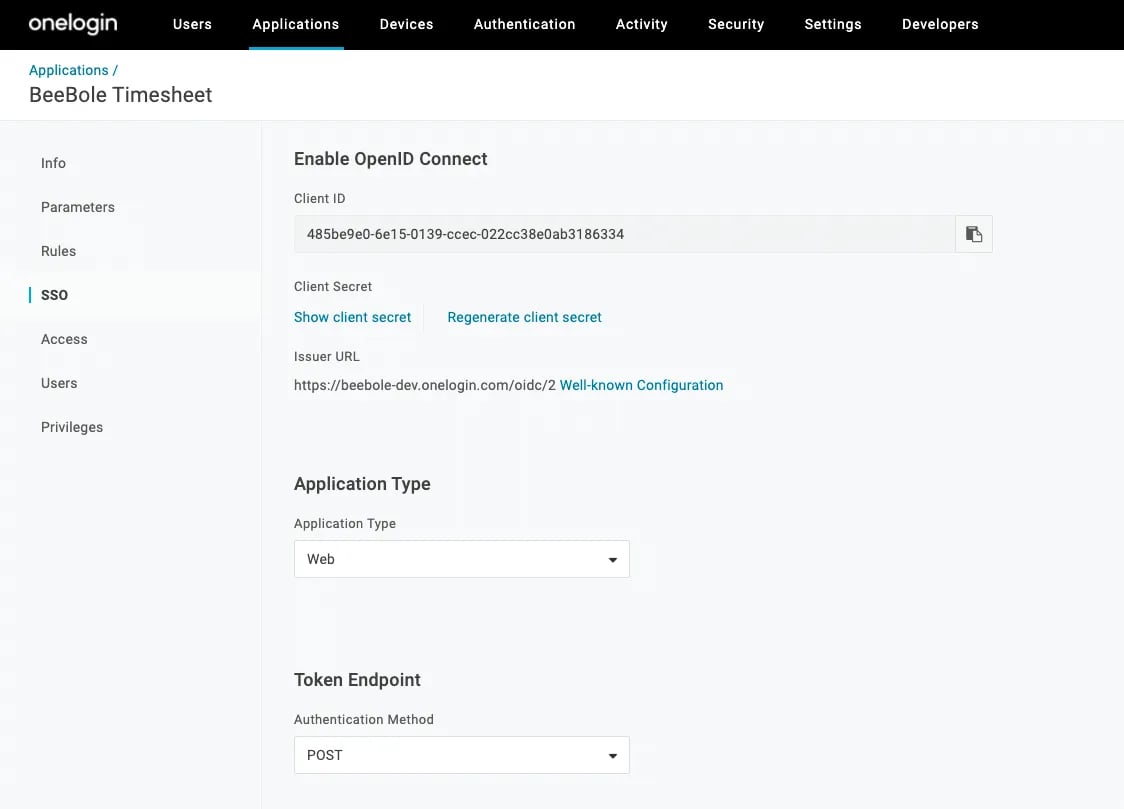
- The app is now created. Click on “SSO” in the left menu. Be sure that the application type is “Web” and the authentication method is “POST”. Retrieve the Client ID and the Client Secret and paste these values into your Beebole account under “UponID Connect” in the Account module on your Settings page.
-
Back on the SSO tab, click on “Well-known configuration” and retrieve the API endpoints. Look for the authorization_endpoint and the token_endpoint URLs and paste these values into your Beebole account under “UponID Connect” in the Account module on your Settings page. \
- Assign the new app to the desired people or group using the Users tab in the left menu of OneLogin.
-
Employees assigned to Beebole in your OneLogin portal will now see a new Beebole app in their OneLogin app portal. Clicking on the app will automatically connect them and redirect them to their Beebole account.\
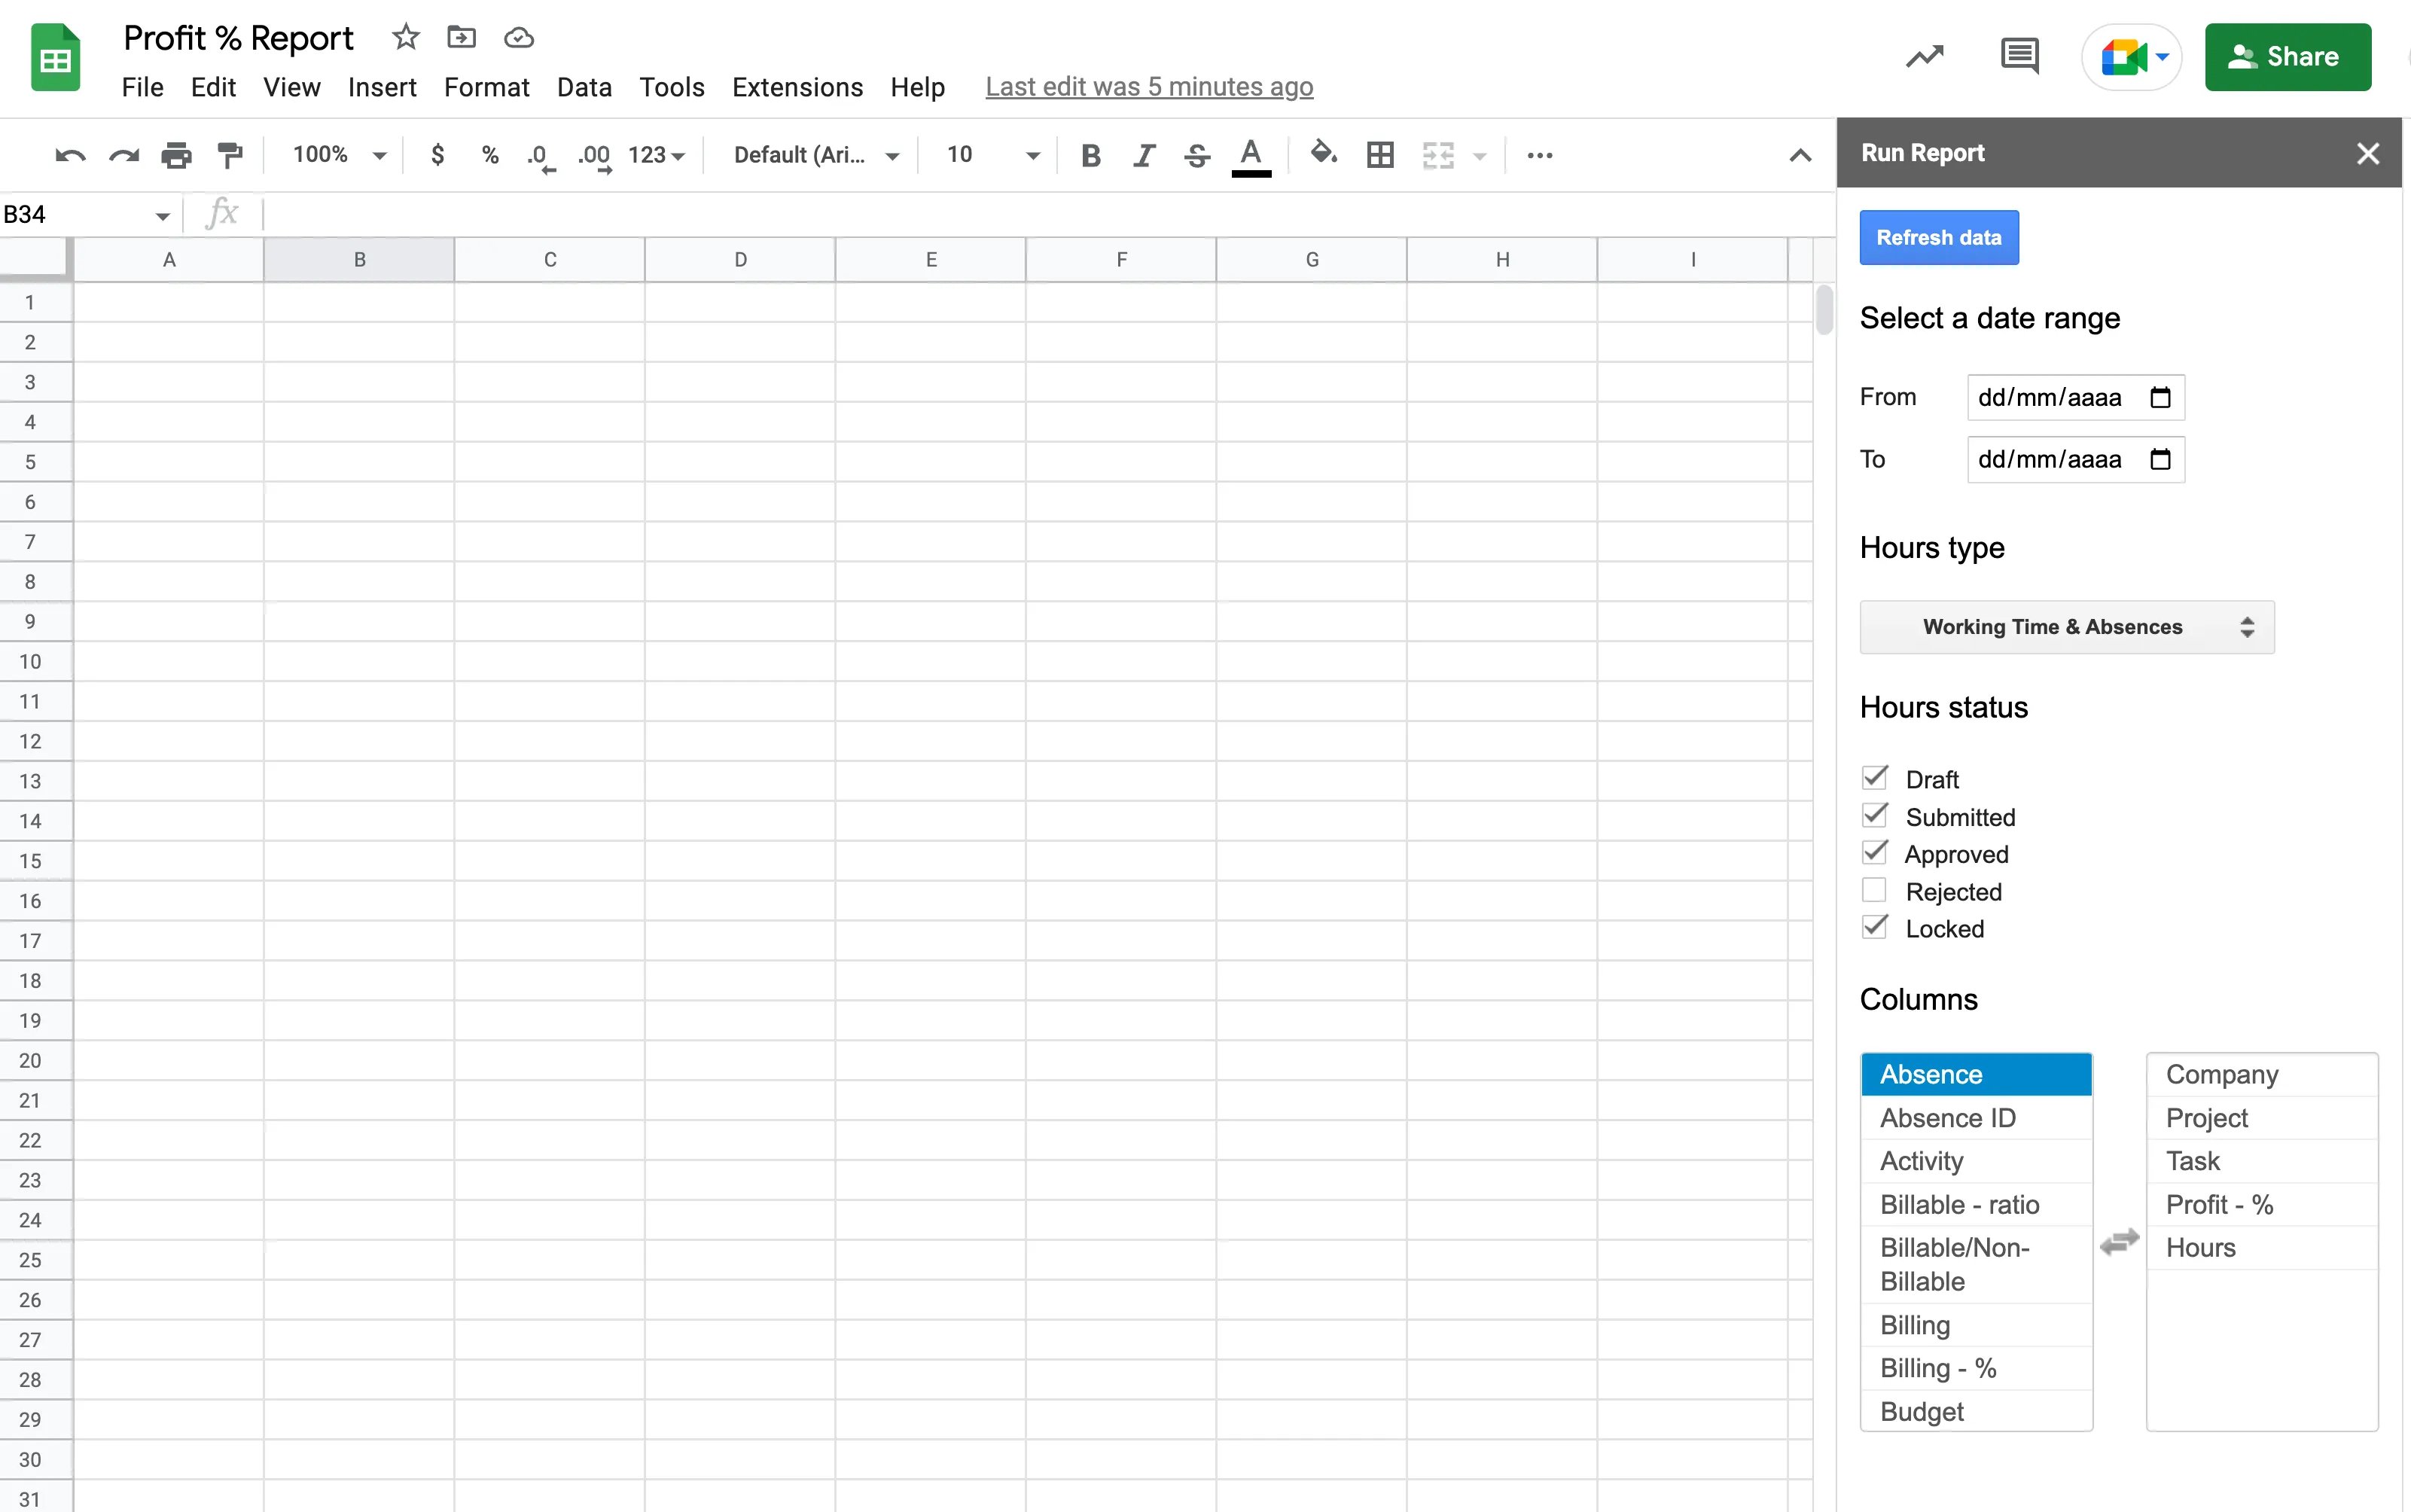
GSheets Add-on
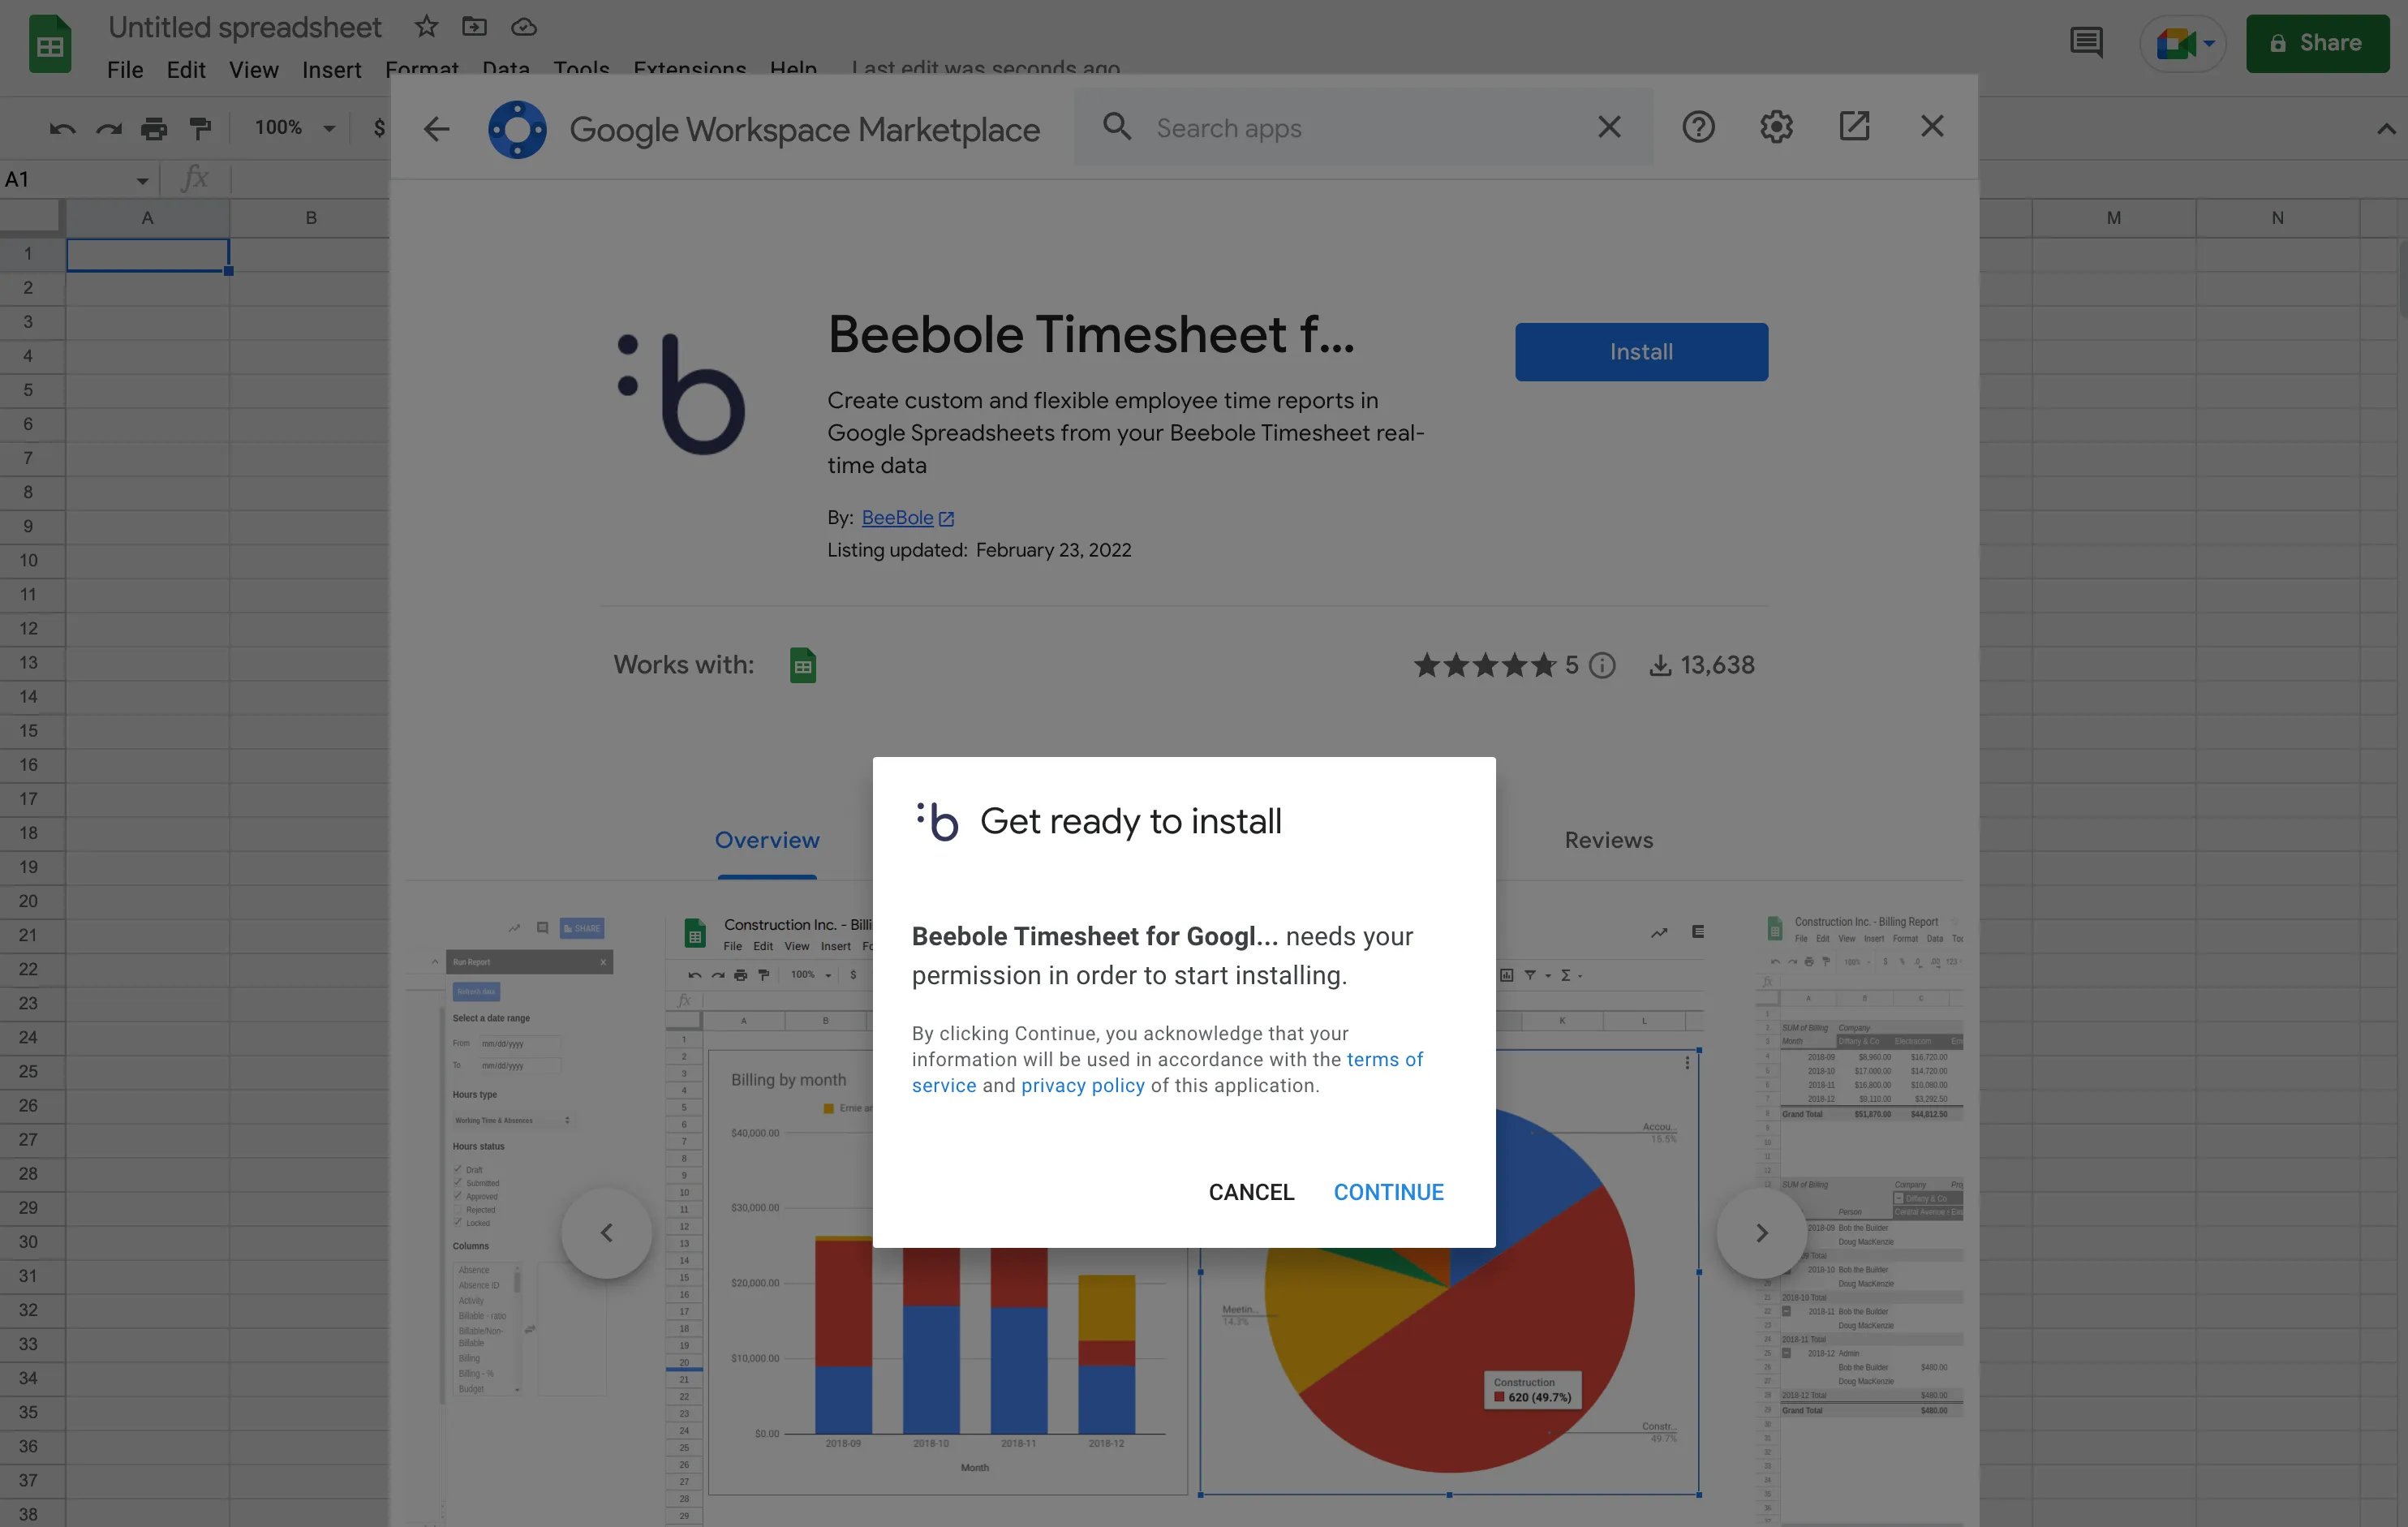
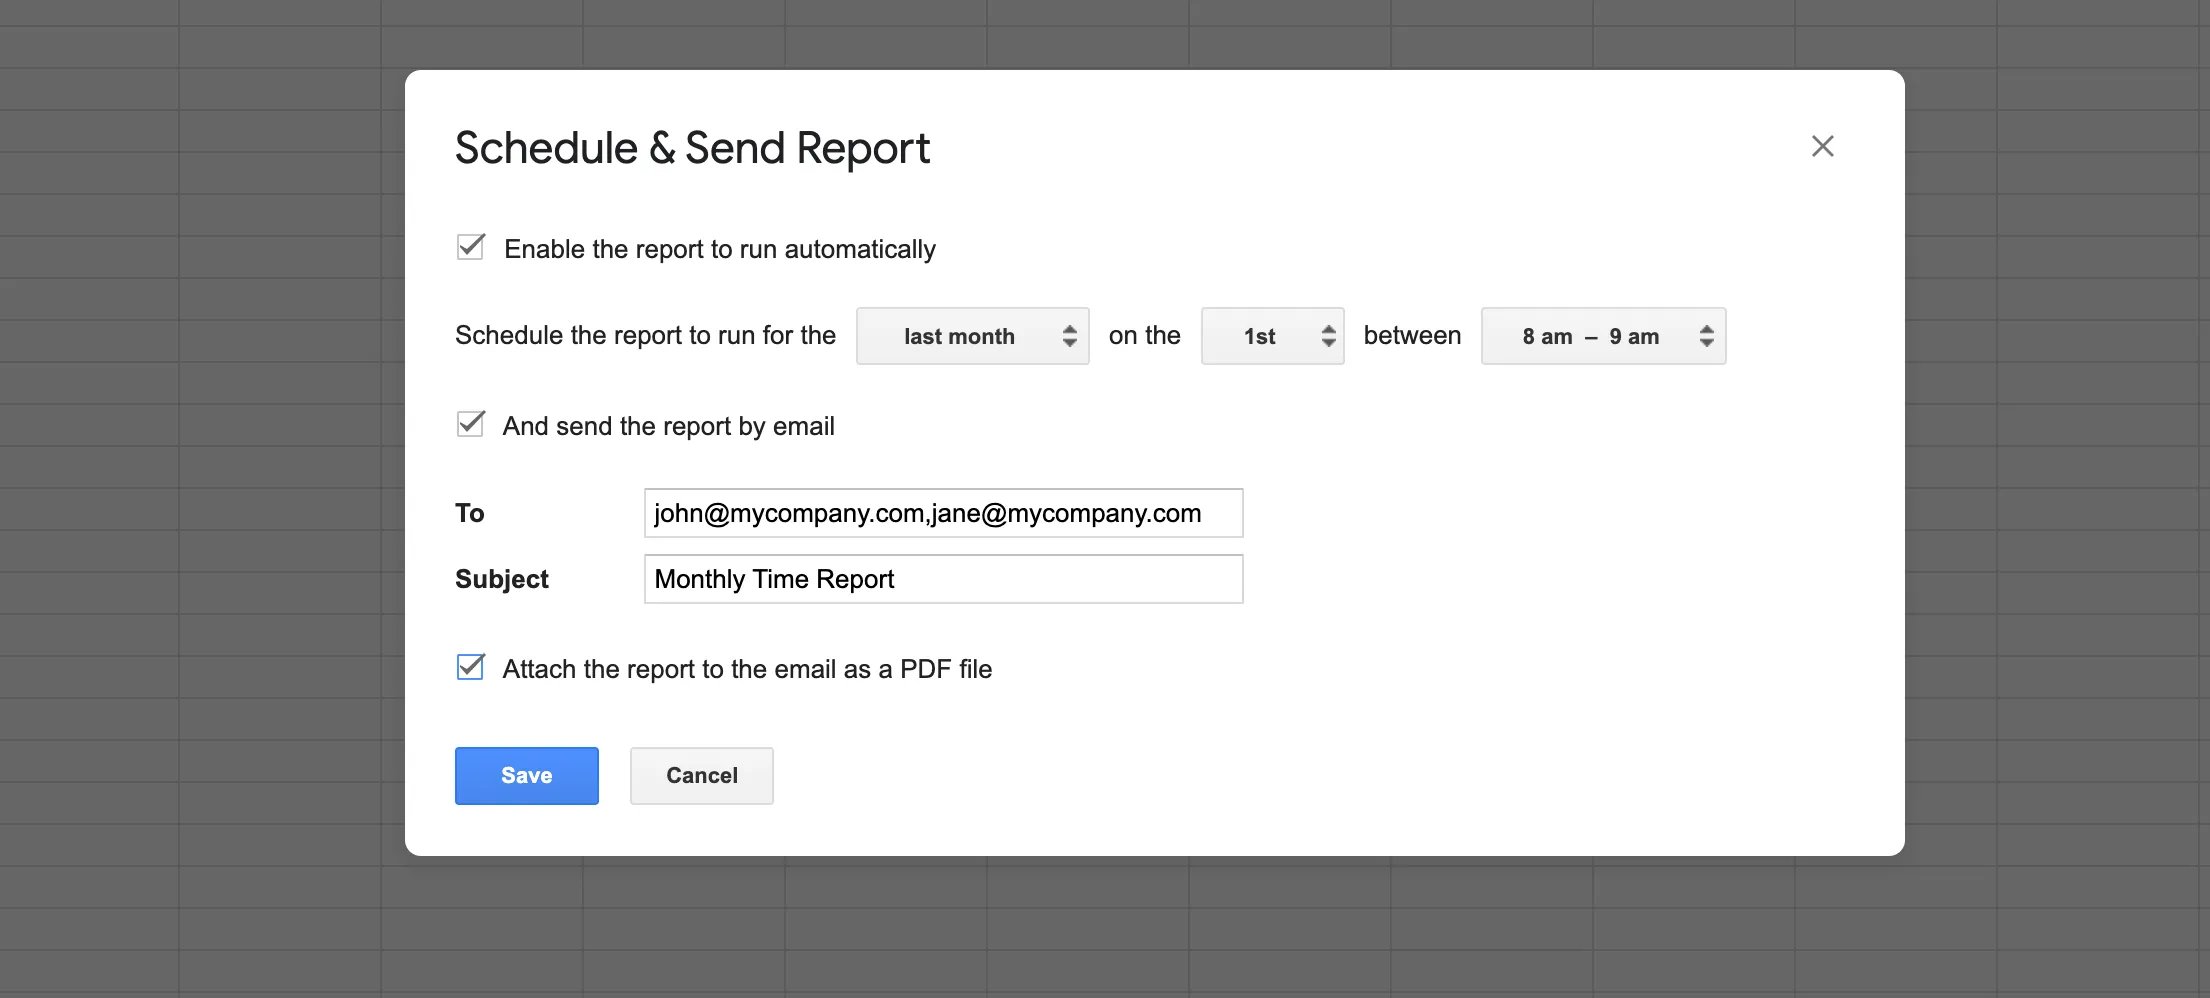
The Google Sheets add-on for Beebole can be used to enhance your Google Spreadsheets and to retrieve real-time data from your Beebole account. Design pivot tables, charts, and more complex calculations to build the perfect report. You can even send periodic, automated emails with updated reports to specific recipients. To install the add-on:- In your Google Spreadsheet click on Extensions >> Add-ons >> Get add-ons. Search for Beebole and click the “FREE” button to install.
- You may be prompted to grant certain authorizations. Click “Allow” to ensure the add-on can be installed. The add-on will now be available in any Google Sheet you use.
5 Things You Can Do With Our Add-on for Google Sheets
Plus more ways that Beebole users are taking advantage of this powerful, free integration
Excel Add-in
Just like Beebole’s add-on for Google Sheets, the Excel add-in allows you to enhance your spreadsheets by retrieving real-time data from your Beebole account. To **install the add-in: **- Open an Excel spreadsheet and select the option Insert > Office Add-ins. Search for the Beebole add-in in the store and click “Add”. Click “Continue” to accept the terms. You can also find the integration on Microsoft AppSource.
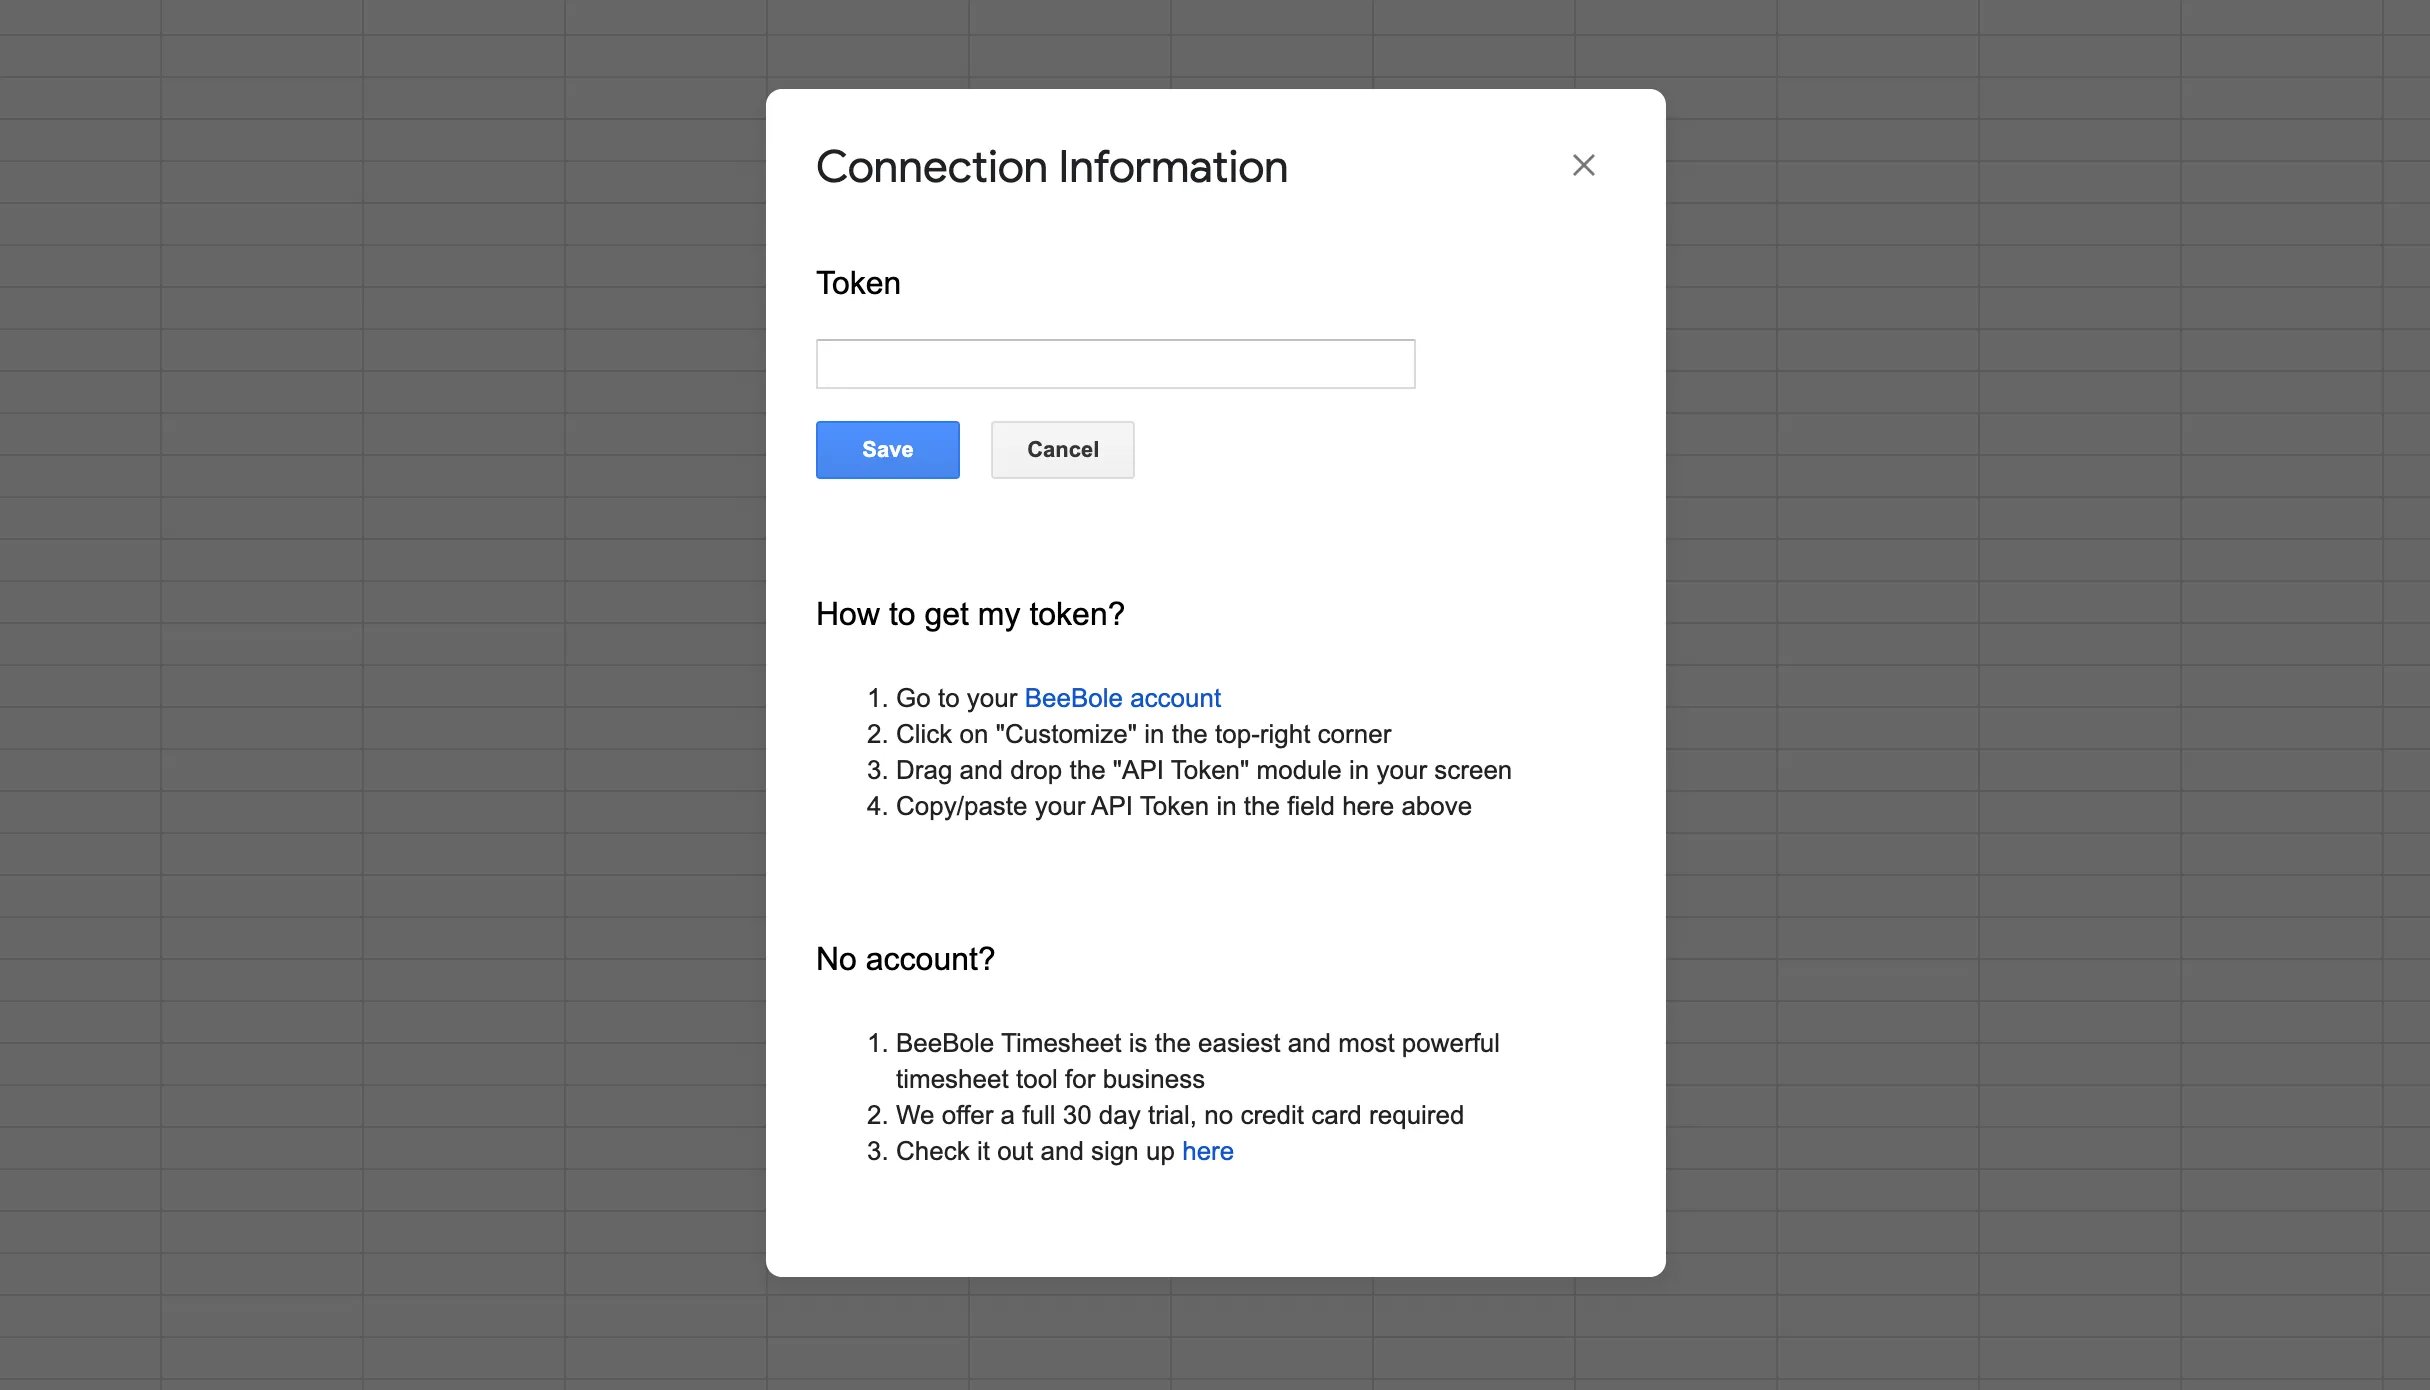
- Click on the Beebole icon that appears in your Home tab. A pop-up window should appear asking for your API token (if it does not appear automatically, click on the button to “Update API Token”).
- Retrieve your Base64 API token from the API Token module on your Beebole home screen. Copy and paste it into the pop-up in your Excel and click “Done”.
- Remember that you must have enabled API calls in the Account module on the Settings screen.
Power up Your Excel Spreadsheets with the Free Add-in
Check out this step by step tutorial on linking your Beebole account data with Excel spreadsheets