

Opening a Kanban view
1
Open the Planning page
Click Planning in the sidebar. Pick the planning you want at the top of the page.
2
Select a Kanban view
Click a Kanban view tab above the task list. To create another one, click Add a view and select Kanban.
Board layout
Each column is one status of the active planning, in the order defined in the Task statuses modal.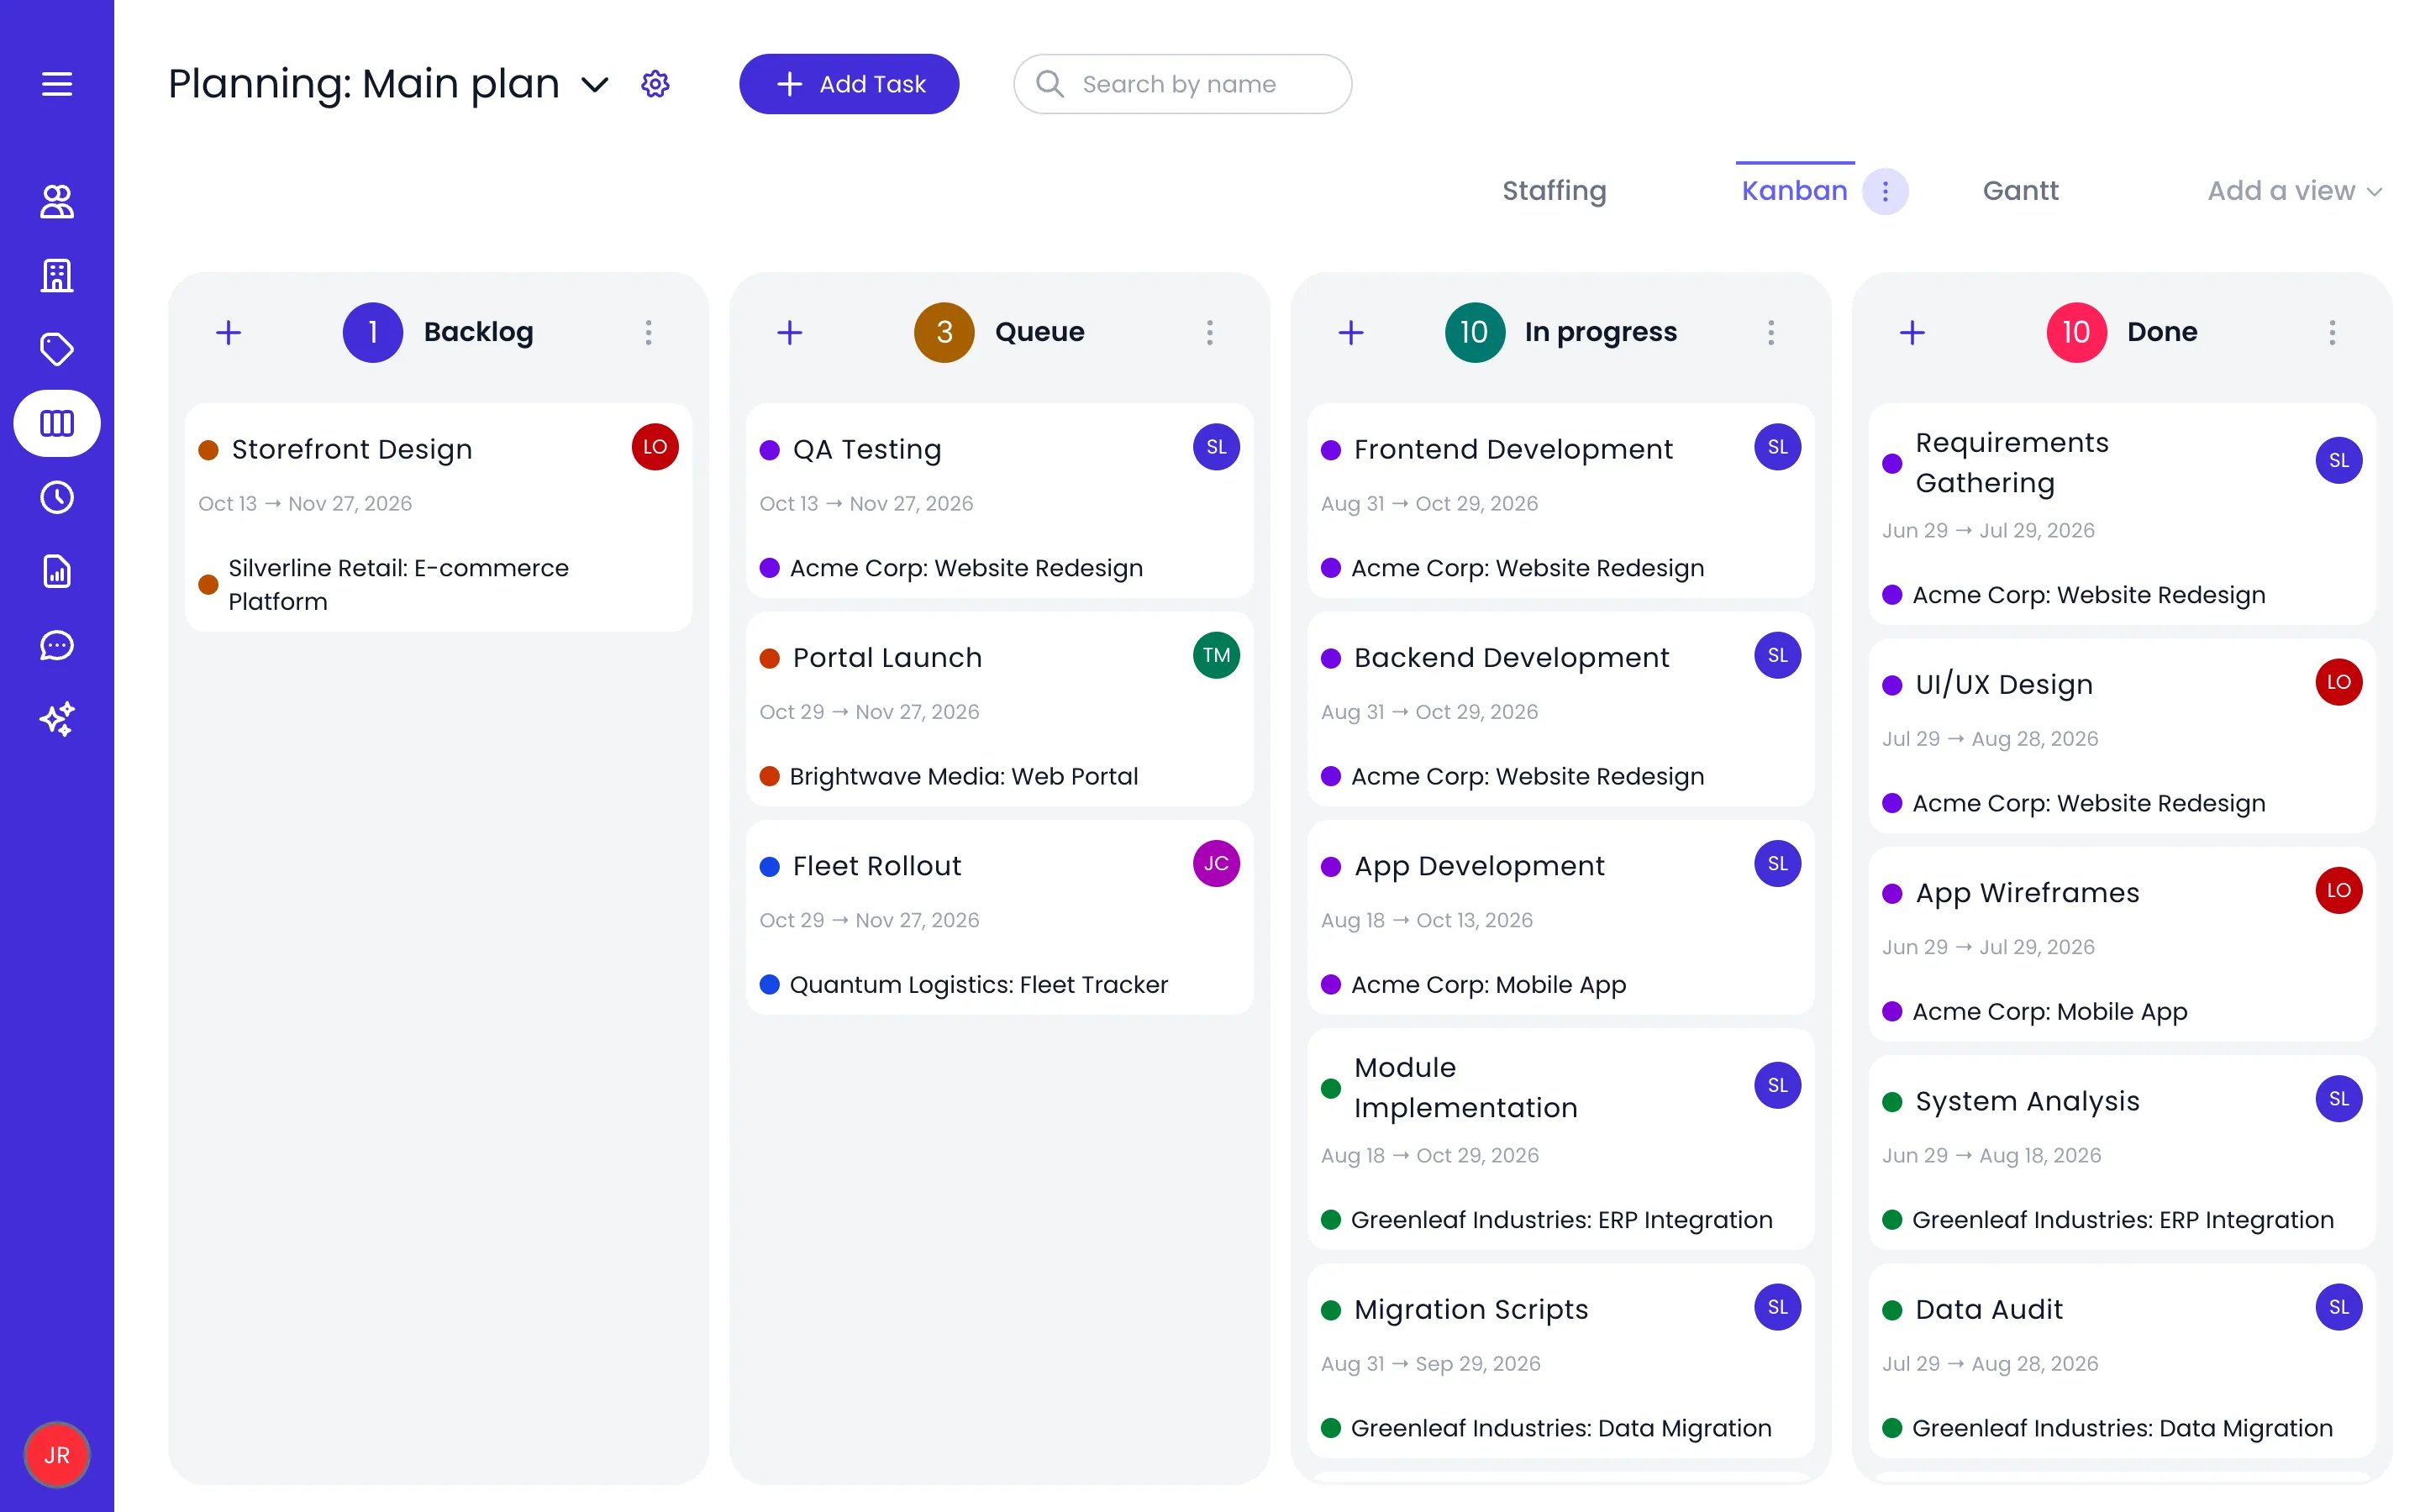
The Main plan planning on its Kanban view
- A + button (Add a task, or Add Booking in a Bookings planning) that opens an add card at the foot of the column, in this status. Hold ⌘ (Ctrl on Windows) as you click it to open the full add form instead, with this status preselected. See Adding cards to a column.
- The number of tasks in the column — displayed as
current/maxwhen the status has a Max tasks limit. - The status name. Click it to open the Task statuses modal.
- A ⋯ menu with Done (mark every task in the column done), Reopen (reopen the column’s done tasks), Move entries to left / Move entries to right (move the column’s tasks into the neighboring status), and Delete (only available when the column holds no tasks, done ones included, and isn’t the planning’s only status).
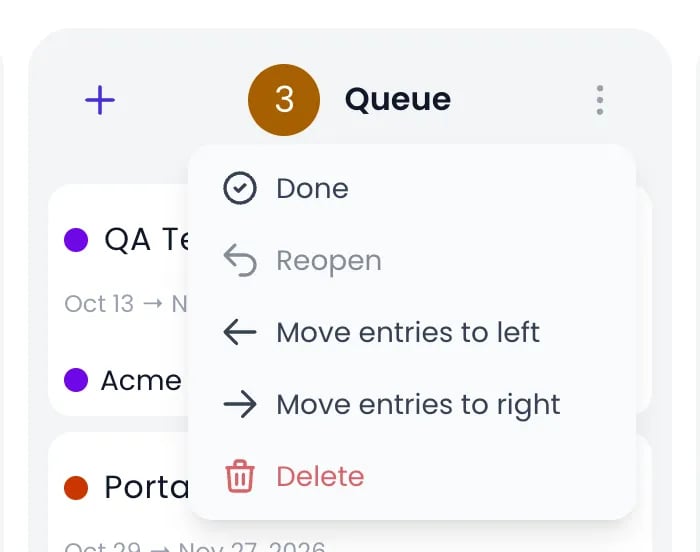
A column's ⋯ menu
Setting up status columns
Statuses belong to the planning — not to a project — so every planning defines its own columns. Click any column’s name, or the settings button next to the planning name at the top of the page, to open the Task statuses modal, where you can add a status with the Add new status field, rename or recolor one, drag to reorder, set Max tasks, and delete empty statuses. The full options are described in Task statuses.Working with cards
- Create a task — Click the + button at the top of a column to add cards right in it (see Adding cards to a column), or the Add Task button in the page header to open the full add form (see creating a task). In a Bookings planning, the header button reads Add Booking.
- Open a task — Click its card. The detail panel opens with the task’s dates, status, owner, description, and custom fields.
- Move a card — Drag it to another column to change its status, or drop it at a different position in the same column to reorder.
- Act on a card — Hover over it and click the ⋯ menu for Duplicate, Rename, Done, Reopen, and Delete. Done takes the card off the board without losing its data; see marking tasks done.
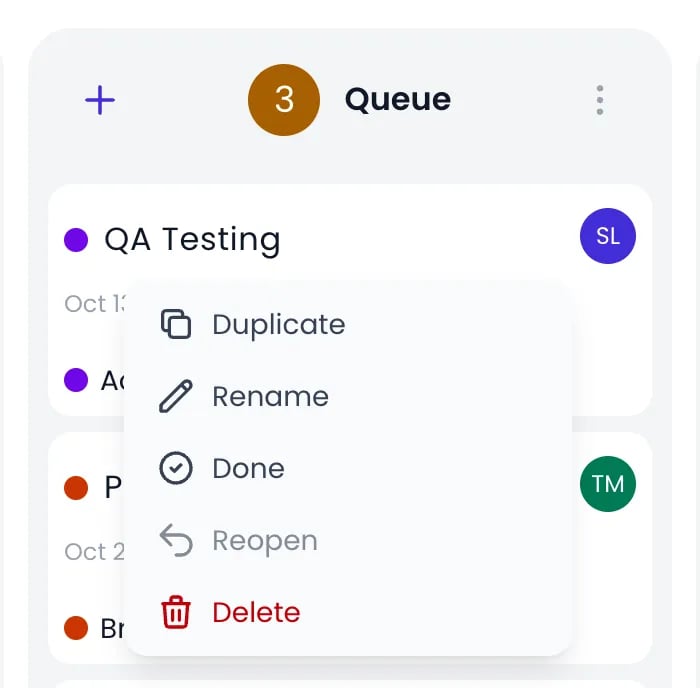
A card's ⋯ menu
Adding cards to a column
Click the + at the top of a column to add cards without leaving the board. An add card opens at the foot of the column, and what you add there gets that column’s status. The + only appears if you are allowed to manage tasks. In a Tasks planning, the card starts with a name field. Below it, the card shows the fields the planning uses: the dates and Planned time, the owner (Select the owner), the projects, and the tags. A field counts as used when at least half of the planning’s tasks that aren’t marked done have it filled in, so a planning with no tasks yet asks for a name only. The card also fills in the owner, project, or tag the board is filtered on.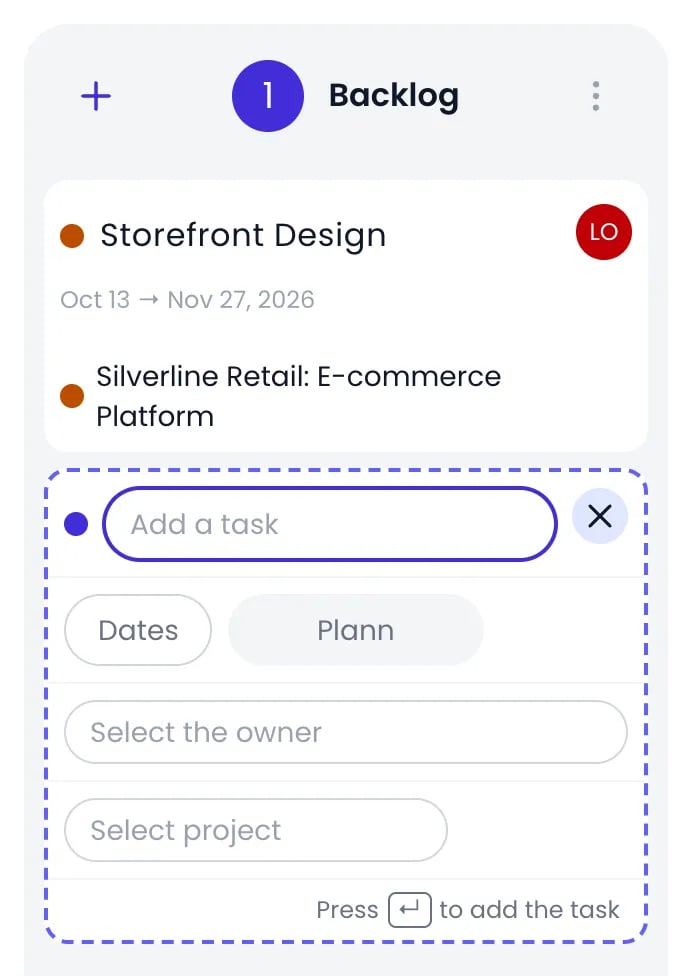
The add card at the foot of the Backlog column
- With a name only, type it and press Enter, as the card’s hint says: Press ↵ to add the task. The task is added and the field empties for the next one, so you can add task after task.
- With fields, the task is created as soon as it has a name and you press Enter or pick a value. The card then stays on the new task, every change applies at once, and Add another starts the next one. An empty name takes the name of the project you pick, until you type over it.
- To add several tasks at once, paste a list into the name field: one name per line, with indented lines becoming subtasks of the line above, or a single line of names separated by semicolons. Each task gets the values picked in the card.
Choosing what cards display
Open the ⋯ menu on the active view tab and hover over Show to toggle the card fields: Parent, Owner, Assignee, Dates, Projects, and Tags. Each Kanban view remembers its own selection.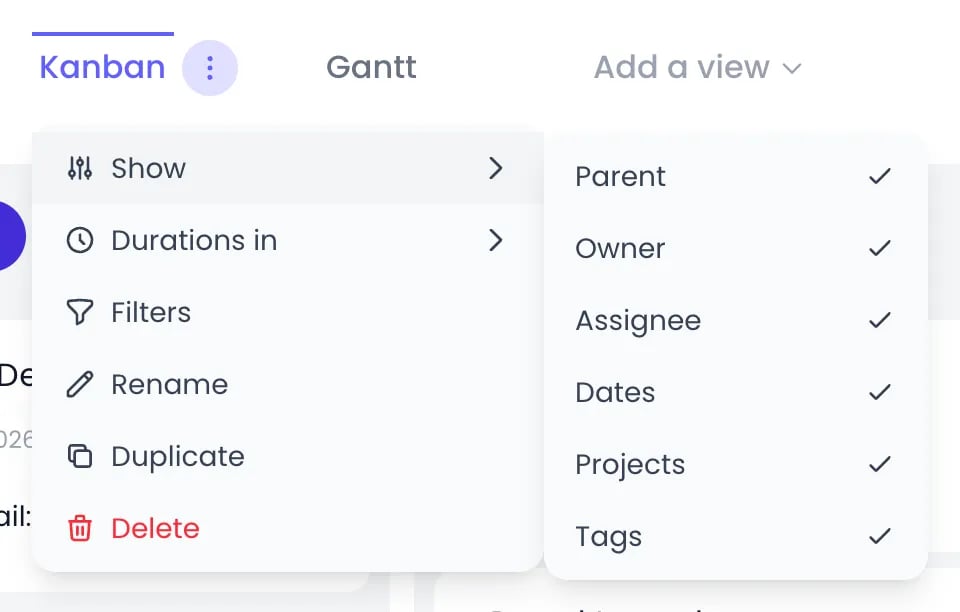
The Show submenu of the Kanban view tab
Selecting multiple cards
- ⌘+Click (Ctrl+Click on Windows) a card to add it to or remove it from the selection.
- Shift+Click selects the whole range between two cards in a column.
- Drag any selected card to move all selected cards together to the target column.
- Press Esc to clear the selection.
WIP limits are hard limits
Set Max tasks on a status in the Task statuses modal to cap how many tasks it can hold. On the board, the column header then showscurrent/max.
The limit is enforced, not just suggested:
- Dragging cards that would push the column over its limit is rejected — the column border turns red while you hover, and dropping shows the error “[Status] is at its task limit (N)”.
- The same rule applies when changing the status from the task’s detail panel, and Beebole’s server enforces it too.
- You cannot set Max tasks below the number of tasks currently in the column.
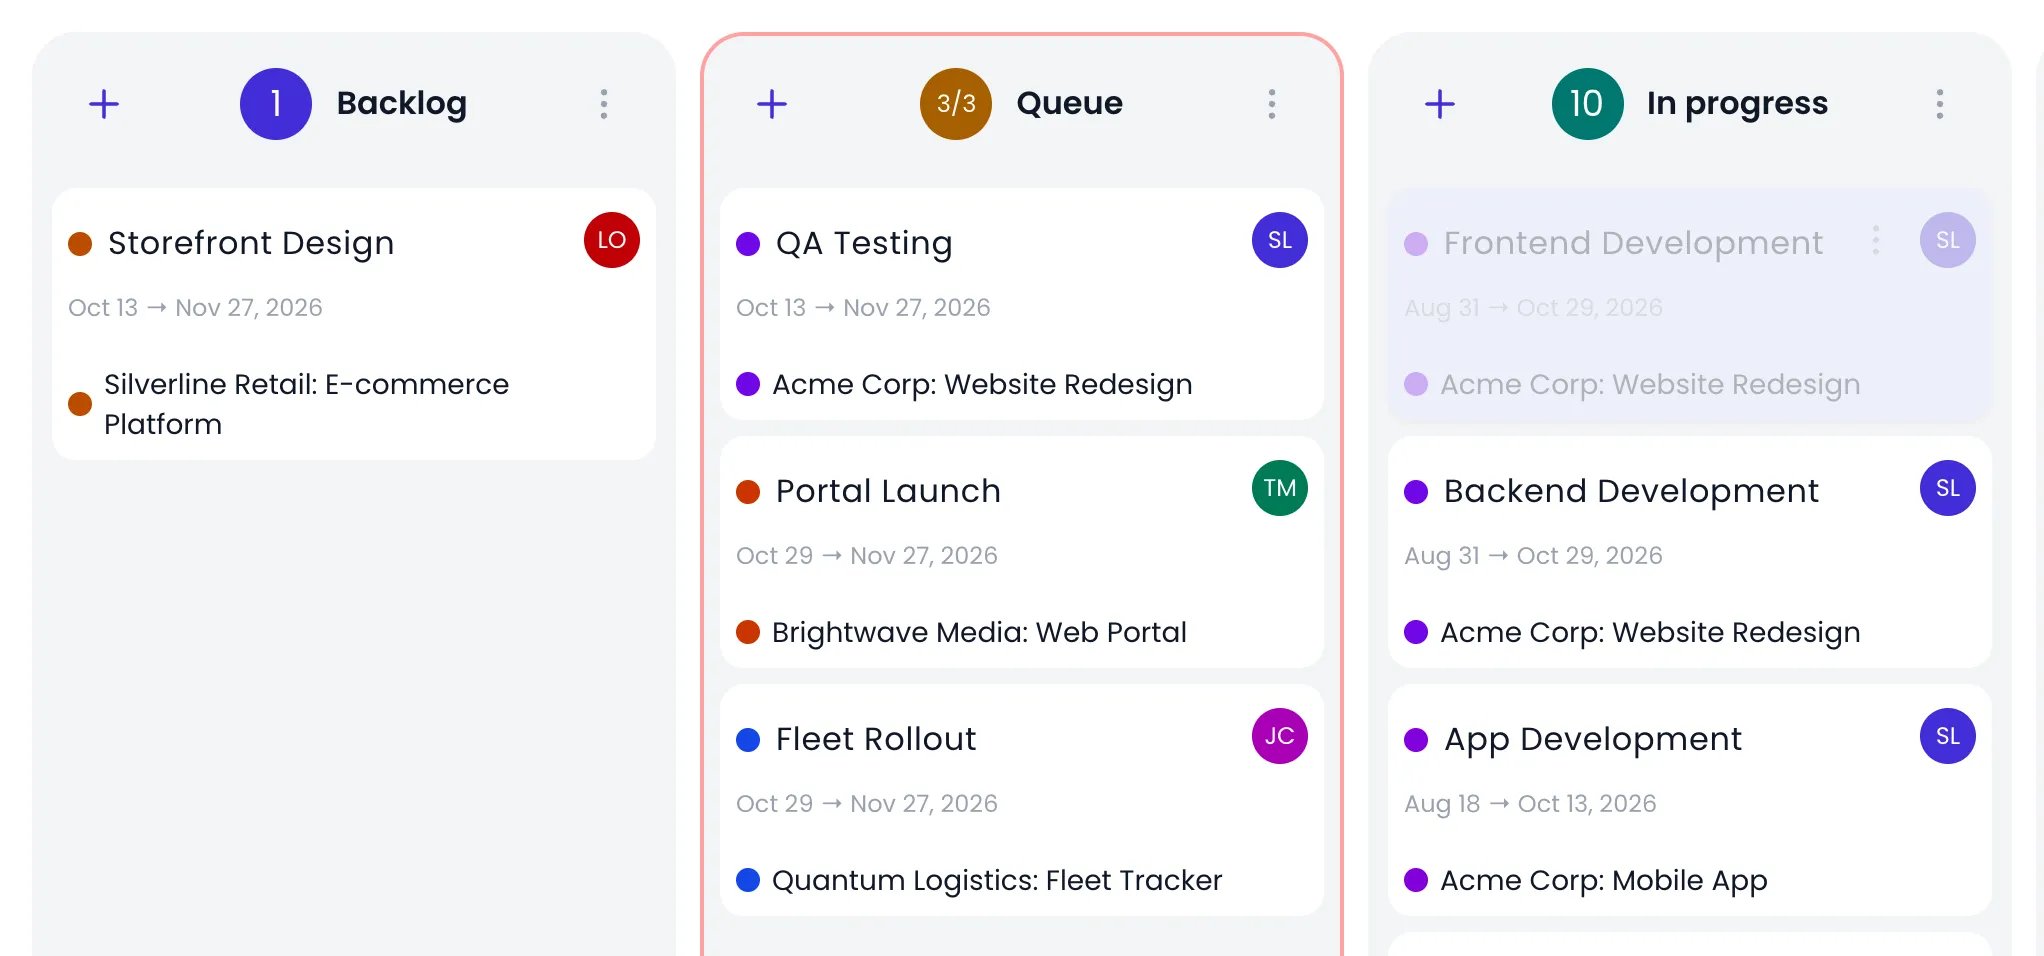
A card dragged over Queue, which holds 3 of its 3 tasks: the column border turns red
Task descriptions
Every task has a Description panel with a rich-text editor. The toolbar offers Bold, Italic, Code, Link, Bulleted list, Numbered list, text alignment (Align left, Align center, Align right), Text color, text size, Mention (type @ to reference a teammate), Undo, Print / Save as PDF, and Attach a file — images, videos, and PDFs, which you can also paste or drop directly into the text. Edits are saved automatically. The description is part of the task, so the same content appears whether you open the task from the Kanban board or the Gantt chart.Tracking time from a card
Hover over a card and click the clock button (Add time) to log time on that task for today, without leaving the board. Once time has been logged, the card shows a pill with the logged total next to the planned time, in hours (for example4 / 8) — click it to add more.
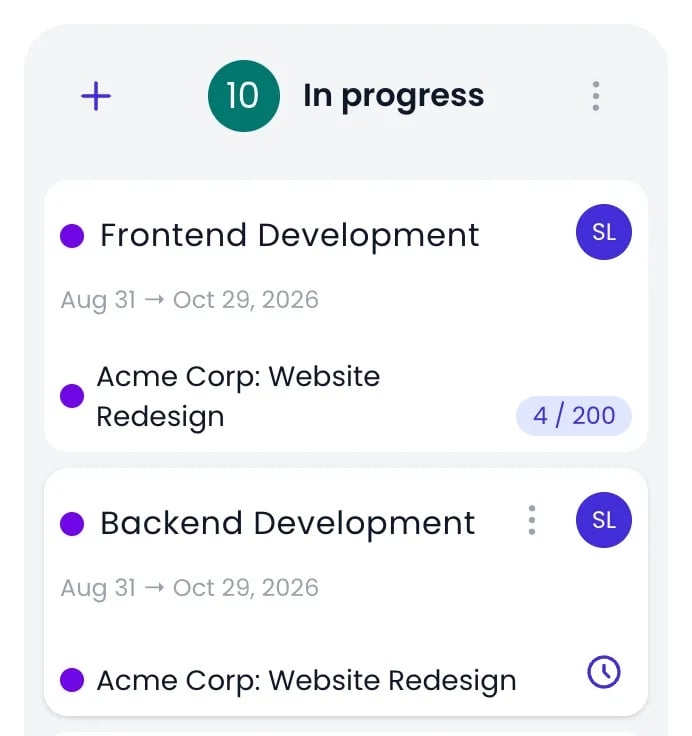
A card with time logged and its pill, and the clock button on the card under the mouse
Auto Timesheet: statuses that drive time records
With Auto Timesheet from Planning, the board itself can start and end time records, which reach the person as suggested entries to accept in their timesheet. In the Auto Timesheet from Planning tab of Timesheet and Planning Settings, check Enable Auto Timesheet from planning, pick a planning, then choose the Start and End statuses — the statuses that trigger a time record to start and to end. Moving a card into those columns then drives the time record for the task: cards created directly in a start status begin tracking immediately, moving a card back before its start column stops its clock, and finishing several tasks the same day splits the day between them — manual entries always win. Cards show a gray pill with the suggested, not-yet-accepted time alongside logged time.Keyboard navigation
The board has a keyboard cursor that moves from card to card:- Arrow Down / Arrow Up — Move to the next or previous card in the column.
- Arrow Right / Arrow Left — Move to the neighboring column, landing on the card at the same height (or on its last card when that column is shorter). Empty columns are skipped.
- Enter — Open the task panel for the card under the cursor; press it again on the same card to close it. While the panel is open, it follows the cursor as you move.
- Shift+Arrow — Select the cards in the column between the cursor and the card you land on, like Shift+Click.
- ⌘+Arrow (Ctrl on Windows and Linux) — Add the card you land on to the selection, or remove it, like ⌘+Click.
Enter is left to any field that has focus. If the keys do not respond, click an empty spot on the board first.
Related content
Tasks
What tasks are in Beebole: creating, importing, assigning, and marking them done.
Gantt chart
Schedule the same tasks on a timeline with dependencies and a workload heatmap.
List view
The same tasks as a sortable table, with in-place editing and mass edits.
Timesheet and Planning Settings
Choose which plannings accept time entries and configure Auto Timesheet from Planning.
Frequently asked questions
Can I use the Kanban board without setting up statuses first?
Can I use the Kanban board without setting up statuses first?
Yes. New Beebole accounts come with the default Main plan and the statuses Backlog, Queue, In progress, and Done, so the board works immediately. You can rename, recolor, reorder, add, or remove statuses later in the Task statuses modal.
What happens when a column reaches its WIP limit?
What happens when a column reaches its WIP limit?
Beebole blocks the move. The column border turns red while you drag over it, and dropping shows an error saying the status is at its task limit. Raise the status’s Max tasks value, set it to 0 for unlimited, or move other tasks out first.
How do I move several cards at once?
How do I move several cards at once?
⌘+Click cards to build a selection (or Shift+Click for a range within a column), then drag any selected card — all selected cards move to the target column together, as long as the move stays within the column’s WIP limit.
How do I add several tasks to a Kanban column quickly?
How do I add several tasks to a Kanban column quickly?
Click the + at the top of the column. In Beebole, an add card opens at the foot of the column: type a name and press Enter, or paste a list with one name per line, and each task lands in that column’s status. When the card also shows fields such as the owner or the dates, Add another starts the next task. Hold ⌘ (Ctrl on Windows) as you click the + to open the full add form instead.
How do I mark every task in a column done?
How do I mark every task in a column done?
Open the column header’s ⋯ menu in Beebole and click Done. The cards leave the board but keep their data and time records. The same menu offers Reopen to bring back the column’s done tasks, and Show Done in the page header displays them.